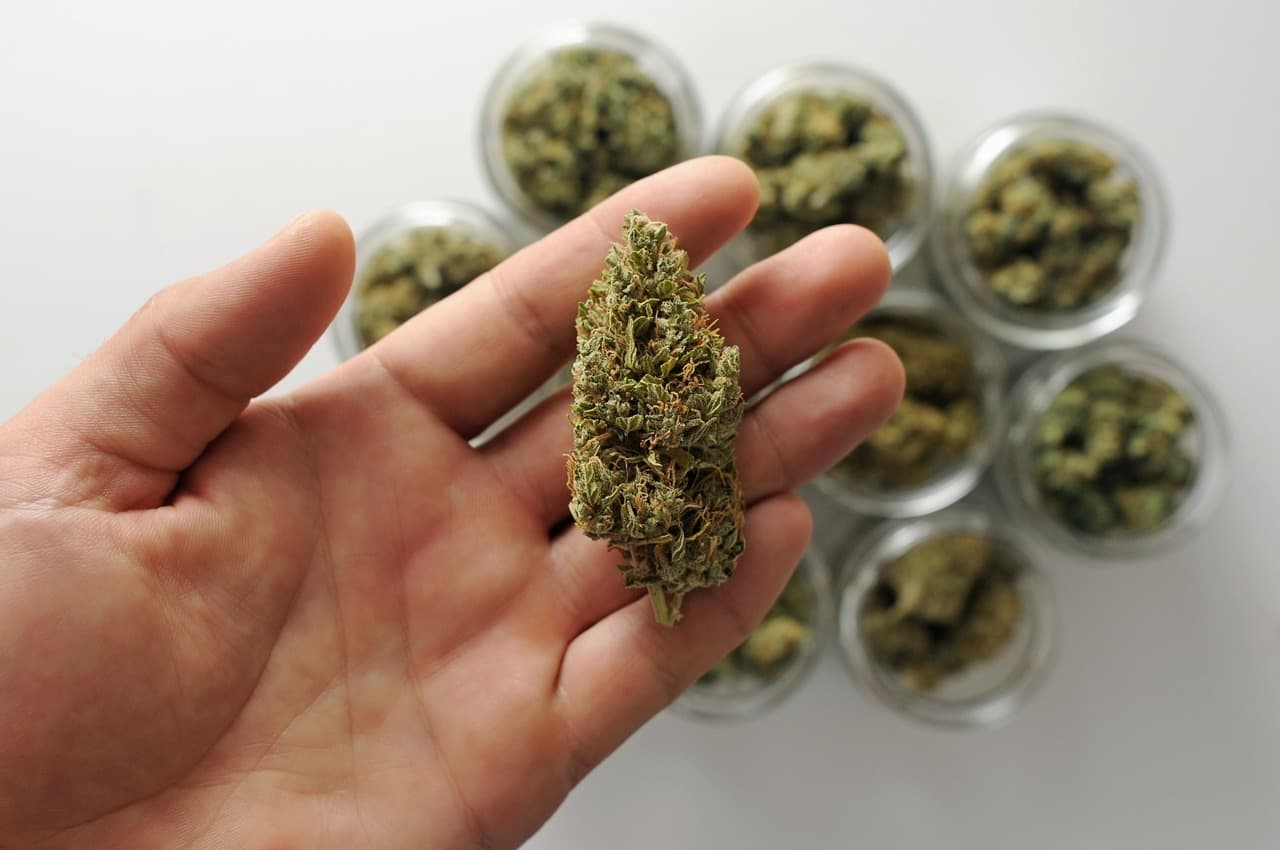
Curing weed adds several weeks to the wait before you can smoke your homegrown stash, but it makes your marijuana well worth it.
This process transforms a harsh, damp smoking experience into one where texture is all smoothness and joy on your tongue. Each taste note stands proud in the unique terpene profile, pronounced in your preserved colas.
Drying and curing cannabis prevents mold issues, extends the shelf life of your buds, and makes each puff as flavorful as it gets. So don’t miss out on a premium experience due to impatience.
Join us as we find out how to master each step and cultivate dispensary-tier ganja in your garden.
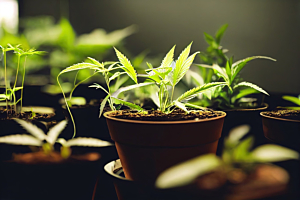
Why dry marijuana plants?
When you cut down your cannabis crops at harvest day, they’re still full of water and dripping with chlorophyll. Nobody smokes buds in this state, but if you did, you’d experience a powerful taste of fresh-cut grass.
Drying marijuana eliminates most of the moisture accumulated in the buds. As that happens, cannabis loses vegetal flavors, retaining only cannabinoids and terpenes.
This process immediately follows the harvest. You do it in the open air, before or after trimming the colas.
Drying weed has two main purposes. For one, it ensures that your colas burn after you light them up—so blunt won’t go out as often.
More importantly, drying helps your cannabis stay fresh for longer. Without it, the internal moisture combined with a dark, enclosed space of your stash causes mold on those new buds.
Everything you need to know about drying marijuana
People drying and curing weed for the first time have many questions about the process. After all, you want to get things right, not waste a fresh pot stash.
Let’s break it down into bite-sized info chunks and leave no rookie grower behind.

How long should you dry cannabis for the best quality?
Drying weed takes anywhere between two days and a week. Depending on your trimming style, you’ll either:
- Hang your entire plant or individual branches to dry on a string
- Place individual, already trimmed buds on a drying rack
Check back in after two days. The best way to examine remaining moisture is by bending a small branch or stem. If it snaps, drying cannabis is all done. If it bends but doesn’t break, give it another day.
Tip: If there are no branches left after trimming, squeeze the bud. It should be springy but dry on the surface.
How to best set up your cannabis drying room
A cannabis drying room is simple to set up. All you need to do is keep the space dark, with consistent temperatures between 60°F and 70°F and relative humidity in the 55%–65% range.
Introduce a small fan to circulate air throughout the room. If you live in a particularly stuffy environment, ACs and dehumidifiers are absolute day savers.
What cannabis drying equipment do you need?
You won’t need much equipment to set up your cannabis drying room. The necessities are:
- A drying rack or line for hanging your fresh cannabis
- A hygrometer to keep the temperature and humidity in check
- A fan for circulation purposes
Again, if your climate is especially humid, you might invest in a dehumidifier to speed up the process or prevent seeing mold on your buds.
What are the main methods for drying marijuana?
Okay, you have the equipment, but how to dry cannabis? You have two main options, depending on whether you prefer wet or dry trimming.
- Dry trimming happens after the plant already releases moisture. In that case, you’ll hang branches (or the entire crop) to hang from a line.
- Wet trimming takes place right after the harvest. You’ll need a flat surface for placing the buds. Pick a rack with mesh for excellent airflow.
How to know when your cannabis is dry enough to cure
Drying weed sometimes takes two days and other times up to a week. You should use your senses to gauge whether it’s time for the next step. There are several handy pointers in your corner:
- The buds lose a lot of moisture, but not all of it. The flower should still be a bit springy when you squeeze it. Otherwise, it might crumble beneath your fingers.
- The stems snap when the crop loses enough water. There should be a cracking sound when you bend it.
- The bud should stay lit when rolled up into a joint. Of course, the flavor won’t be the same as with cured buds, but if the rolling paper keeps burning, it’s a good sign that you’re doing it right.
It’ll take some trial and error at first. There’s no one-size-fits-all answer to how long to dry cannabis, but you’ll start picking up the indicators easier with time.
Why drying your weed isn’t the end of the process
Now that you’ve made sure that your cannabis is good enough for smoking, you can sit back and light it up, right? In theory, you could, but the results may disappoint.
Drying and curing weed go hand in hand for a good reason. Only a combination of these two processes ensures a smooth texture that doesn’t only burn uniformly but provides a slick, flavorful experience from start to finish.
You can smoke your weed as soon as you dry it, but dispensary-grade marijuana requires learning how to cure cannabis.
What is curing weed and why is it important?
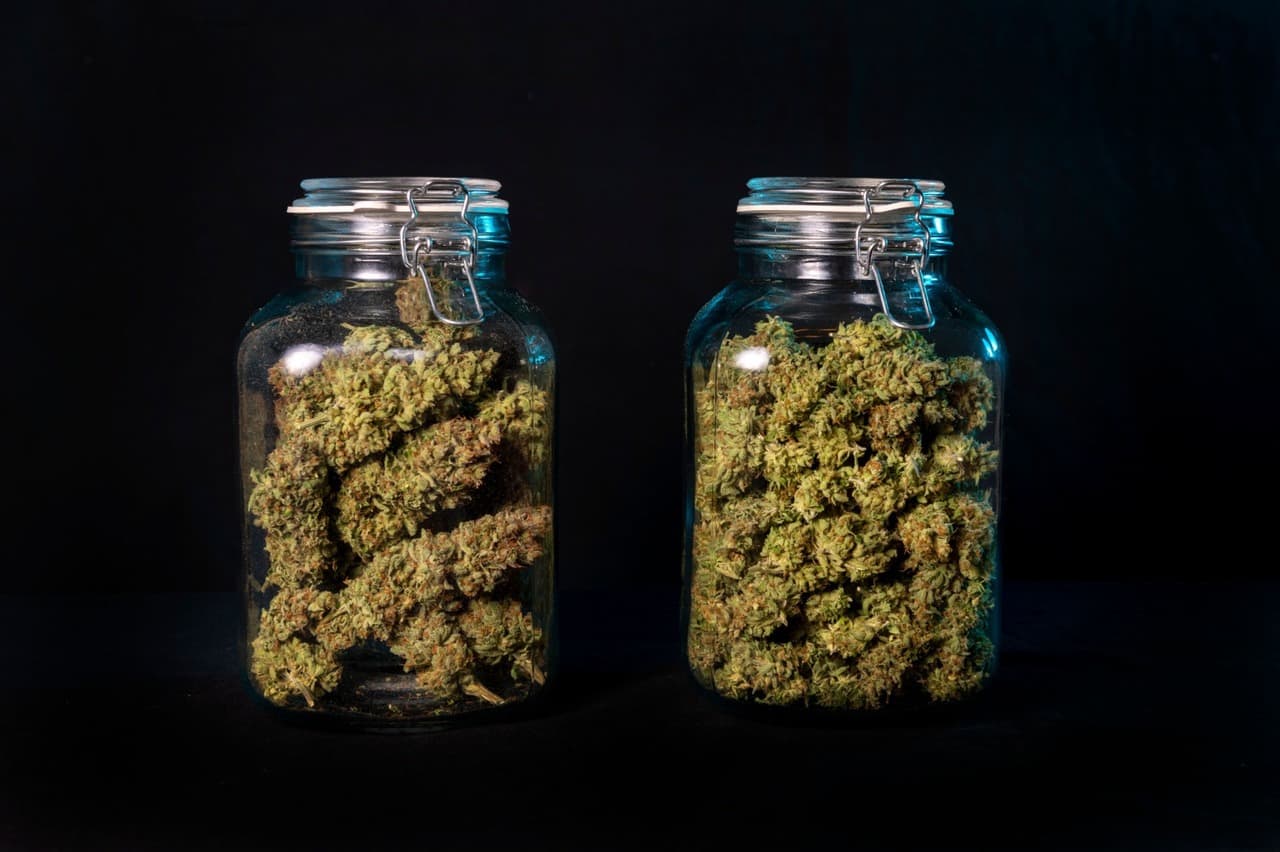
Once the buds are dry, it’s time to cure cannabis. This process entails storing dry colas in containers—typically glass jars with airtight lids.
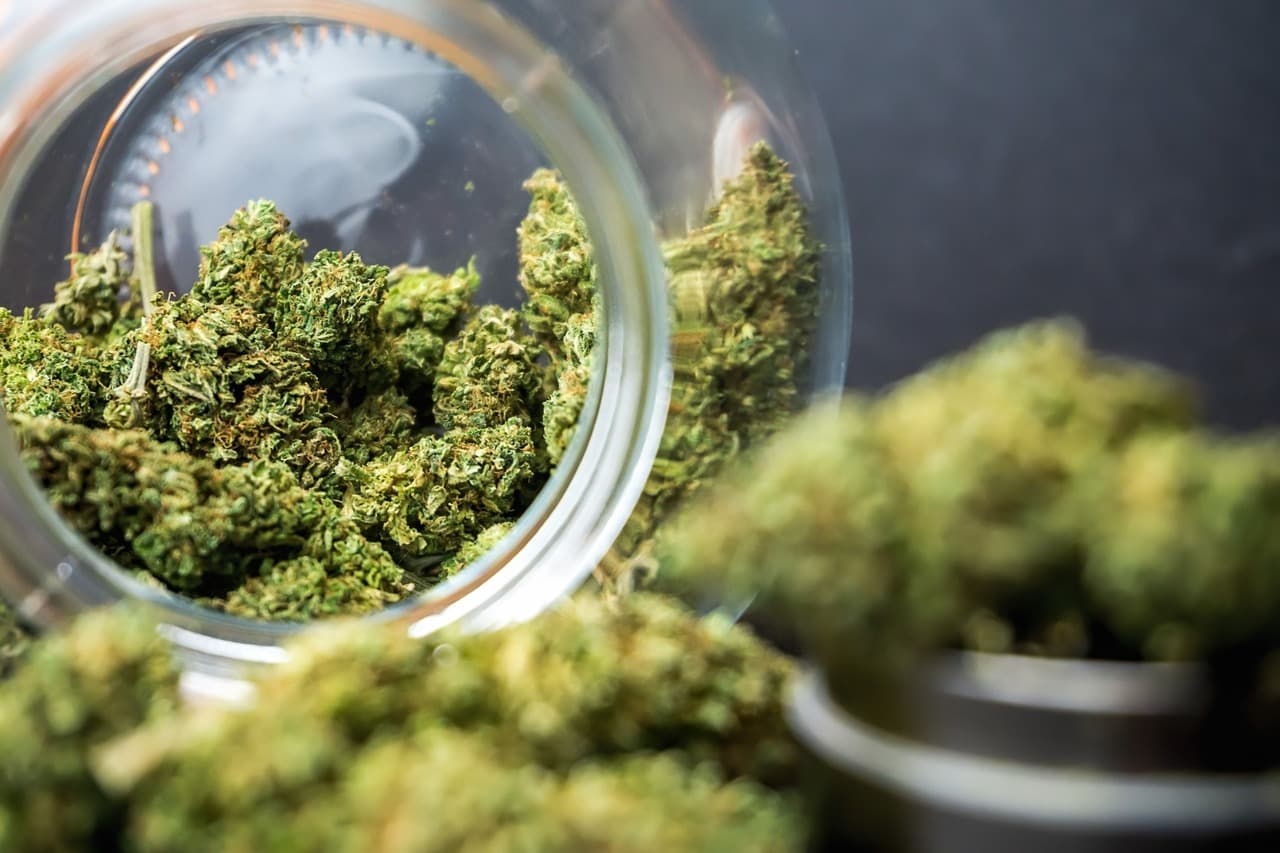
That way, you stop the rest of the moisture from leaving your cannabis plant, preserving its aroma.
Here’s what you get by properly curing weed:
- Smoother bud texture upon combustion
- Reduced ‘fresh hey’ smell of the flowers
- Pronounced aromatic notes
- Little to no cough-inducing harshness
- Eliminated risk of mold and bacteria in your buds
Some growers also swear that buds become more potent and less anxiety-inducing upon a successful curing project!
In short, your buds go from good to excellent, displaying every last bit of quality promised by their genetics.
Why curing your buds is paramount to quality weed?
Curing marijuana is an often overlooked aspect of canna cultivation, but it can make or break the finished product quality. Why is that so?
The buds lose most, but not all, of the water as it dries. Once you get curing, the moisture accumulated in the center draws to the outer layers.
The remaining liquid spreads throughout the bud, preserving the terpenes and cannabinoids. Cure cannabis correctly, and you can maintain bud freshness and potency for up to a year. A smart stoner doesn’t smoke stale ganja!
Things to consider around the curing process
Before explaining how to cure weed step by step, let’s explore the factors that influence the outcome. That way, you’ll know what you need to succeed.
Light exposure
Darkness is the number one requirement as you’re curing weed. Light exposure can degrade THC and terpenes.
Your stash needs to remain in a box or dark cupboard to preserve the optimal amounts of the good stuff.
Tip: Apart from finding a screened location, pick a type of glass that filters out all visible light except for violet.
Heat stress
Some warmth is okay, but curing weed in excess heat leads to cannabinoid degradation and reduced potency. Ideally, the location should remain around 70°F at all times.
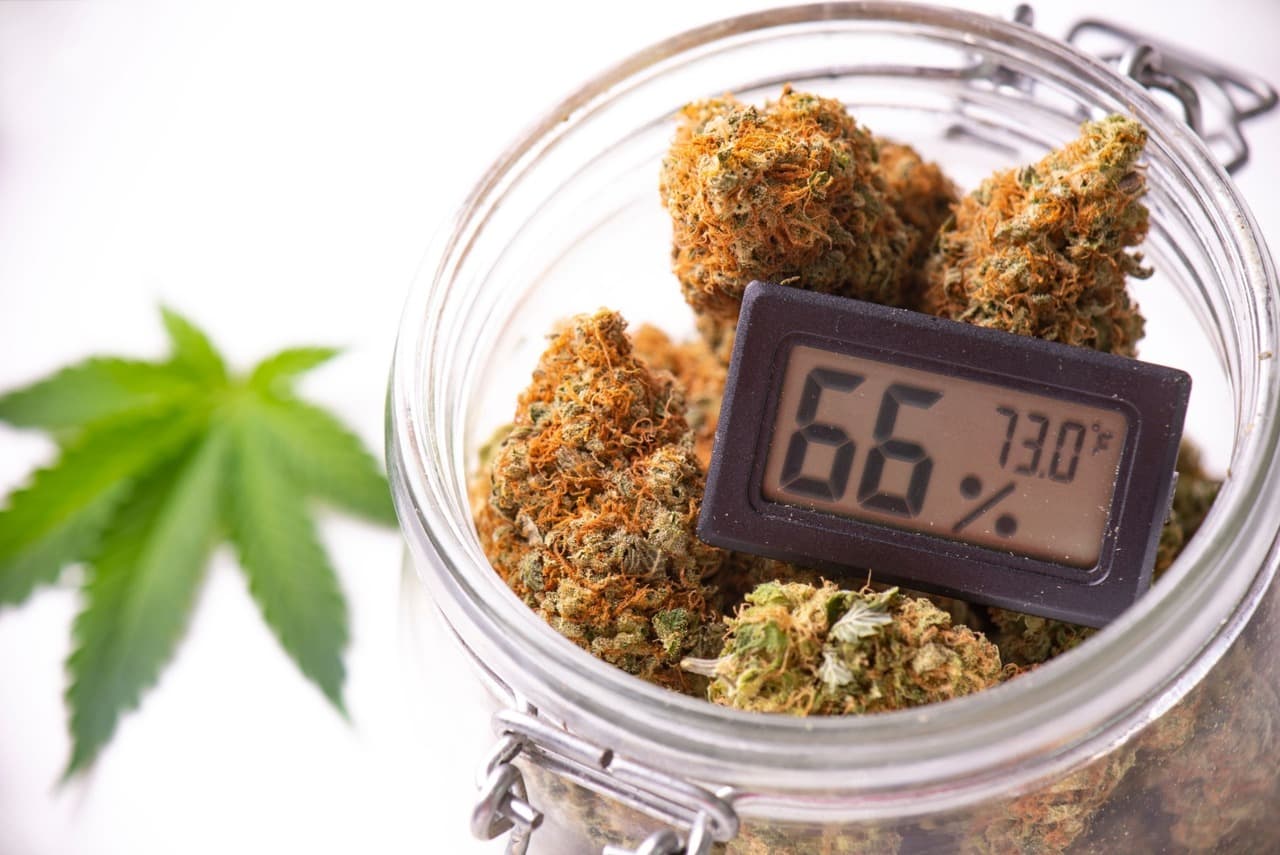
Humidity
Moisture is the central factor of teaching yourself how to cure marijuana.
If the stash remains wet, you’re running the risk of mold. On the flip side, letting your buds dry too much makes them crumbly and harsh on the lungs.
You can do two things to avoid these issues:
- Master finding the sweet spot during the drying process
- Keep the jar humidity at 60% for curing weed
What tools and equipment do you need to cure cannabis
Like with drying marijuana, curing doesn’t take much extra equipment. Everything is easy to organize as long as you keep the conditions a top priority.
Climate control is a must. You’ll need a dark room with stable temperature and humidity levels.
Other than that, airtight glass jars with wide necks and a hygrometer for each help maintain optimal curing conditions.
How to cure weed step by step
Now that you know what you need to keep things in the perfect range let’s discuss how to cure marijuana step by simple step.
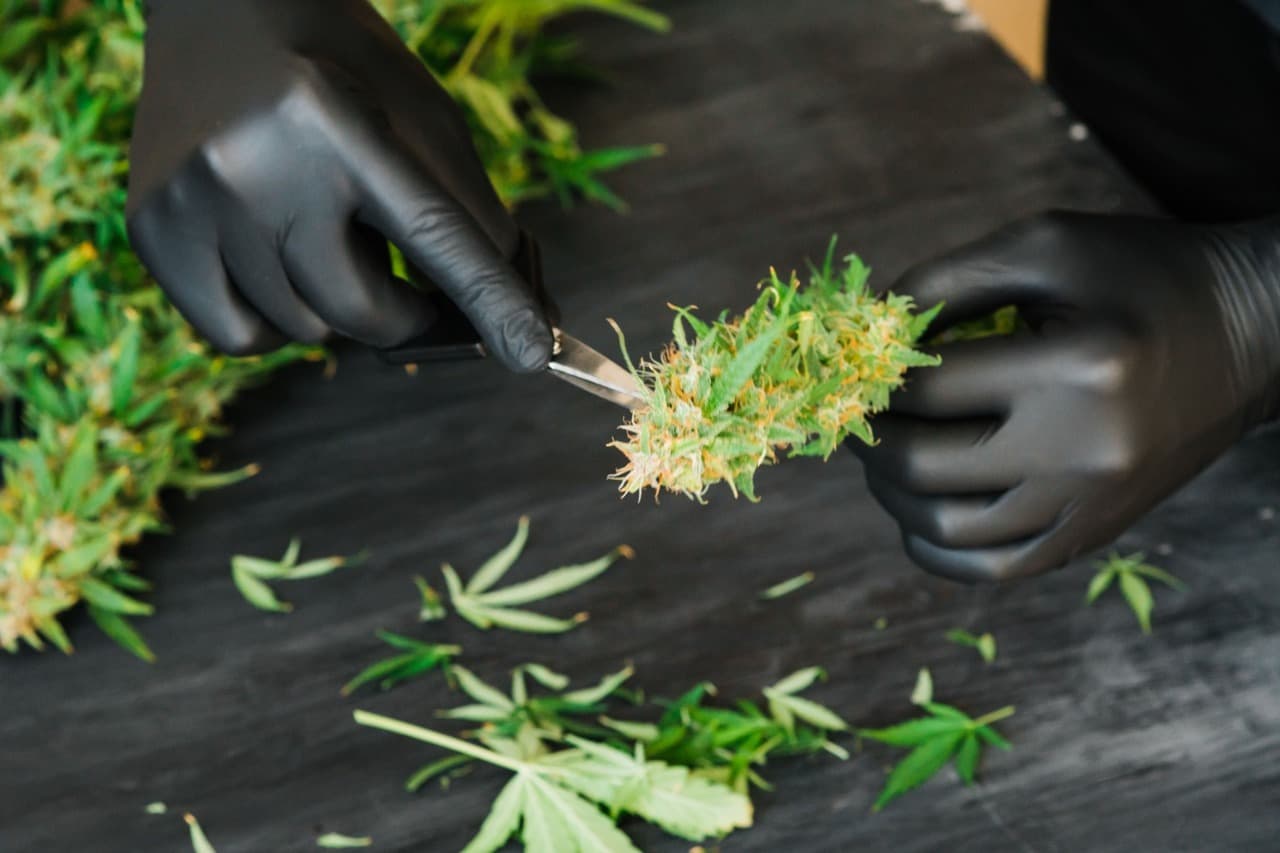
Step 1: Prepare your buds
This step requires you to learn when to harvest weed and how to dry marijuana.
Successful curing can’t happen without flawlessly dry, perfectly ripe colas. Dry, buck, and trim, and every next step becomes much simpler.
Step 2: Place your flowers in glass jars
It’s time to fill your airtight mason jars with fresh buds. Consider the size here—anything larger than 32 oz. for curing cannabis encourages mold.
Fill the jars at around 80% capacity to leave some breathing room for the colas. Close it and shake the glass gently.
If the buds move easily, you’re good to go. If you notice them sticking together, they’re still too moist and need some further drying.
Step 3: Store the jars
Find a place with the right humidity, temperature, and light exposure for curing weed. Make sure it’s secure, and leave your mason jars there.
Step 4: Air the jars
The first couple weeks of curing weed require daily attention.
Unscrew the lid once a day and leave it open for a few minutes, letting accumulated moisture evaporate.
Now’s also your chance to detect any ammonia odor. If you notice it, you have a humidity problem.
Tip: Use your meter to check for humidity. Don’t open the jar when it’s too low. If it gets too high, leave it open for several hours.
Step 5: Keep checking the buds
After around a week of regularly crisp aromas and stable humidity, you no longer need to check the jars every day.
Instead, check back in once every few days to avoid any nasty surprises after a calm week.
Does it take a long time to cure cannabis?
Curing weed is the recipe for cream-of-the-crop colas in your stash. How long should you keep your mason jars shut for the best possible experience?
Ask ten people how long to cure weed, and you’ll get ten different answers. As always, it’s not an exact science, but some regularities are here to help.
After two to four weeks, your marijuana is already preserved enough for an aromatic, quality experience. More is better when it comes to curing weed, though.
Many connoisseurs like keeping things sealed for as long as two months. Colas continue to increase in quality for six months after curing, and some strains benefit from drawing things out for half a year.
Tip: If you’d like to see how curing cannabis affects the flavor profile, you could separate your jars. For example, take one at around a month to smoke and keep curing the rest.
What’s the best way to store your cured cannabis buds?
Curing weed lets you store it for up to two years without seeing much degradation in terms of potency and flavor.
The shelf life and quality raise when you keep your stash in a cool and dark place—around 70°F is ideal. Higher temperatures let mildew, mold, and organic matter thrive on your buds.
Heat can dry out cannabinoids and terpenes, causing hot and harsh smoke. Also, keep your stash airtight. Too much oxygen causes that precious THC to turn into the much less psychoactive CBN.
As a rule of thumb, the environment for storing cannabis should be:
- Out of direct sunlight
- Cool and dark
- Vacuum sealed
Tip 1: Use containers with a neutral charge, such as mason jars. Avoid plastic for optimal flavoring.
Tip 2: Climate control isn’t essential after curing weed, but it still makes a difference. Using a hygrometer in your room ensures your weed stays high-quality even months down the line.
Tip 3: While storing, separate your cultivars. That way, you’re avoiding flavor mixing that can muddle the profile of individual superstar strains.
Drying and curing weed: Top tips to remember
Dying and curing weed is essential for getting the best-tasting buds you’ve ever experienced in your at-home garden. Here are the top things to keep in mind:
- Always dry and cure cannabis
- Keep humidity in check to avoid mold issues
- Avoid light exposure to bypass cannabinoid degradation
- Combine actionable tips with good reasoning to calculate the best moment to finish the process
- Don’t let your impatience get the better of you
These tips become second nature as you gain experience. Before you know it, you’re curing weed like a pro and turning yourself into talk of the town for bud quality.
Stay tuned to our blog for more educational guides and resources to make every stash be the best one you ever tasted. Grow your own at home with the skills you acquired here at Seed Supreme and never run out of the highest-quality weed money can buy.
Drying and curing weed: FAQs
Before sending you to your weed, let’s answer some questions about drying and curing buds we hear in the community.
Does curing increase weed potency?
No. Curing weed can’t make your buds more potent than their genetics, and growing environment allows.
Curing does change your perception of the existing potency. It makes each terpene more pronounced, making the high clearheaded. For you, the experience might feel more powerful.
Does curing preserve your cannabis?
Yes, it does.
Curing cannabis extends the shelf life of your bud, preserving terpenes and cannabinoids with the optimal amount of moisture. It also prevents mold and mildew issues that could bring a thick, unpleasant smell to your smoking experience.
Does curing make cannabis smell stronger?
Yes. Compare uncured and cured cannabis, and you’ll notice a significant difference in the potency of the aromatic bouquet.
Curing weed eliminates the vegetal cola smell. It brings out those deep terpenes that contribute various smells to that traditional cannabis perfume.
How often should you air cannabis jars when curing?
Airing the marijuana jars prevents excess moisture accumulation. You’ll need to do it daily for the first week.
If things remain stable for several days in a row, you can reduce airings to once every two days for the rest of the time you cure cannabis.
What’s the best temperature for curing weed?
While teaching yourself how to cure weed, you’ll learn that paying attention to the environment is the central factor in play.
When it comes to heat, it’s no good to go too high or too low. Temps between 60°F and 70°F is ideal to avoid terpene degradation or moisture issues.
Can you cure cannabis for too long?
No, not really. You can hold your buds in mason jars until you smoke them. Nothing particularly bad will happen.
Curing weed stops delivering benefits in around six months. After that, keeping your buds in the curing jars can only boost the degradation rate.