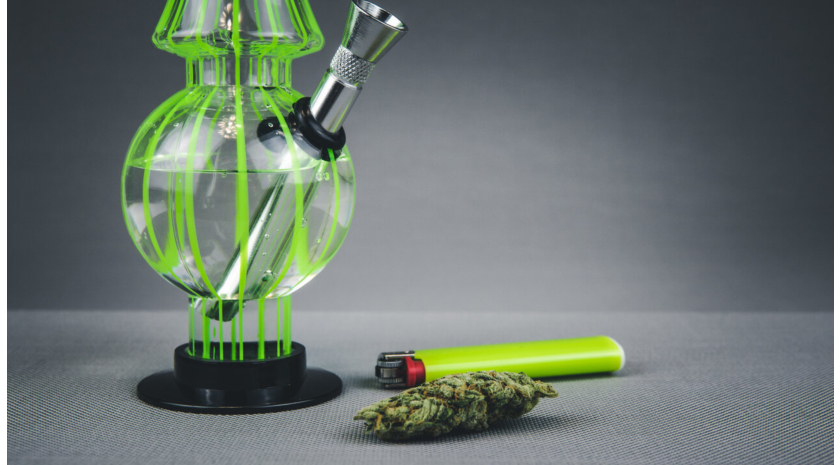
Do you love consuming cannabis and looking for a fun, cheap way to indulge? Get tired of rolling joints? Try making a homemade bong with the things everybody has in their house. These are ideal for when you left your store-bought bong at a friend's house, can't keep it at home, or are simply looking for a little craft project.
Marijuana consumers have been making bongs for years because there's something magical about the process of building them, then using them to smoke with friends.
How to make a homemade bong? There are many effective ways to construct one with everyday household items. Create a DIY bong free, with some added creativity.
Want to know more about building your very own DIY bong? We're going to cover the essential parts and the various ways to construct it. Let's go.
Understanding the basics: parts of a bong
Before we get into how to make a homemade bong, let's look at the parts you need to construct one. Every functioning bong has four elements: the tube, the base, the carb or carburetor, and the downstem.
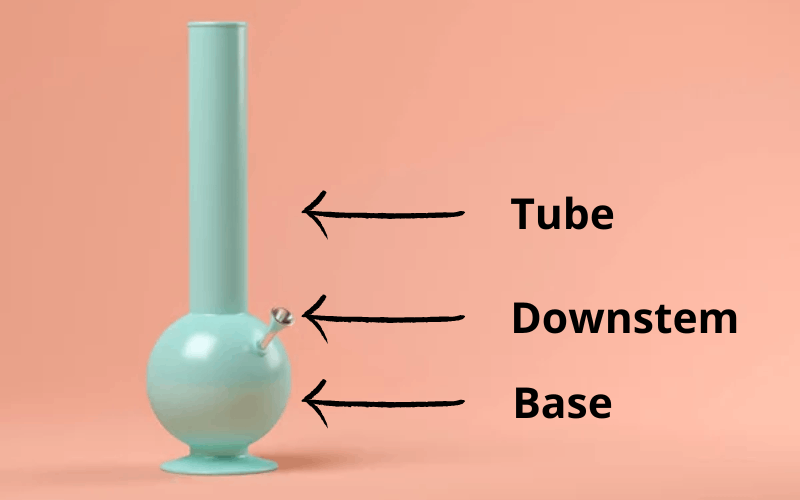
Tube
The tube is the long neck of a store-bought and homemade bong. The smoke fills this chamber and is where you place your mouth to inhale. The bigger and longer the tube is, the more vapor you inhale at one time. When constructing homemade bongs, consider how big you want the hit to be and keep these dimensions in mind.
Base
The base of a DIY bong is basically the bottom where you put water. H2O is necessary because it helps pull the smoke into the chamber before taking a hit. There are no regulations for the base, but a general rule is that the bigger it is, the larger the homemade bong, which results in a massive toke.
Carb or carburetor
All homemade bongs have a carb or a carburetor, a small hole on the side to help you with the airflow. Place your finger over the hole to fill the chamber with smoke. Release it when you inhale to bring in the fresh air and push the vapor into your mouth and lungs.
Downstem
The downstem is where the delicious homegrown marijuana goes. It's a thin pipe that connects to the tube of the DIY bong. A bowl, store-bought or handmade, connects to the other end of the downstem. Construct a bowl with tin foil and use a pin to poke holes. Manipulate the size and shape so it fits into the downstem. If you're using a store-bought one, ensure it fits into the homemade downstem pipe.
The bottle bong
For years, the bottle bong has been the most basic homemade bong by cannabis consumers. It's the classic go-to when you're with a group of friends and want to get creative.
To make a plastic bottle DIY bong, you need a bottle, scissors or a sharp pen, a marker, duct tape, a needle, and some tin foil.
Let's discuss the bottle first. Use any water, soda, or juice plastic one. Don't use a reusable one because the plastic is too hard to cut. If you're constructing with a soda or juice vessel, ensure you rinse it out before building your DIY bong so there isn't any sticky residue.
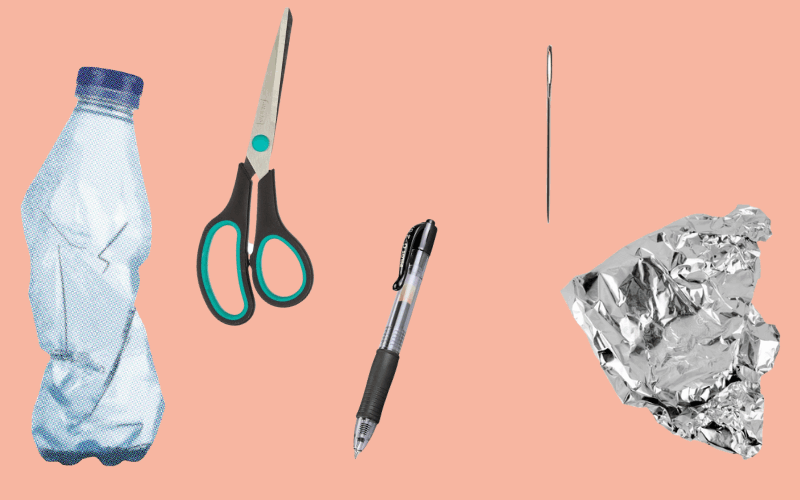
Use the scissors or a sharp pen to make two holes, one for the carb and the other for the downstem. Fill the bottle with water. Don't worry if you lose the bottle's cap; it's not essential.
Building the downstem and bowl
Build a downstem for your homemade bong with a marker. Use the scissors to cut open the marker and pull the ink cartridge out. You should have just the hollowed-out plastic outer layer.
Place the downstem into the hole on the plastic DIY bong bottle. Secure it with duct tape and ensure there are no air holes.
Use tin foil to construct a bowl. Create a small bowl shape with a short spout on the bottle to insert it into the downstem. Use a needle to poke several holes into the tin foil. These let you pull the smoke from the marijuana into the homemade bong.
Fill the plastic bottle with water so that the downstem pipe is covered. Now all you have to do is grind some homegrown cannabis, place it into the bowl, and inhale. Cover the carb with your finger. When you want to release the smoke, lift your finger, and it will rush into your lungs.
In a few simple steps, you have your very own DIY bong.

The gravity bong
For those who've experimented with bottle homemade bongs and want an upgrade, a natural progression is to create a gravity bong.
These babies provide a huge and intense hit that experienced consumers love. It uses gravity to pull the smoke into the chamber. Physics class was never so much fun.
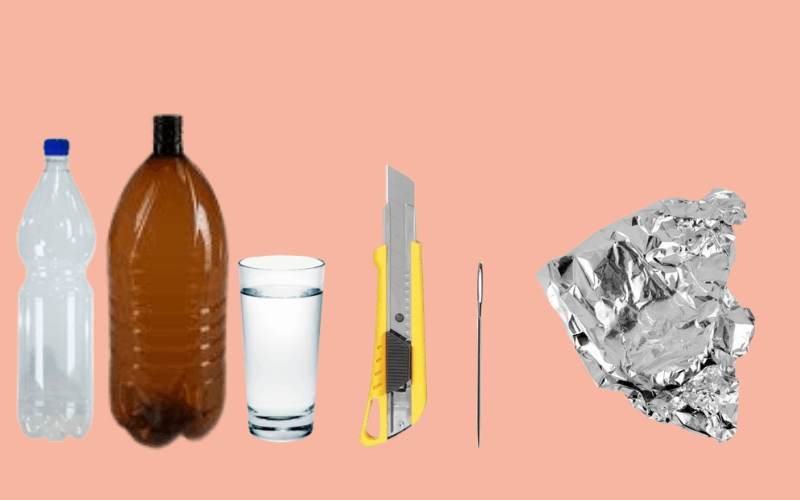
The materials required are a plastic bottle, a bigger plastic container, such as a bucket or large bottle, a needle, and tin foil.
Building a gravity bong
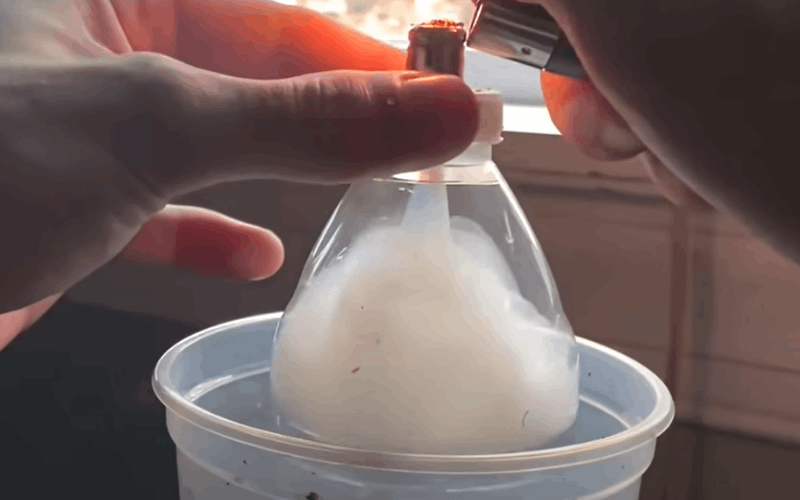
How to make a homemade gravity bong? We'll tell you now. First, take the rinsed-out plastic bottle and throw out the cape. Cut the bottom half of the bottle off. Cover the mouth hole with tin foil. The foil should dip down into the hole to make a bowl shape. Take the needle and poke tiny holes into the tin foil so that the smoke can enter the bottle of the homemade bong.
Cut the top half of your larger bottle off, or use a bucket. Fill the plastic container with water. Place the smaller half bottle with the tin foil bowl in the water, with the bowl facing up. Submerge as far as you can without the water touching the tin foil.
Now, place some homegrown cannabis into the bowl and light it up. Gravity will pull the smoke down into your DIY bong's smaller bottle chamber. Slowly pull up the bottle to allow more smoke to fill.
Ensure it doesn't leave the water because you will lose your smoke. When it’s filled, take off the bowl and quickly inhale. Soon you'll be feeling the effects of marijuana. Is bong water good for anything? Yes, of course. Do not hurry to get rid of leftover bong water. You can use it for plants or even for cannabis cooking.
The Tic Tac bong
Even if you don't have any plastic bottles in your room, there are other vessels to construct a homemade bong. Find any sturdy container, like a Tic Tac box or a Pringles can. All you need is a little creativity, and you can turn anything into a DIY bong.
Building a Tic Tac bong
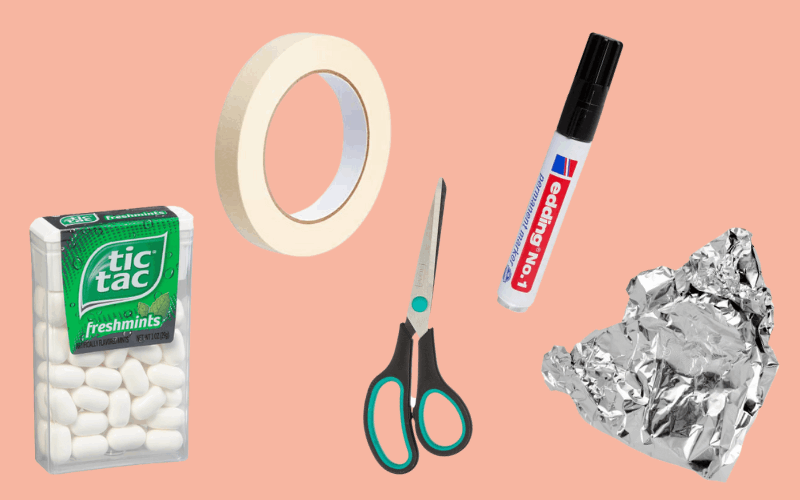
Constructing a Tic Tac homemade bong is very similar to the bottle bong. The materials required are the Tic Tac box, scissors, tape, a marker or pen, and tin foil.
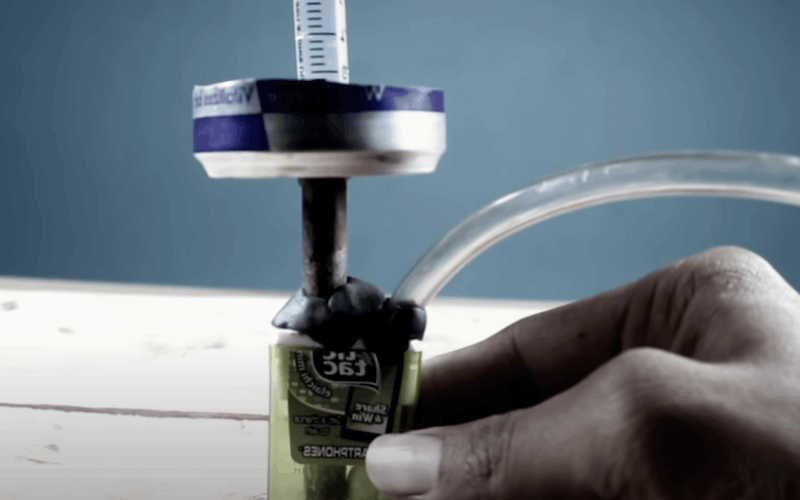
Use the scissors to drill two holes into the Tic Tac box, one for the downstem and the other for the carb. Cut the marker or pen and take out the ink. Use this as a downstem pipe.
Attach the two using tape. Any type will work, but duct tape is the strongest and most reliable. Form a bowl with a spout on the bottom with tin foil. Fill the Tic Tac box with some water to cover the downstem pipe.
Grind homegrown marijuana and place it into the tin foil bowl. Now light it and inhale through the hole in the lid of the Tic Tac container. Cover the carb with your finger. When you're ready to take the smoke, release your finger.
It's a small homemade bong, but it gets the job done.
The iBong, or the apple bong
If you're looking for a plastic-free way to create a DIY bong, the iBong or apple bong is for you. Instead of a bottle or container, the vessel is a fresh and ripe apple. Choose a Granny Smith, Red Delicious, or Honey Crisp; it doesn't matter what type it is.
Building an apple bong
The required materials for your homemade bong are an apple and a pencil. Remove the stem of the fruit. Use the pencil or any shape object and pierce through the top center of the apple. Only go about halfway through the fruit. This hole functions as the bowl and downstem.
Use the same pencil and make a hole from the side of the apple until you reach the center. The idea is that both holes meet in the middle of the fruit. This hole functions as the carburetor.
Make another hole in the front of the apple that meets the other ones. This hole functions as a tube.
Now, it's ready to use as a DIY bong. Place cannabis on the top of the apple and put your finger on the carb hole. Bring the apple to your mouth where the tube is.
Light the homegrown marijuana and inhale. The smoke fills the inside of the fruit. When you want to consume it, release your finger and suck.
This method doesn't only work with apples. Choose any hard fruit or vegetables like pineapple, pumpkin, or cucumber.
Mason jar bong
Mason jars have been trendy as cups, lamps, and candle holders, but use them as DIY bongs too. It's a durable container that you repeatedly use.
Let's look at how to make a homemade bong with a mason jar.
Building a mason jar bong
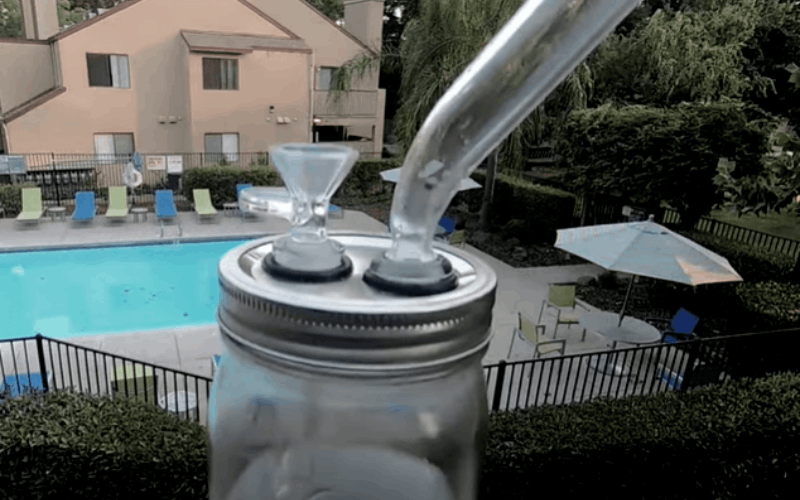
The materials required for this DIY bong are a mason jar, a knife, a marker, a straw, a needle, duct tape, and tin foil.
Cut three holes into the jar's lid with a knife: one for the carb, the tube, and the downstem.
Cut the marker and pull out the ink. Place it into one of the holes on the mason jar's lid. Put the straw into another hole to create the tube. Secure both with duct tape.
Use the tin foil to construct a bowl, similar to the other methods, and poke holes with the needle. Insert the bowl into the downstem marker. Fill the mason jar with water until the downstem is submerged.
Now, you're ready to consume with your homemade bong. Grid up some homegrown marijuana and place it into the bowl. Put your finger over the remaining carb hole and suck in with the straw. When you want to inhale, release your finger and take in the hit.
Use The mason jar method with any hard containers like alcohol, olive oil, or glass milk bottles.
Pros and cons of each bong type
With everything in life, there's the good and bad. Let's look at the pros and cons of each homemade bong.
Water bottle bong
The advantage of the water bottle DIY bong is that it only takes a few minutes to construct because the cutting is easy. You make it from household items, so it's pretty much free. The negatives are that you can't use it multiple times. A water bottle homemade bong is only good for one night. Also, it can break very easily.
Gravity bong
A gravity bong is one of the most popular homemade bongs because it creates a massive hit. Use a big container and bottle, and you inhale the smoke of 5 hits in one shot. This is also a great DIY bong for anyone who loves physics. The disadvantage of a gravity bong is that it's not easily portable. Construct this homemade bong where you intend to use it and keep it there.
Tic Tac bong
The Tic Tac bong is a pocket-sized vessel that many users love. It's perfect for those who want a portable and discrete homemade bong. It can save the day when you're out and about and forget your pipe at home. The negative about the Tic Tac bong is that it's just a one-hitter. This DIY bong is not the type that will send you into another world. Rather, it gives you a quick buzz you need when you’re on the go.
iBong, or apple bong
The iBong is ideal for those who don't have all of the materials for a bottle or gravity DIY bong. All you need is an apple and something sharp. It's easy to construct and gives the marijuana a fresh taste. It's eco-friendly because it doesn't use plastic or water. The con of apple bongs or bags is that you can only use them once because they will start to rot. The flavor of the fruit will influence the flavor of the cannabis, which some might enjoy, but others may not.
Mason jar bong
Marijuana users love the mason jar homemade bong because it takes a little extra time and craft to construct. It's durable, and you use it over and over again. The con of building a mason jar DIY bong is that it requires more dedication, and you can't make it on the fly. You need to be careful and use a sharp knife when cutting the metal lid.
The final hit on homemade bongs
How to make a homemade bong? Now you know.
Each method of constructing a homemade bong has its benefits. Take a look around your house to see what materials you have and get creative. Use these ideas and develop your own DIY bong to impress your buddies.
Building a makeshift bong is a fun activity to do with your friends. Create a water bottle, gravity, Tic Tac, apple, or mason jar bong at home.
Everyone can bring some supplies and construct a massive DIY bong together. Do it while consuming cannabis to make the experience even better.
After constructing your homemade bong, buy cannabis seeds at Seed Supreme and grow your own harvest.

 THC
THC