Contents
How is autoflower germination different from other cannabis types?
Do autoflower seeds need light or darkness to germinate?
Proven ways to germinate autoflowering marijuana seeds
Simplicity is the key to successful germination
What’s the best way to germinate autoflower seeds? If it’s your first time sprouting them, you may be overwhelmed by the conflicting instructions available online. Fear not; we’re here to provide a comprehensive guide covering everything you need to know.
Successfully encouraging your seedlings’ development in the right conditions can boost the health and production of your cannabis plants.
Ready to sprout your way to high-yielding, prosperous crops? Let’s begin.
How is autoflower germination different from other cannabis types?
Germinating autoflowers is easy if you know how to sprout weed seeds. The approach is identical to regular or feminized variants, so you only need to know the differences once the seedlings pop.
An autoflower cannabis plant is unique from a typical photoperiod. The former depends on age alone, while the latter relies on changing light hours and needs more attention and effort.
Non-photoperiods are ideal for beginners as they don’t require changes to the lighting schedule or advanced techniques. The plants grow smaller than average cannabis crops but flower automatically and mature faster.
Buy high-quality products with stable genetics before learning how to germinate autoflower seeds. At SeedSupreme, our autos are feminized, meaning you won’t find male plants in your crop. You only harvest females with delectable buds to consume as you desire.
Do autoflower seeds need light or darkness to germinate?
Several factors contribute to the healthy condition of your plants. A seedling requires you to monitor and look after it to ensure it receives the best quality of care.
There may be multiple reasons why germination fails. This crucial growth stage depends on three vital components: water, light, and moisture.
It’s essential to provide the right environment when setting up your space for autoflower germination. You may wonder whether the seeds need light or darkness to sprout. Luckily, in this stage of growth, there aren’t strict requirements.
While plants need plenty of light during cultivation, seedlings have the best chance of success in complete darkness.
Keep them indoors, as they’re delicate in this phase. Outside, they’re more prone to dust, mold, pests, and extra light. A warm, dark place is ideal for starting autoflower seeds.
Keep contact to a minimum, and try not to let any light in when checking on your seedlings. They should receive moisture, temperatures around 70–85°F, and about 80–90% relative humidity.
When you see small tap roots emerge from the shells, the exciting journey of planting germinated autoflowers begins. Let’s explore the different methods that help you reach that stage without issues.
Proven ways to germinate autoflowering marijuana seeds
The best autoflower germination method depends on personal preference, budget, and accessible materials or media.
Sow your marijuana seeds with the sharp end pointing down and the indented side facing up. Use gloves and sterilized tweezers to handle them, but try to avoid touching them as much as possible.
Below are six popular ways to ensure victory during germination.
The paper towel method
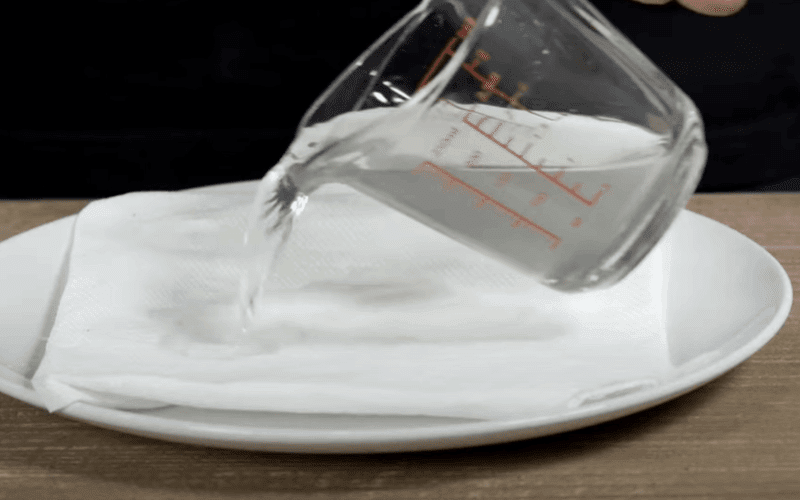
Many use the paper towel technique as it’s straightforward and proven to result in successful germination. Follow these simple steps:
Moisten a non-porous paper towel with purified or filtered water so that it’s soaked through but not dripping.
Place it on a dinner plate or inside a clean plastic container with two holes in the lid for aeration.
Use a pair of sterilized tweezers to place your autoflower seeds on top of the damp sheet. Spread them at least an inch apart, then lay another moist paper towel on top.
Cover your seeds with another plate or close the container, then move your setup to a warm, dark environment.
Keep checking them to ensure they remain moist. Use a spray bottle to top them up with water if necessary. Once you see taproots protrude, use the tweezers to transplant them into your growing medium.
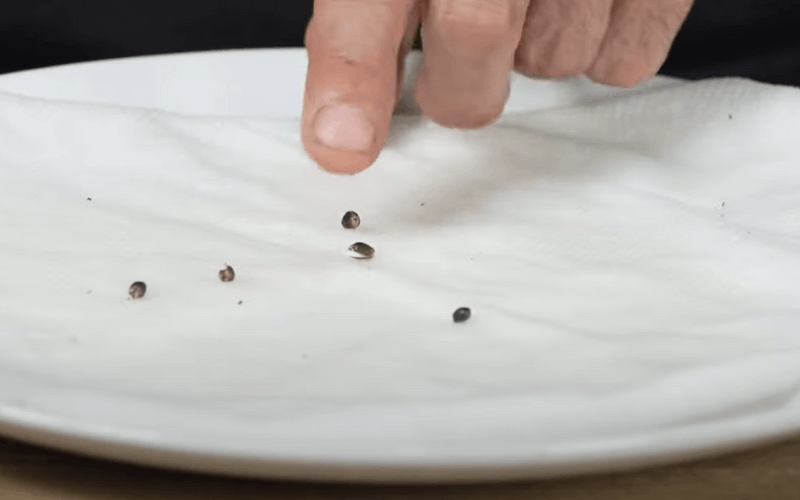
Direct planting into soil in a pot or container
Many people prefer learning how to germinate autoflower seeds in soil as it minimizes contact with their fragile shells and taproots. You also allow them to adjust to their growing environment before they sprout.
Purchase organic, properly aerated soil that drains easily. Avoid fertilizers and excess nutrients at this point, as they could burn and damage your seeds. Ensure adequate space by making a hole about 0.5–1 inch deep.
Moisten the soil before planting your seeds and cover the hole gently once you’ve placed them inside. Don’t apply any pressure so their roots can stretch out and penetrate the substrate easily.
Keep the pH at around 6.0 and maintain temperatures at 70–80°F. You should see taproots emerge after 1–5 days. Germinating autoflowers in soil may take as little as 12 hours, but some seeds take up to around ten days.
Some growers use organic additives like coco coir, perlite, or vermiculite to get bigger autoflower yields. It’s best to save these for when your plants are vegetating.
Seedlings only require water and sufficient oxygen to germinate. Once your seeds pop and start maturing, you can add light nutrients and additives.
Starter cubes and seedling plugs
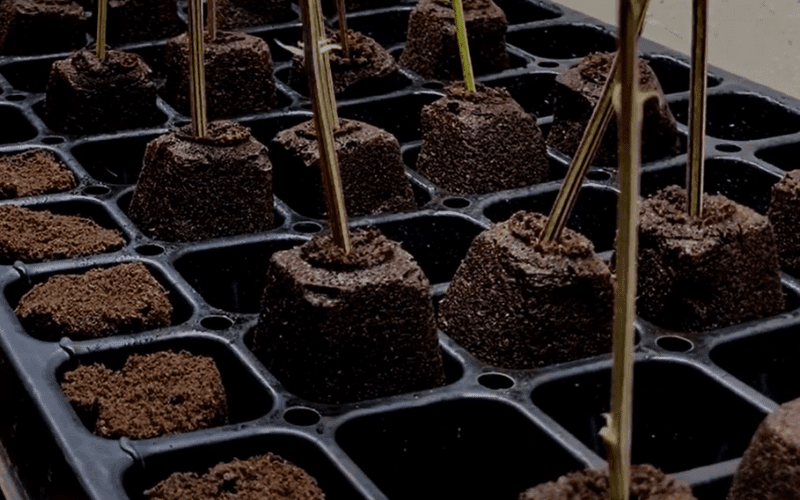
For a low-contact approach, choose a starter cube or a seedling plug from an online store or at your local gardening vendor. They work like peat pellets, providing all-in-one growing environments for planting germinated autoflower seeds:
Moisten the plug or cube, keeping it from dripping excess water.
Make a hole and insert your seed into it.
Place your cube or plug into the soil and cover the hole with a cup for humidity retention.
Once your seed germinates, uncover it so it can grow freely.
Water soaking
One of the simplest and cheapest germination methods is to soak your seeds in a glass of purified or distilled water. Store it at room temperature and don’t let your seedlings sit for more than 24 hours.
This technique isn’t always successful, but it’s beneficial for old or hardened seeds. Keep an eye on them and use tweezers to remove them as soon as their taproots show. Healthy ones will sink to the bottom and sprout within a day.
If they don’t pop after 24 hours, take them out and try one another technique. Many growers soak their seeds before germination for improved chances of success.
A germination station
Some people consider a germination station the best option for starting autoflower seeds. The setup is self-contained, allowing you to control light, heat, and moisture.
Place your seedlings in starter cubes inside the station, then watch them sprout. Once they do, transferring them to your growing medium is easy.
The plants don’t require much effort, as they grow naturally without manipulating light cycles. Use low-stress training for autoflowers only if necessary, but avoid pruning or using high-intensity bulbs. They mature fast, so sit back and let nature do the rest.
Simplicity is the key to successful germination
Finding the best way to germinate autoflower seeds comes down to preference. Many growers stick to the paper towel method, while others swear by starter cubes as they’re more stable.
There are three vital points to remember when choosing your approach: good seed quality, correct moisture, and minimal contact.
Use gloves or clean hands, sterilize all equipment, and keep your autoflowers moist and in the dark before they sprout. Buy genetically stable, top-shelf autoflower seeds from SeedSupreme to give yourself the best chance of success.

 THC
THC


