The flowering stage is the moment when cannabis plants stop preparing and start becoming what they were meant to be. From early on in the flowering period, every internal process shifts toward one goal: reproduction. Buds form, resin develops, aromas emerge, and the plant’s entire structure begins its final transformation within the plant’s lifecycle.
Nothing in a grow matters more than how this stage unfolds. The choices you make during flowering directly shape potency, yield, and quality, and small mistakes can’t always be corrected later. That’s why understanding what happens here—step by step—is essential.
This guide takes you deep into the flowering stage, walking you through each phase from the earliest signs to harvest, drying, and curing. You’ll see how the plant changes week by week, learn how to respond at every turn, and understand why this final transformation is what ultimately defines your harvest.
Before the First Signs of Flowering Stage Appear: How Cannabis Decides It’s Time to Flower
Before you ever notice visible changes, the cannabis flowering stage has already begun internally. While the plant still looks like it’s in the vegetative stage, its priorities are quietly shifting from growth to reproduction.
If you’re growing outdoors, this transition is triggered by shortening days and longer nights. As the season changes, the cannabis plant senses that time is limited and starts preparing to flower, even though nothing obvious has appeared yet.
When you grow indoors, this shift happens inside the grow room the moment you change the light schedule. The plant may keep producing leaves and stems, but internally it has already started moving toward bloom.
At this point, growth doesn’t stop; it changes direction. Energy that once fueled expansion begins redirecting toward future flower sites, setting the stage for what you’ll see next.
Photoperiod vs. Autoflowering Plants: Two Different Clocks
Photoperiod plants start flowering in response to changes in the light cycle. Once darkness lasts long enough each day, the plant recognizes that the season has shifted and begins its transition into flower. This is why indoor growers trigger bloom by switching to a 12/12 schedule. The cannabis plant isn’t reacting to light exposure itself, but to consistent, uninterrupted darkness.
If you decide to go for autoflower seeds, these plants follow a different clock. They start flowering based on age and genetics, not light cycle changes, which means the transition happens whether you intervene or not. Because of this difference, photoperiod plants give you control over timing, while autoflowers run on a fixed schedule.
In both cases, once flowering begins, the process moves forward without pause.
The Transition Into Flowering (The Days Before Week 1)
In the days before flowering becomes visible, your cannabis plants are still technically vegging plants, but their behavior starts to shift. Growth may continue, yet it no longer feels purely focused on size and structure.
Inside the cannabis plant, hormones begin redirecting energy away from building more foliage and toward reproduction. This is the quiet bridge between veg and the bloom phase, even though no flowers are visible yet.
You may notice subtle changes in posture and growth speed. Fan leaves often stay large and healthy, but new growth may appear slightly different in shape or spacing. This is not the moment to intervene aggressively. The cannabis plant is preparing itself, and your role is simply to maintain stability while it finishes letting go of the vegetative stage.
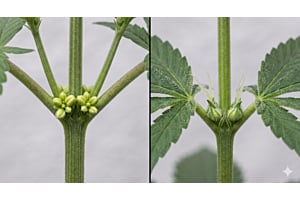
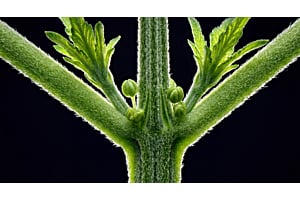
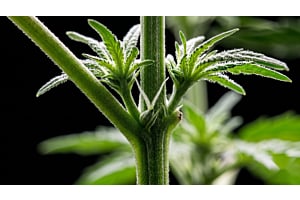
Week 1 – The First Signs of Flowering Stage Appear
This is the week when changes become visible at the nodes where branches meet the main stem. Female cannabis plants begin to show small calyxes, signaling that flowering has officially started.
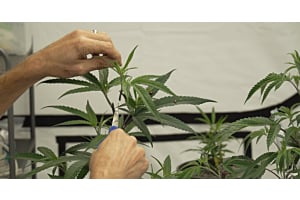
On female plants, you’ll see wispy white hairs emerging from these calyxes. When you spot them, your job is simple: observe closely and avoid making sudden changes to feeding, lighting, or training.
At the same time, inspect carefully for male plants. Instead of hairs, males form round clusters that develop into pollen sacs. If you identify these structures, act immediately by removing male plants from the grow space. Doing this early protects the rest of your crop and allows true flowering to continue without interruption.
Week 2 – Stretch Begins and Bud Sites Multiply
During Week 2, the cannabis plant shifts into rapid growth, marking one of the most noticeable changes in the flowering process. This is when height increases quickly, often surprising growers who thought vertical growth was finished. The preflowers you noticed earlier are now easier to spot and appear at more nodes.
During these first few weeks, the plant focuses on creating as many future bud sites as possible. Internally, energy is being redirected toward reproduction, but structural growth hasn’t stopped yet. This combination is what drives the stretch and gives the cannabis plant its final shape.
Grower Tip: Stability matters most now. Keep temperatures steady and monitor relative humidity, as rapid growth increases the risk of stress if environmental conditions drift too far outside the range.
Week 3 – Early Flower Formation Takes Shape
By Week 3, the transition becomes obvious across the entire canopy. Your flowering plants begin to slow their vertical stretch and redirect energy toward forming structure rather than height.
At the nodes, growing buds start to cluster instead of standing alone. What once looked like scattered pre-flowers now begins to resemble early, recognizable flower sites. A light layer of aroma may develop as resin production slowly increases. This is often the point where your cannabis crop starts to smell noticeably different, even if buds are still small.
Grower Tip: Avoid major changes and focus on keeping light, airflow, and feeding steady so flowers can continue developing without interruption.
Week 4 – Transition From Early Flower to Full Flower
By this point, the plant’s focus fully shifts toward flower production. Vertical growth slows significantly, and most of the plant’s energy is now directed at the canopy. You’ll notice clear changes at each node as bud formation becomes more defined. Small clusters thicken, and individual sites begin connecting into larger developing colas.
This is also when growing flowers start to gain weight rather than just shape. Resin glands become easier to see, and aromas intensify as terpene production increases.
Grower Tip: This is a stabilizing phase. Maintain consistent feeding and environment, because disruptions here can affect flower size and density later on.
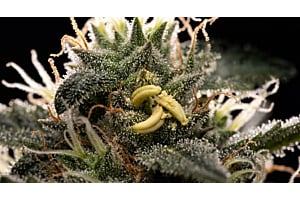
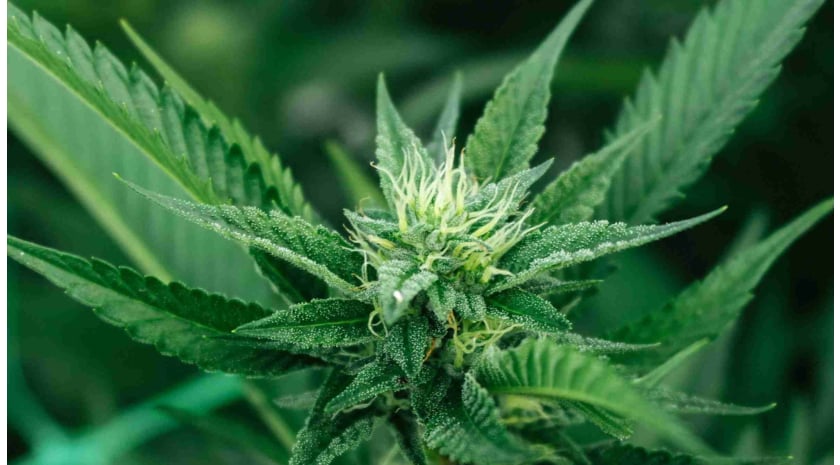
Week 5 – Bud Development Accelerates
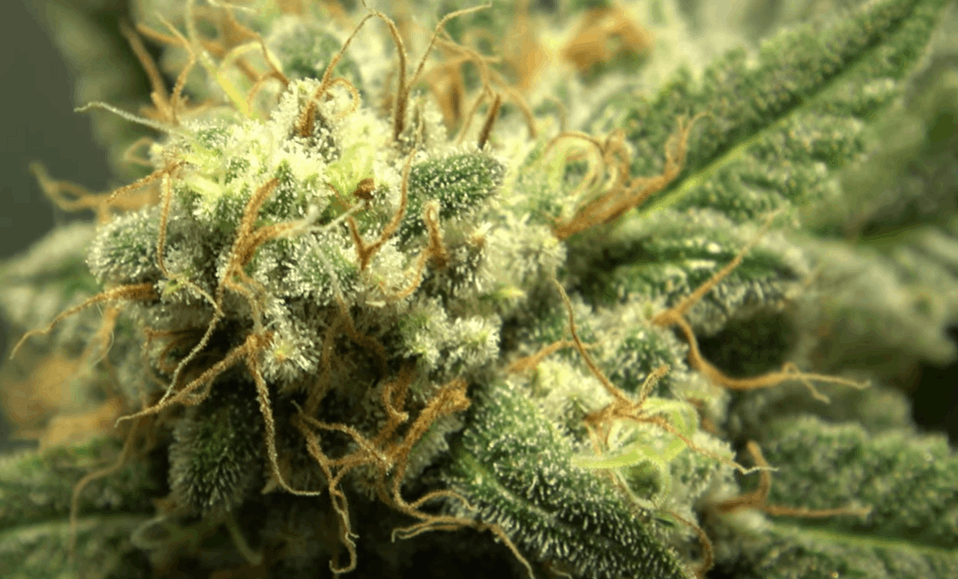
Resin-coated cannabis flower showing expanding buds and pistils during mid-to-late flowering.
This is the point where rapid bud growth becomes easy to recognize.
The plant’s energy is now fully committed to bud production, and flowers begin to swell rather than just multiply. As flower development advances, you’ll notice a sticky, crystal-like coating starting to appear on buds and nearby leaves. These crystals are trichomes, tiny resin glands that produce cannabinoids and terpenes.
Trichomes look like fine, clear, or cloudy frost when viewed closely, especially under a magnifying glass or jeweler’s loupe. They are most visible on the surface of buds and along the edges of sugar leaves.
Grower Tip: Throughout this stage, maintaining healthy foliage is important. Leaves are still fueling growth, so avoid stress or overfeeding that could slow bud expansion or reduce overall quality.
Week 6 – Flower Density and Resin Production Increase
At this point, cannabis buds mature quickly as the cannabis plant enters full flowering mode. Most vertical growth has stopped, and nearly all energy is directed toward the flowers. You’ll notice a clear increase in bud density as calyxes stack more tightly together. Buds feel firmer to the touch and begin taking on their final shape.
Resin production ramps up as the cannabis plant protects its flowers and develops potency. Trichomes become more abundant and visible, giving buds a frosted appearance. This is when growers start seeing bigger buds instead of just more bud sites.
Grower Tip: Your role now is to maintain consistency and avoid unnecessary changes that could slow maturation.
Week 7–8+ – Ripening and Maturation
During this period, most cannabis strains slow their visible growth and shift fully into finishing mode. The plant is no longer building new flowers, but refining the ones it has. Buds continue to swell and harden as they approach peak maturity. Pistils often darken and curl inward, and overall water and nutrient uptake begin to decline.
Trichomes are the clearest indicator of progress now. What started clear and cloudy will gradually include amber trichomes, signaling that cannabinoids are reaching their final balance.
Grower Tip: This is a stage that rewards patience and observation. Rushing changes or harvesting too early can undo weeks of careful flower development.
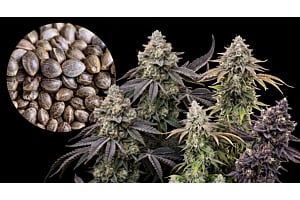
How Genetics and Other Factors Determine Time to Harvest
From this point forward, genetics play the biggest role in how long it takes for a cannabis plant to reach harvest time.
- Indica-dominant strains often finish sooner, commonly within 7–9 weeks of flowering, while sativa-dominant types may need 10–12 weeks or more.
- Hybrid genetics usually fall somewhere in between, depending on which traits are more dominant.
- Autoflowering plants tend to have shorter overall timelines, but their final ripening speed is still influenced by genetics.
Environmental factors also matter. Light intensity, temperature, feeding consistency, and stress levels can all slightly speed up or slow down the final stretch. Because of this, calendar dates are only rough guidelines. Observing trichomes and overall plant behavior is more reliable than counting days when deciding the right harvest window.
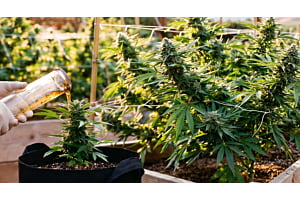
Nutrients During the Flowering Stage (General Guidelines)
Once flowering begins, your feeding approach needs to change along with the plant. The transition from grow nutrients to bloom nutrients supports the shift from leaf and stem growth to flower production.
This doesn’t mean an abrupt switch or heavier feeding right away. During early flower, the goal is balance, not force-feeding, so nutrients support development without overwhelming the plant.
Vegetative vs. Flowering Nutrient Needs
During the vegetative stage, cannabis plants rely heavily on nitrogen to build foliage and structure. In flowering, nitrogen becomes less important as phosphorus and potassium take priority.
Flowering plants still need some nitrogen, but in lower amounts. Too much can delay flower development and keep plants focused on leaves instead of buds.
Early Flower vs. Mid-Flower Feeding
In early flower, feeding should change gradually as the plant transitions. This supports stretch and early bud site formation without shocking the root zone.
By mid-flower, the plant’s demand for phosphorus and potassium increases. At this point, consistent bloom feeding supports bud swelling and resin production.
The key difference is timing. Early flower rewards restraint, while mid-flower benefits from steady, well-balanced input.
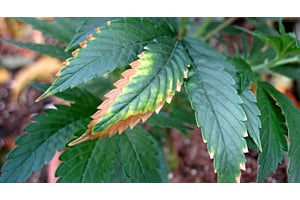
Common Nutrient Mistakes Beginners Make
- Increasing feed strength too quickly, which often causes nutrient burn, is seen as yellow or scorched leaf tips
- Switching to bloom nutrients too early or too aggressively, stressing plants during the transition phase
- Overreacting to minor leaf changes, mistaking normal flowering behavior for deficiencies
- Feeding on a fixed schedule instead of observing the plant, leading to unnecessary buildup or imbalance
- Ignoring runoff or medium condition, which can cause salt accumulation and lock out nutrients
Organic vs. Synthetic Feeding Differences
Organic nutrients work more slowly, relying on soil life to make nutrients available. This makes them forgiving, but timing becomes more important to feed plants properly.
Synthetic nutrients act faster and give more direct control. However, they require precision, as mistakes show up quickly and can be harder to correct.
Neither approach is better by default. Success comes from understanding how your chosen system delivers nutrients and adjusting your strategy to match the plant’s pace.
Light Schedule and Darkness During the Flowering Stage of Cannabis
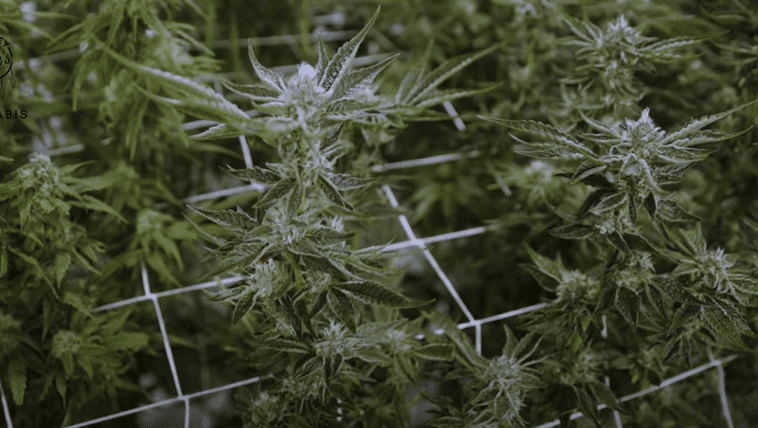
LED grow lights supporting cannabis flowering through a consistent light and darkness cycle.
Light management is one of the most decisive factors in the flowering stage of cannabis. Once flowering begins, consistency matters more than intensity, and mistakes with light or darkness can disrupt the entire cycle.
Why Darkness Is Non-Negotiable During Early Flower
During early flower, cannabis relies on uninterrupted darkness to maintain hormonal balance. Even brief light exposure during the dark period can confuse the plant and slow or disrupt flower development.
This is especially critical in the first weeks, when the plant is locking into its flowering pattern. Light leaks in the grow space can cause stress responses that reduce bud quality later on. For indoor growers, this means treating darkness as seriously as light. A sealed tent or room and strict timing are essential once flowering has started.
Ideal Light Spectrum for the Flowering Stage of Cannabis
As the flowering phase progresses, cannabis responds best to light with a stronger red spectrum. This encourages bud formation, swelling, and resin production rather than leafy growth.
Modern grow lights, especially full-spectrum LEDs, are designed to support this shift without needing major equipment changes. The key is proper intensity and even canopy coverage, not constant adjustment.
Once the light setup is dialed in, resist the urge to experiment. Stable lighting allows the plant to focus fully on flower development instead of adaptation.
Flushing: When, Why, and How (If You Choose to Do It)
Flushing is the practice of feeding only water during the final phase of flowering. While opinions differ, most growers flush to reduce excess nutrient salts in the medium before harvest.
When to Flush Cannabis
Flushing is usually done during the last 7–14 days before harvest, depending on the growing medium. Soil typically requires a longer flush, while coco and hydro systems need less time. The timing matters more than the duration. Flushing too early can starve the plant, while flushing too late may have little effect.
Why Some Growers Choose to Flush
Growers flush to encourage the plant to use stored nutrients as it finishes ripening. This often coincides with natural leaf fade as the plant reaches maturity. Many believe flushing improves flavor and smoothness, though results depend on genetics, feeding practices, and overall plant health.
It’s a finishing technique, not a fix for earlier mistakes.
How to Flush Properly
To flush, simply use pH-balanced water, ideally 6.0–7.0 for soil, or 5.5–6.5 for coco and hydro, to avoid locking out any remaining nutrient uptake during the final days. Ensure good runoff so accumulated salts are washed from the root zone. During this time, avoid making other changes. Flushing works best when the plant is already healthy and close to harvest.
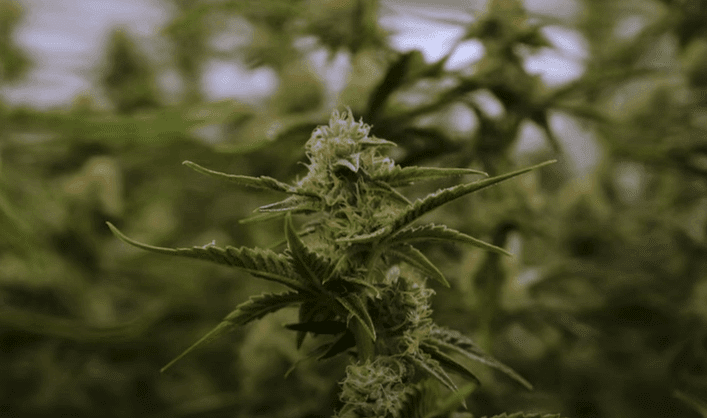
Knowing When It’s Time to Harvest
Close up of darkened buds with curled pistils, indicating time to harvest your flowering cannabis.
Knowing when to harvest cannabis is one of the most important decisions in the entire grow cycle. Harvest too early or too late, and weeks of careful flowering work can lose potency, flavor, or balance.
Visual Signs That Cannabis Is Ready for Harvest
- Trichomes change from clear to cloudy, indicating cannabinoids are reaching peak potency
- Some trichomes turn amber, signaling a more mature, heavier effect profile
- Pistils darken and curl inward, rather than standing straight and white
- Bud growth slows noticeably, with no new swelling over several days
- Leaves begin to fade naturally, especially larger fan leaves, as nutrient uptake declines
Why Timing Matters for a Successful Harvest
Harvest timing directly affects the type of experience the final flower delivers. Earlier harvests tend to produce lighter, more energetic effects, while later harvests lean heavier and more relaxing.
A successful harvest comes from observation, not impatience. Rather than relying on calendar dates, let the plant show you when it’s ready.
Final Checks Before You Harvest Cannabis
In the final days, water uptake slows, and leaf fade becomes more noticeable. These are natural signs that the plant is finishing, not problems to correct.
Once trichomes show the balance you’re aiming for, it’s time to harvest. At this point, waiting longer rarely adds benefit and can begin to degrade quality.
Drying and Curing Cannabis After Harvesting
Once flowering ends and you harvest cannabis, quality is no longer determined by how the plant grows, but by how it’s handled. Drying and curing are the final steps that preserve potency, flavor, and aroma. For best results, harvest at the start of the dark cycle or early morning before lights come on, when terpene content in the plant is at its peak.
Drying Cannabis After Flowering
Drying begins immediately after harvest and usually lasts 7–14 days. Buds should dry slowly in a dark space with moderate airflow, temperatures kept between 60–65°F (15–18°C), and humidity around 50–60% RH. You’re looking for a gradual loss of moisture, not rapid dehydration. When small stems snap instead of bend, drying is complete, and curing can begin.
Curing Cannabis for Quality and Smoothness
Curing is the process of slowly stabilizing moisture inside the buds. Flowers are placed in airtight glass jars and opened daily during the first two weeks to release excess humidity, targeting a stable 58–62% RH inside the jar. During curing, chlorophyll breaks down, and terpene profiles develop fully. This stage improves smoothness, aroma, and overall smoking experience.
How Long Does Curing Take
Initial curing takes about 2–4 weeks, but quality continues improving for several months. Rushing this stage often results in harsh smoke and muted flavors.
Proper drying and curing don’t increase potency, but they protect it. This final patience step is what separates average results from a truly finished harvest.
The Flowering Stage: Bringing It All Together
The marijuana flowering stage is where preparation meets payoff. Every adjustment you made earlier—genetics, environment, nutrients, and lighting—comes into focus as the plant moves from early bloom to ripening and harvest.
Successful cannabis cultivation during flowering isn’t about forcing results. It’s about observation, consistency, and knowing when to act and when to step back while the plant does what it’s genetically designed to do. From the first signs of flowering to drying and curing, each step builds on the last.
When you understand the full process, flowering stops being intimidating and becomes the most rewarding part of the grow.
FAQs About the Flowering Stage
How Long Does the Flowering Stage Last?
The flowering stage typically lasts 7–12 weeks, depending on genetics. Indica-dominant strains often finish faster, while sativa-dominant strains usually take longer. Environment and grow conditions can slightly influence timing, but genetics set the baseline.
Can Flowering Be Reversed?
Yes, but only under specific conditions. Flowering cannabis can revert to vegetative growth if the light schedule is changed back to long days early enough. However, re-vegging causes stress, irregular growth, and extended timelines. It’s generally avoided unless there’s a clear reason.
Why Did My Plant Stop Stretching Early?
Stretching usually ends once the plant fully commits to flower production. If it stops early, it’s often due to genetics, limited light intensity, or environmental stability. This isn’t a problem as long as buds continue developing normally.
Should Leaves Yellow During Flowering?
Some yellowing is normal, especially late in flower. As flowering cannabis plants finish, they naturally redirect nutrients away from older fan leaves. Early or rapid yellowing, however, can indicate feeding or environmental issues and should be monitored closely.
Are Flowering Timelines Different for Autoflowers?
Yes, autoflowers follow a genetic timeline rather than a light-based one. They usually flower faster overall, often completing their entire life cycle in 8–12 weeks. While the flowering phase is shorter, ripening speed still depends on strain genetics and growing conditions.