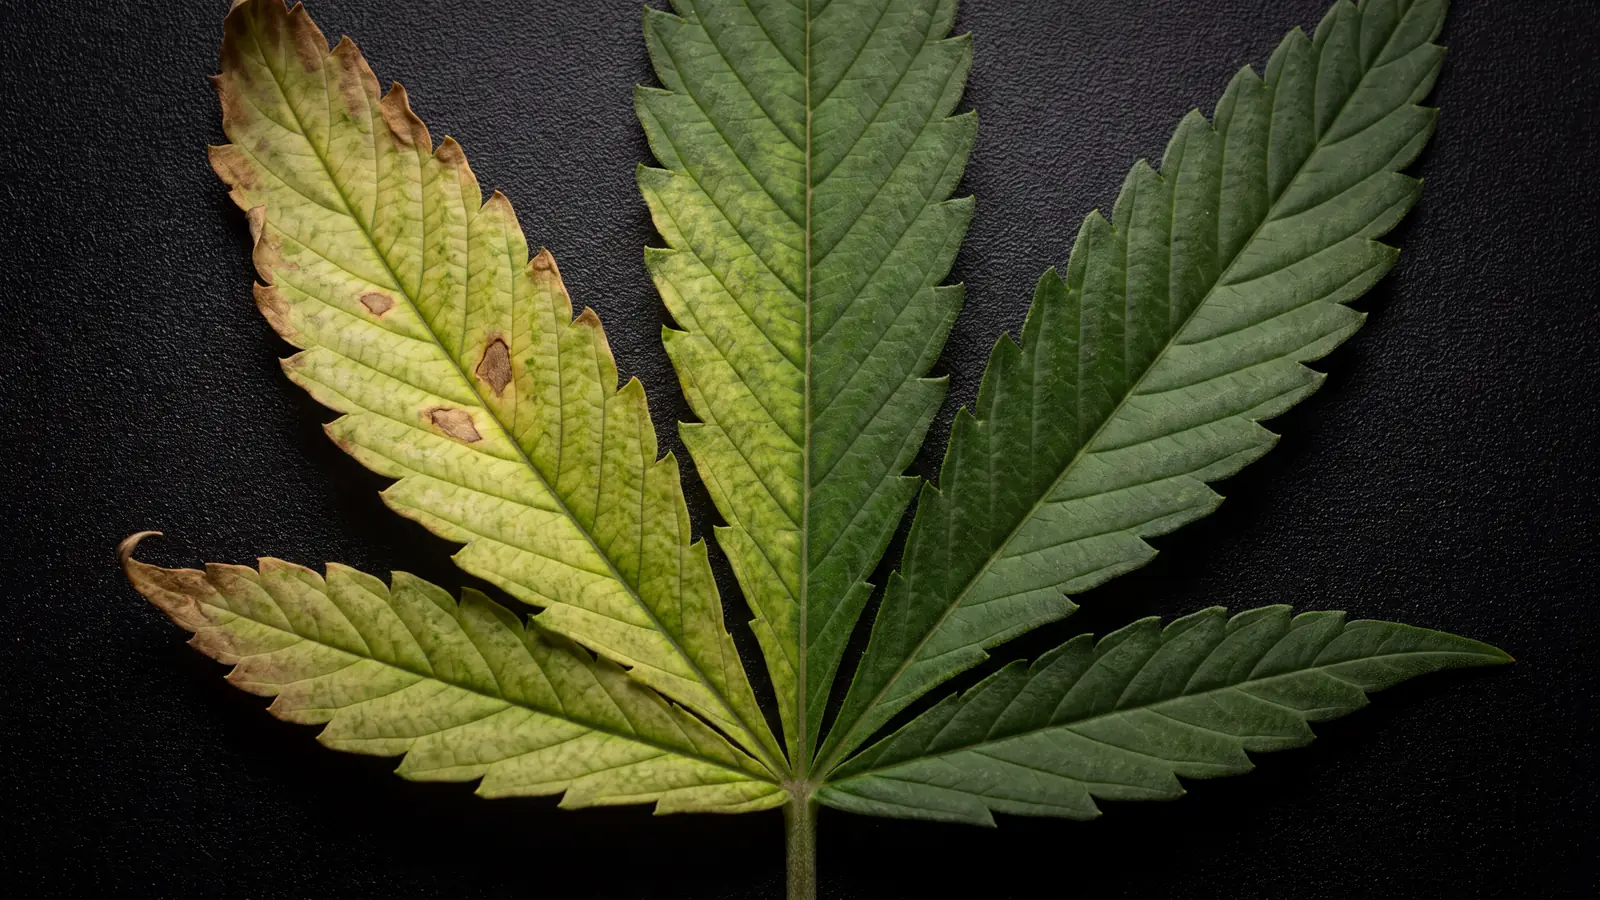
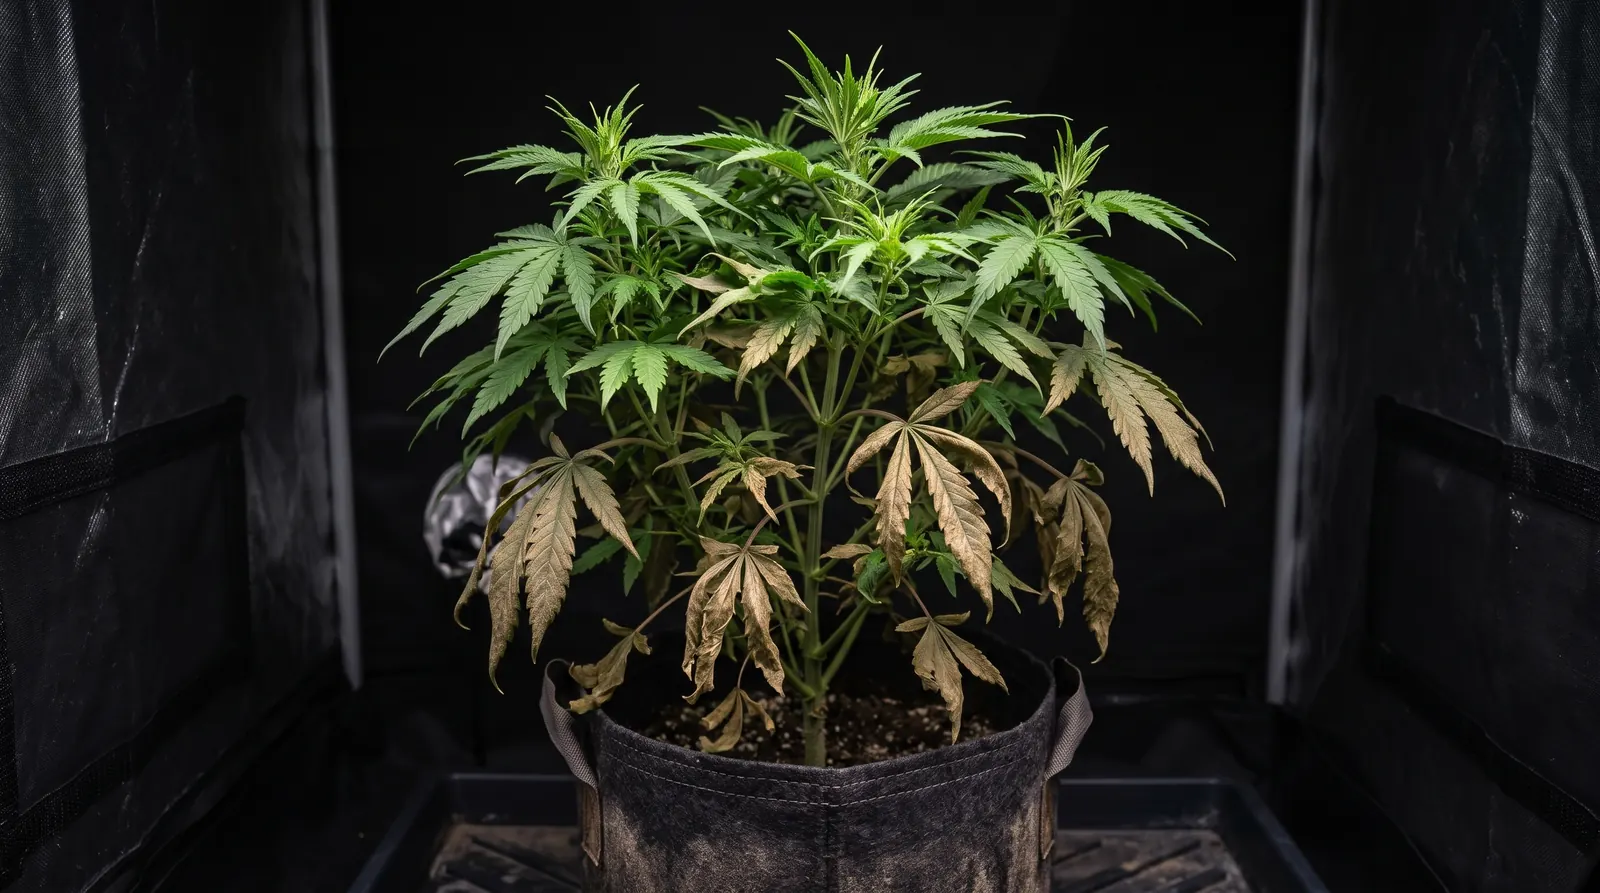
Hemp russet mites are microscopic pests that feed only on cannabis and hemp. You can't see them with the naked eye, so you'll usually spot the damage first. Watch for dull, brittle lower leaves with curled edges and bronzed stems, and no webbing anywhere. To get rid of them, contain the plants, spray repeatedly over several weeks, and follow up with predatory mites.
Speed is everything. On cannabis, russet mite damage looks a lot like heat stress, a feeding mistake, or a pH problem, so most growers start treating late. Most infestations arrive on infested clones or plants, which is why yield-focused growers start from feminized marijuana seeds because it makes them a tad easier to keep out.
This guide covers the signs of russet mites, steps on getting rid of them in veg and flower, common lookalikes, and prevention tips.
What Are Hemp Russet Mites?
Hemp russet mites (Aculops cannabicola) are microscopic mites that pierce the surface cells of cannabis and hemp leaves and suck out the contents. They belong to the Eriophyidae family of gall and rust mites, and the "russet" name comes from the bronzed, rusty look they leave on leaves and stems. Cannabis and hemp are the only host plants known.
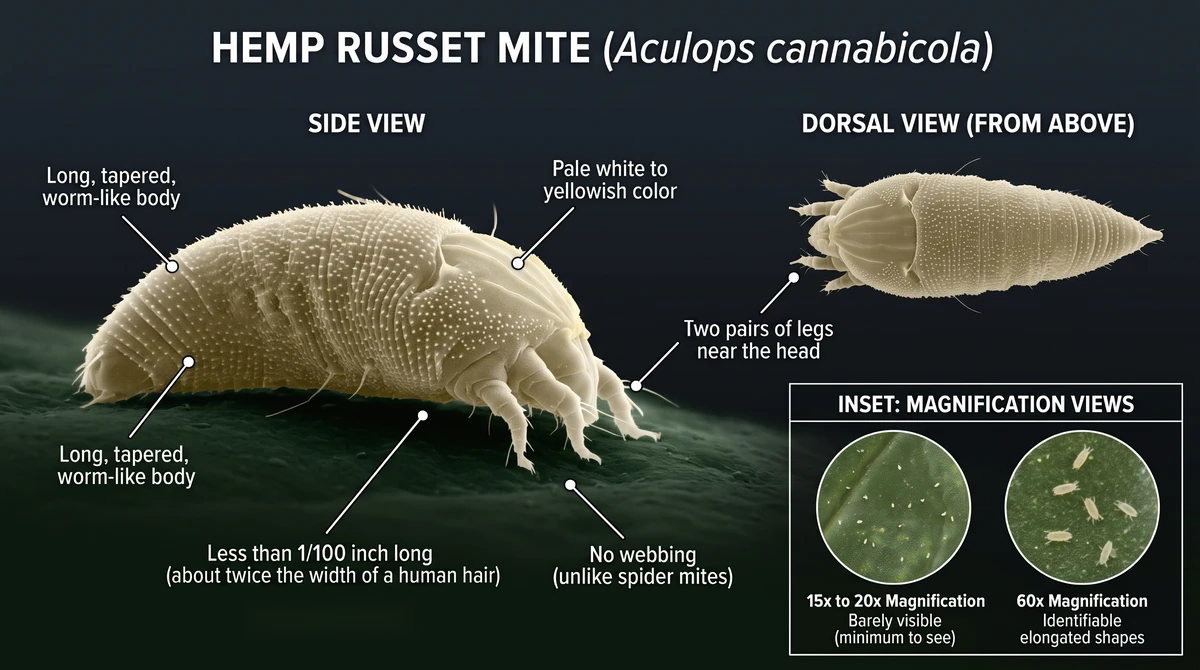
They're less than 1/100 inch long, about twice the width of a human hair. Colorado State University says you need at least 15x to 20x magnification to see them at all. In practice, most growers confirm them with a 60x pocket scope or a clip-on phone microscope, which makes checking at home cheap and easy.
Under magnification, look for:
- A long body that tapers sharply at the rear, more like a grain of rice than a dot.
- Pale white to yellowish coloring with a wormlike shape.
- Only two pairs of legs, both near the head, where most mites have four pairs.
- No webbing at any stage, which sets them apart from most other mite pests.
They start on the undersides of lower leaves and spread to upper surfaces, petioles, stems, and flower buds as numbers climb. Point your scope at living tissue just above the worst damage, not at dead leaves. The mites move on as tissue dies.
How Russet Mites Spread and Multiply
Hemp russet mites multiply fast, with several generations living on the same plant at once. They spread mainly on infested clones, cuttings, and other plants brought into the grow, then move between plants on hands, clothes, tools, pets, and air or wind currents. Each mite can go from egg to adult in as little as a week, and adults live up to 30 days.
Warm, humid conditions speed up breeding, and a steady supply of fresh plants lets them breed year-round. Outdoors, numbers climb through the summer as temperatures rise.
Russet mites can’t crawl far, but they gather at leaf edges and catch air currents. That’s enough to cross a tent with a fan running or drift between neighboring plants in an outdoor garden. Outdoors, they’re also thought to survive between seasons on crop debris and cannabis plants.
Colonies build up unseen on lower, older growth, then work their way up. Numbers peak in the growing tips, where they stunt new growth. Because the top of the plant is the last part to show damage, the problem often seems to appear overnight.
Signs of Russet Mites on Cannabis
The signs of russet mites on cannabis start as subtle changes in leaf texture on the lower plant. They then climb upward and end with bronzed stems and damaged buds. At every stage it looks like something else, so growers often chase a nutrient deficiency, pH lockout, heat stress, or overwatering while the mites multiply.
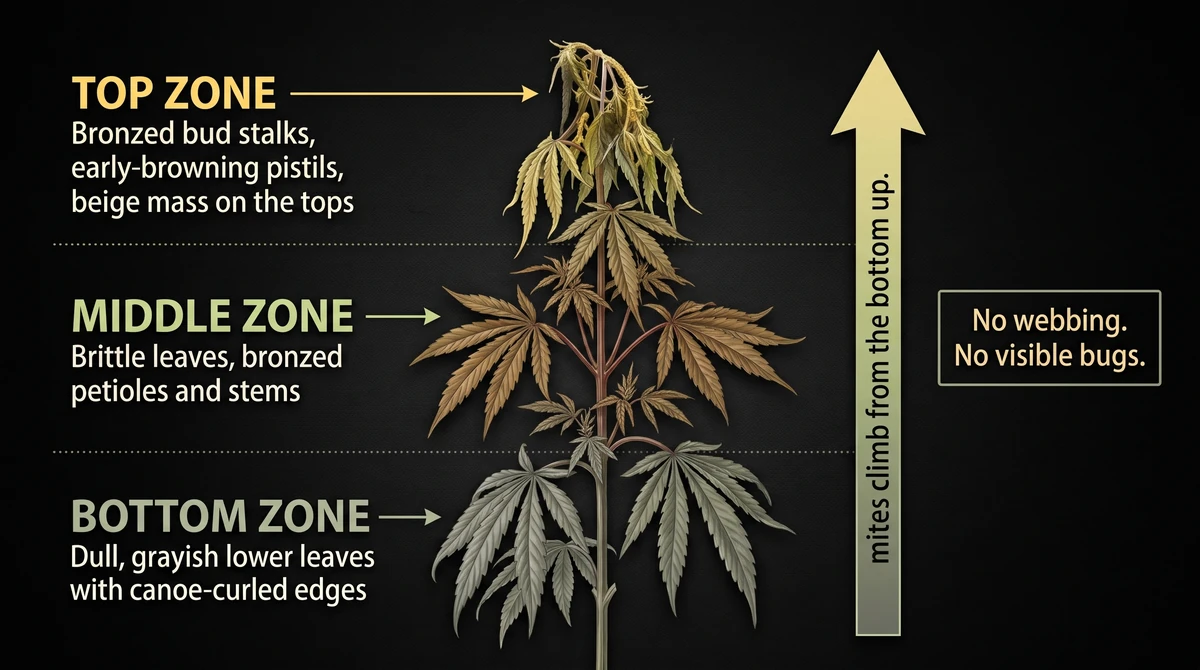
Two things missing are clues in their own right: there's no webbing and no visible bugs. Feeding and environment problems also tend to show up unevenly and improve once you fix them. Russet mite damage keeps climbing week after week no matter what you change.
Hemp russet mite damage isn't noticeable while numbers are low, and symptoms like leaf curling won't show on every plant. A clean-looking plant next to an affected one tells you nothing.
Early Russet Mite Damage in Veg
Early russet mite damage shows up in veg as a change in leaf texture and finish before color. Lower leaves turn dull, stiff, and slightly leathery, and their edges start curling into a canoe shape. Both changes show up well before anything turns yellow.
Here are the signs of russet mites in veg, in rough order of appearance:
- Lower leaves lose their healthy sheen and go dull, sometimes with a faint gray or bronze cast.
- Leaf edges curl upward or downward.
- Leaves turn stiff and brittle.
- New growth slows down or comes in small and distorted, with shorter gaps between nodes.
- Faint bronzing at petiole joints and on stems, the "russeting" the mite is named for.
- Damage starts at the lowest affected node and creeps higher each week.
Through all of this, you won't see webbing, speckled leaves, or anything moving. If leaf texture and new growth change while your feed, pH and environment haven't, scope the tissue before you touch your nutrients. You only get this early window once.
Russet Mite Damage on Buds
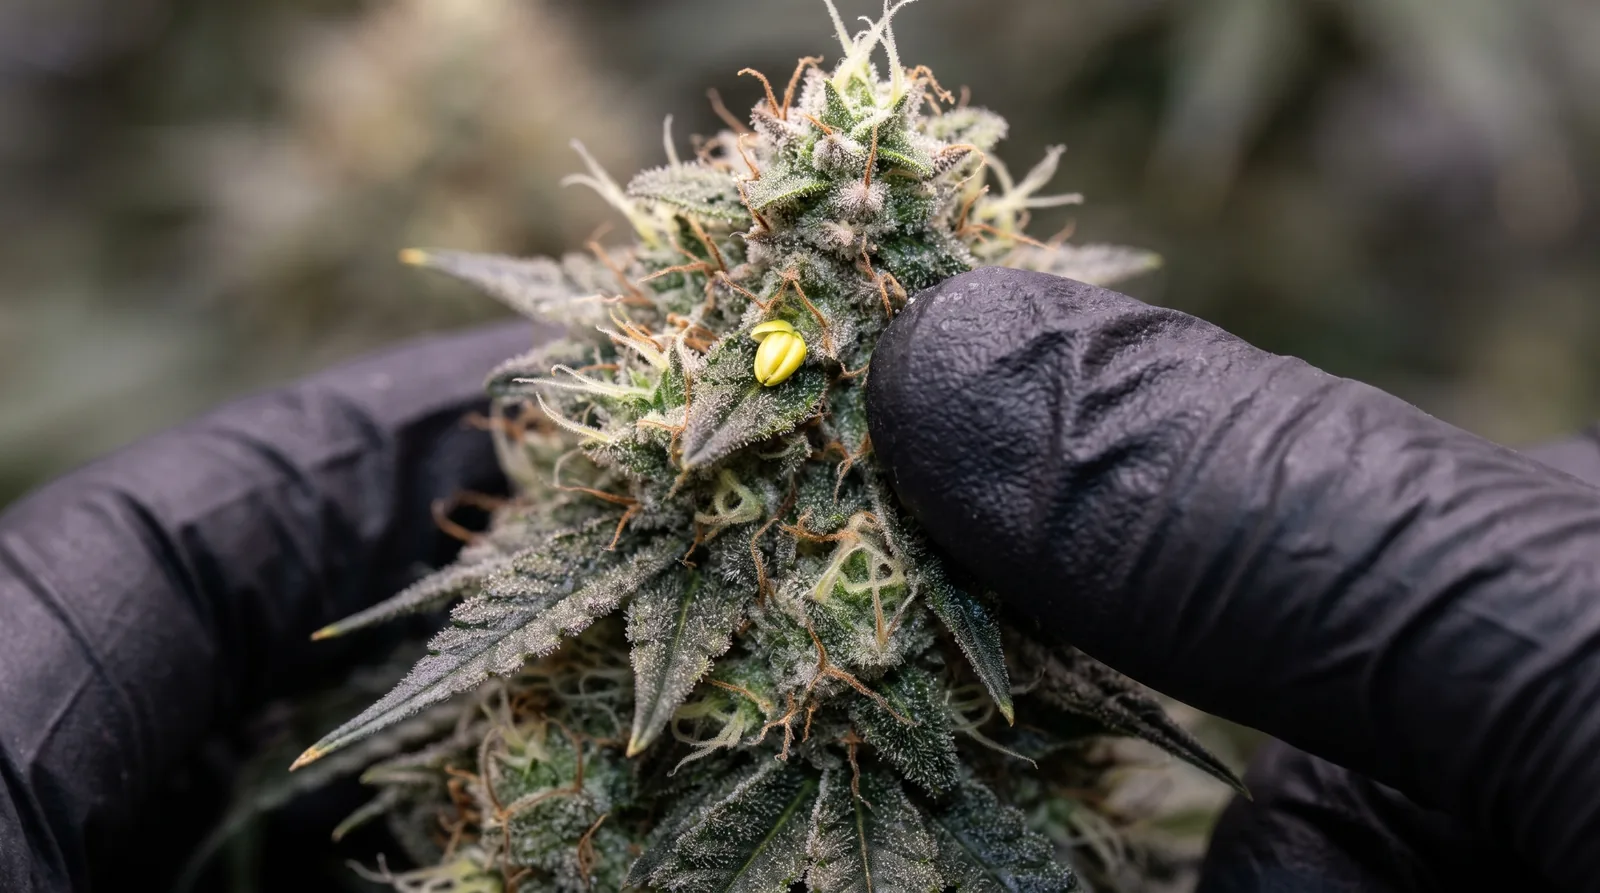
On buds, russet mite damage shows up as bronzed bud stalks, early-browning pistils, and dull, dry flowers that stay small and lose their aroma. In heavy infestations, you may also see a beige or yellow mass on the tops. It’s often mistaken for mold or pollen, but it’s actually masses of mites.
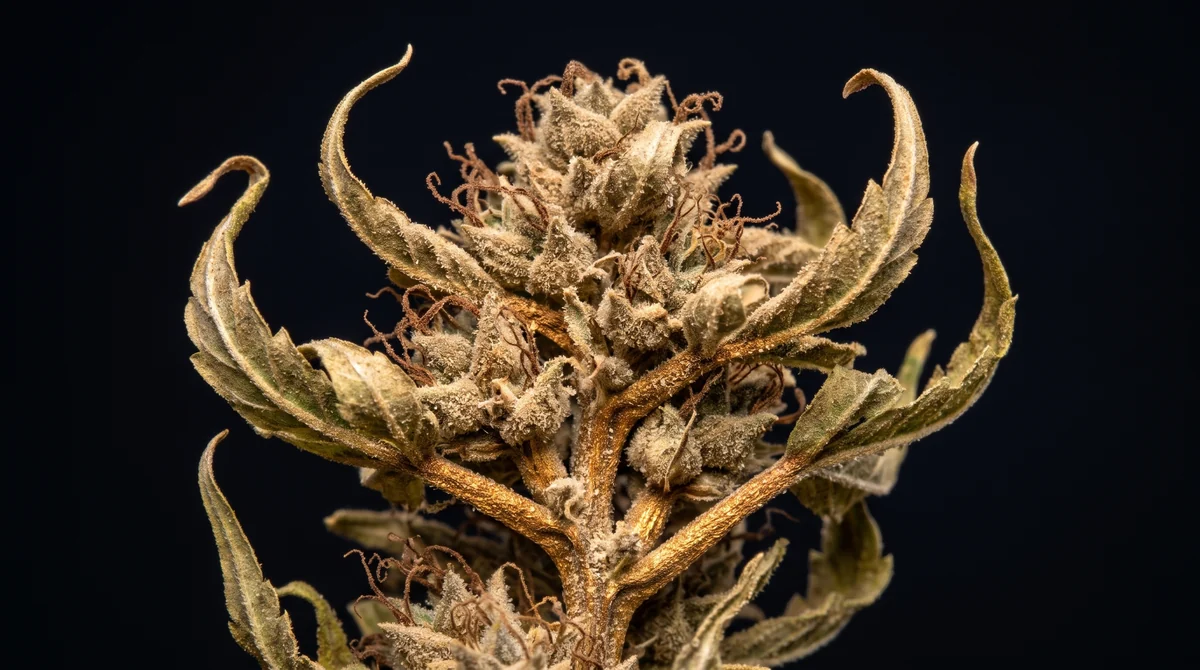
Other signs of russet mite on flowering plants include:
- A brown or tan powdery dust on leaves and stems, made up of shed mite skins.
- Lower leaves yellowing, drying out, and dropping.
- Fewer bud sites and smaller leaves across the plant.
Normal late-flower fade is even, spreads across the canopy, and keeps pace with trichome ripening. Mite damage is patchy, shows up early, and keeps advancing while trichomes lag behind. Damage that’s already on bud tissue won’t heal, so anything you do from here protects the buds that are still clean.
Russet Mites vs Spider Mites vs Broad Mites
To tell hemp russet mites apart from lookalike cannabis pests, check three things: webbing, where the damage starts, and how it progresses.
Russet mites leave no webbing, start on lower, older growth, and climb steadily upward. Spider mites spin webbing, while broad mites hit new growth at the top first. Use the table below to confirm what you’re dealing with.
| Check | Russet Mites | Spider Mites | Broad Mites |
| Visibility | Invisible to the naked eye | Visible as tiny moving specks | Invisible to the naked eye |
| Webbing | None | Fine webbing on leaf undersides | None |
| Body | Long and tapered, two pairs of legs near the head | Rounded, four pairs of legs | Oval, translucent to amber, four pairs of legs, fast-moving |
| Damage | Dull, curled, brittle leaves and bronzed stems | Small pale or yellow specks on the tops of fan leaves | Twisted, blistered, shiny new growth |
| Where it starts | Lower, older growth, petioles, and stems | Leaf undersides | New growth at the top of the plant |
| How it progresses | Climbs steadily from the bottom upwards | Speckling spreads and webbing builds as numbers grow | Growing tips stall and new leaves come in deformed |
| Magnification needed | 15x to 20x minimum, 60x for a confident ID | A 10x loupe is usually enough | A strong scope, much like russet mites |
Russet Mite Damage vs Environmental Problems
Nutrient deficiencies, pH lockout, heat or light stress, and overwatering can all look like early russet mite damage. The difference is how the damage behaves. Environmental damage stops spreading or improves once you fix the cause, but russet mite damage keeps climbing the plant, no matter what you change.
Here’s how each one usually differs:
- Nutrient deficiency: Leaves change color first, often yellowing on older or newer growth (depending on the deficient nutrient) or between the veins. Early russet mite damage changes leaf texture before color.
- pH lockout: Several deficiency symptoms show up at once even though you’re feeding normally. Checking the pH of your water and runoff confirms or rules it out.
- Heat or light stress: Damage is worst on the tops closest to the light, with leaves tacoing or bleaching. Russet mite damage starts low and works its way up.
- Overwatering: Leaves droop across the whole plant at once and perk up as the medium dries out.
If you’ve corrected an environmental cause and the damage still climbs, scope the plant. With no scope on hand, judge by progression and webbing, and treat for mites instead of waiting another week for proof.
How to Get Rid of Russet Mites Step by Step
To get rid of russet mites, contain the infestation, treat every plant with repeated sprays over several weeks, and follow up with predatory mites. One spray almost never does it, because eggs survive and overlapping generations reinfest the plant within days.
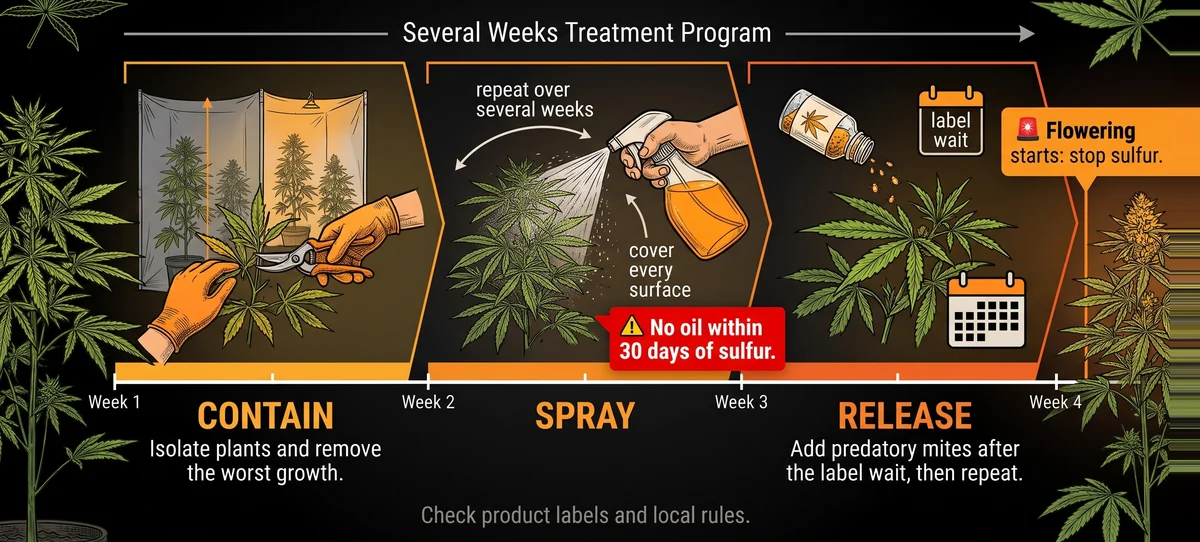
Product availability, legality, and approved crop use vary by location, and some areas don’t allow any chemical pesticides on hemp at all. Always read the label and check local rules before treating a crop you plan to consume.
The three steps below take you through the full program, from stopping the spread to choosing your sprays and releasing predators:
Step 1: Contain the Russet Mite Infestation
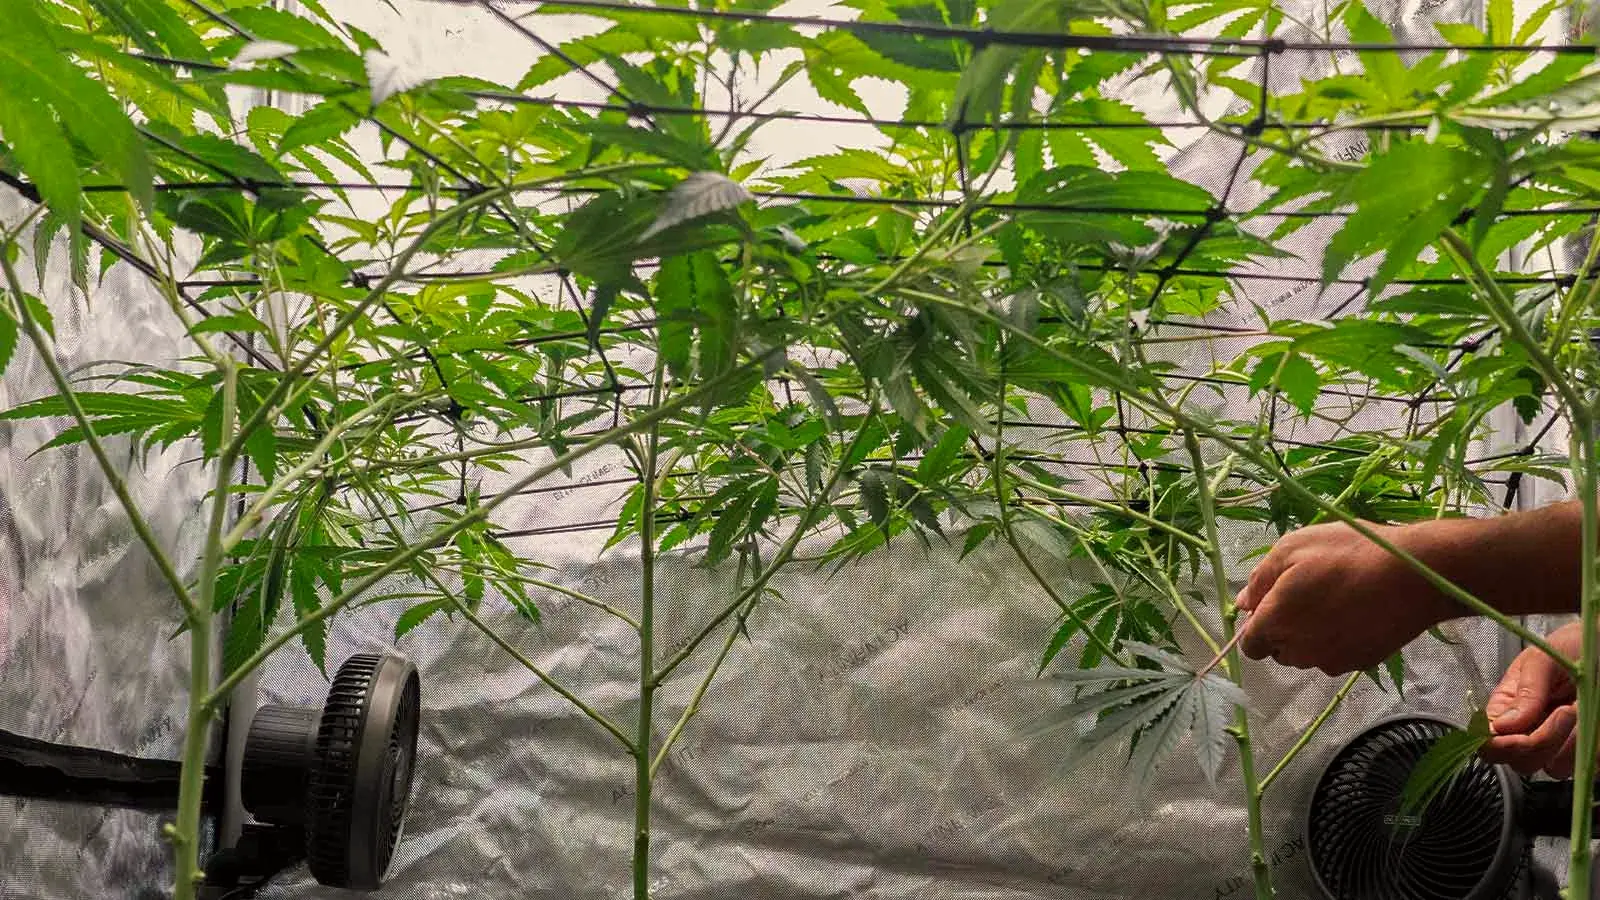
Start by stopping the spread, as moving russet mites around undoes everything else. Remove suspected plants from the main space right away and keep them isolated until you've confirmed what you're dealing with.
- Keep infested plants away from shared airflow, and treat every marijuana plant in the grow as exposed, however clean it looks.
- Handle infested plants last, then wash your hands and change clothes before touching clean ones.
- Cut away the worst lower growth and dead tissue, bag it right at the plant, and dispose of the bag elsewhere.
- Stop taking clones from affected plants, and quarantine any cuttings you've already taken.
- Decide early which plants are worth treating and which should go.
Don't move plants between tents or rooms to escape the problem. It's one of the most reliable ways to start a second infestation somewhere you're not watching.
Step 2: Spray With Sulfur, Oils or Soaps
Once the infestation is contained, start a contact spray program. Sulfur is the go-to for russet mites in veg, and it comes in organic-approved forms. Growers apply it as a wettable spray or through a vaporizer, which should only run in an empty, ventilated room with no people inside.
Horticultural oils and insecticidal soaps kill mites by smothering them, so they need generous, full coverage, and anything you miss survives. In 2021 trials at the University of Kentucky, a mineral oil product and a fungus-based biopesticide (Beauveria bassiana) were the most effective options tested. Neem oil is popular too, but results vary and it can taint aroma.
Never put oil and sulfur close together. Oil on sulfur residue burns leaves, and most oil labels forbid spraying within 30 days of a sulfur application, before or after. Build that gap into your program, and if your label asks for more, give it more.
To make sure your sprays actually work:
- Cover leaf undersides, petioles, stems, and growing tips, not just the tops of fan leaves.
- Treat every plant in the room, not only the ones showing damage.
- Keep spraying on a schedule that spans several generations, even after symptoms improve.
- Avoid spraying under intense light or in high heat, which raises the risk of leaf burn.
When a treatment seems to stop working, the cause is usually coverage, not the product. A spray that never reaches stem crevices and curled leaf edges leaves russet mites behind, and they repopulate the plant right on schedule.
Step 3: Release Predatory Mites
Once your sprays have knocked russet mite numbers down and the label waiting period has passed, release predatory mites to keep those numbers low. Amblyseius swirskii and Neoseiulus fallacis are the best-supported choices. Plan on repeat releases to hold the population down.
| Predatory Mite Species | What the Research Shows | What to Know | Use It? |
| Amblyseius swirskii | Mass releases cut hemp russet mite numbers significantly in field trials | Generalist that also targets thrips and whiteflies | Yes, a top pick |
| Neoseiulus fallacis | Mass releases cut hemp russet mite numbers significantly in field trials | Generalist that also feeds on spider mites | Yes, a top pick |
| Amblyseius andersoni | Feeds on hemp russet mites | Stays active in low humidity and high heat | Worth considering |
| Galendromus occidentalis (western predatory mite) | Controls russet mites on other crops | Struggles in sticky, resinous buds once flowering starts | Best in veg |
| Neoseiulus californicus | Didn’t significantly reduce hemp russet mites in field releases | Often sold for russet mites anyway | No, skip |
| Phytoseiulus persimilis | Barely touches russet mites | Spider mite specialist | No, skip |
Research on hemp russet mites is still thin, so check current supplier guidance before ordering. Predators work best as prevention or against small populations. They can’t keep up with a heavy infestation, and if spider mites or thrips are around, they’ll often go after those first. Don’t release them early, because sulfur, oils, and soaps can kill predators as easily as pests.
Keep checking lower leaves and new growth under magnification every week once predators are out. If damage starts climbing again, go back to step 2 and restart the spray program. Then release a fresh round of predators once the label waiting period has passed.
How to Treat Russet Mites on Weed in Flower
In flower, you can no longer rely on sulfur or heavy spraying, so russet mite treatment comes down to predatory mites, removing damaged growth, and pulling the worst-hit plants. If the infestation is advanced in late flower, harvesting early may be your best option.
Most veg treatments aren’t safe once buds start forming. There's no residue research showing sulfur is safe on cannabis that will be smoked or extracted, so it's best to stop using it before flower. Spraying dense buds also invites bud rot, and the risk grows the further into flower you get.
Your options in flower:
- Predatory mites: These are one of the few low-residue options once buds are growing. Choose from the species in step 3 above.
- Removing damaged growth: Cutting and bagging badly hit lower growth shrinks the mite population without spraying.
- Pulling the worst plants: Removing heavily infested plants entirely protects the rest of the grow.
- Harvesting early: This is the fallback when the infestation is advanced in late flower.
Be honest with yourself about early harvest. You’re weighing ripeness the buds haven’t reached yet against quality they’re losing every week. If buds are dulling and pistils are browning before the trichomes ripen, the flowers are degrading faster than they're maturing, and cutting early limits the loss.
Dealing With Russet Mites After Harvest
Hemp russet mites die off in dried, cured buds, but they survive on any living cannabis left behind. Indoors, that means other plants, clones, or fresh trim. Outdoors, they're thought to carry over between seasons on old plant debris and on cannabis that sprouts from dropped seeds. After harvest, check your buds for damage and reset the grow space before the next run.
Your harvest may still show the damage, even though the mites won't be living in your jars. Buds from heavily infested plants can look dull and dry, carry visible debris, and come up short on aroma. Trim carefully, inspect the buds under magnification, and set aside the worst material before it goes into the cure.
Reset your grow space in this order:
- Remove every plant, including mothers and cuttings, or move them well away from the space.
- Take all plant waste out of the building.
- Clear out pots, trays, saucers, stakes, netting, and floor coverings.
- Wash or replace fabric pots, and clean tools, scissors, and trimming gear.
- Wipe down surfaces, walls, fans, and housings, and service or replace filters.
- Leave the room empty of all living cannabis for about a month. Colorado State reports that remaining mites die within a month without a host plant.
Outdoors, clear the plot as soon as you’ve harvested. Pull up stalks and fallen leaves, and bag or destroy all plant debris instead of composting it on site. Through the off-season, pull any cannabis seedlings that sprout from dropped seeds around the grow, and clean pots, stakes, and tools before you store them.
How to Prevent Russet Mites
Preventing russet mites mostly comes down to controlling which living plants come into your grow. These mites rarely arrive on their own, so you can significantly reduce the chance of them getting in by doing the following:
- Quarantine new plants: Keep every incoming clone or plant away from your grow for a few weeks, checking under magnification throughout.
- Know your source: Only take clones from growers or nurseries whose pest control you trust.
- Scout weekly: Check lower leaf undersides, petiole joints, and new growth under magnification once a week, even when everything looks fine.
- Keep it clean: Wear dedicated clothes and shoes in the grow, wash your hands before handling plants, and clean scissors between plants and rooms.
- Watch your mothers: Inspect mother plants on the same schedule, and never take clones from a plant with unexplained distortion.
- Use predators as a standing defense: Release predatory mites as routine prevention, not just in emergencies.
- Keep outside plants out: Leave outdoor plant material, cut flowers, and untested houseplants out of your grow space.
- Start from seed: Seeds don't come with a living mite colony, so starting from weed seeds cuts out the most common way for mites to get in.
If you only adopt one habit, make it the weekly check of lower growth (under magnification). Dulling leaves and curling edges show up early enough to turn a crop-ending problem into a manageable one. The same routine also catches most other cannabis pests before they get going.