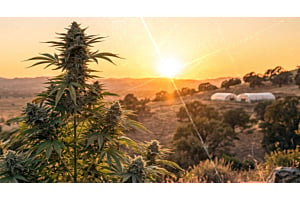
Getting your feeding schedule right is one of the most essential steps toward a heavy, healthy harvest. Open-air growing comes with real variables: rain, shifting temps, and living earth. Your nutrient plan has to account for all of them.
Feed your cannabis plants well at the right time, and they'll reward you. Get the timing or ratios wrong, and you'll spend weeks correcting problems that compound fast.
This guide covers:
- What nutrients do outdoor cannabis plants need
- A complete stage-by-stage feeding schedule
- How to read your plants and course correct when something is off
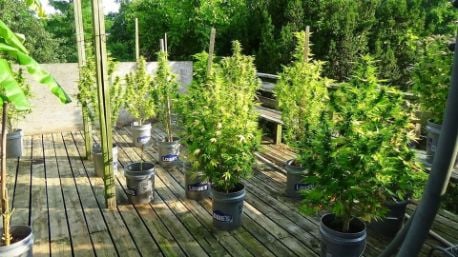
Growing in containers or directly in the ground, the process is the same.
What Outdoor Cannabis Plants Need to Thrive
Cannabis crops draw on a range of nutrients across their growth cycle. Understanding what each one does makes it easier to determine what to adjust and when.
The Big Three: Nitrogen, Phosphorus, and Potassium
These three, referred to as NPK, are the essential nutrients cannabis crops consume in the largest quantities.
- Nitrogen (N) drives vegetative growth: leaf production, stem development, and the healthy green color of a well-fed plant.
- Phosphorus (P) takes priority as plants shift into the flowering stage. It supports bud development and root strength.
- Potassium (K) works throughout the entire cycle, regulating water uptake and contributing to overall plant resilience.
Outdoor feeding schedules are structured around NPK ratios that shift at each growth stage to support the plant as it moves from building structure in vegetation to producing buds in flower.
Calcium, Magnesium, and Micronutrients
Outdoor cannabis plants are particularly prone to calcium and magnesium deficiencies.
- Calcium supports cell walls and helps plants handle environmental stress.
- Magnesium sits at the center of chlorophyll production. A deficiency shows as yellowing between leaf veins, starting on older leaves.
Beyond these, plants also rely on trace micronutrients, including iron, zinc, manganese, and boron. Needed in small amounts, but deficiencies in any of them can stall growth quickly.
Outdoor Marijuana Feeding Schedule by Growth Stage
The table below is your complete reference for tailoring your outdoor grow feeding schedule across the full growing season. The sections that follow cover the specifics for each stage.
| Stage | Weeks | NPK Ratio | Feed Frequency | Key Notes |
| Seedling | 1–3 | 2:1:2 | Plain water or 1/4 dose once/wk | No nutrients for the first 2 weeks. Quarter-strength only if deficiency shows. |
| Vegetative | 4–8 | 3:1:2 | Every 5–7 days | 5-gal pots: standard dose. 10-gal+: increase slightly. Skip after heavy rain. |
| Pre-Flower | 8–10 | 1:2:2 | Twice over 2 weeks | Taper nitrogen gradually. Watch for stretch. Begin transitional bloom formula. |
| Flowering | 10–16 | 1:3:3 | Every 4–5 days | No foliar sprays during flower. Feed after the soil has dried slightly. |
| Late Flower / Flush | Final 1–2 wks | 0:0:0 | Plain water only | Stop nutrients 10–14 days before harvest. Rain counts as a partial flush. |
Seedling Stage (Weeks 1–3)
Seedlings are self-sufficient for the first couple of weeks. The cannabis seed contains enough stored energy to sustain healthy growth through germination and the first set of true leaves.
Plain, pH-balanced water is all that's needed. If you've transplanted into quality pre-fertilized soil, continue with plain water until week 3. Introduce nutrients only if a deficiency shows up, and if you do, use no more than a quarter of the standard dose. Focus on root development and keeping conditions warm and stable.
Vegetative Stage (Weeks 4–8)
This is when plants build the structure they'll carry into flower. A high-nitrogen formula applied every 5 to 7 days supports rapid growth in leaves and stems. Light exposure during these weeks also influences how quickly plants develop, so monitor vigor week by week.
- For plants in 5-gallon containers, stick to the standard recommended dose.
- For 10 gallons or more, increase slightly once plants show they're handling nutrients well.
- For cannabis growing in the ground, start conservatively and increase only if growth slows or leaves begin to pale.
Skip the next scheduled session after significant rainfall. Wait until the top inch of soil has dried and plants show no signs of deficiency before resuming.
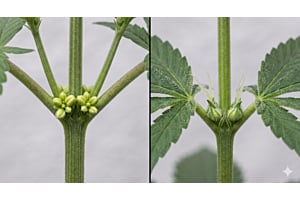
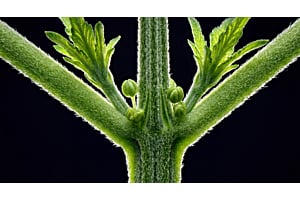
Pre-Flower Transition (Weeks 8–10)
As days shorten and plants show their first signs of flowering, switch to a transitional or early bloom formula with lower nitrogen and higher phosphorus and potassium. Apply twice during this two-week window, tapering nitrogen gradually rather than cutting it all at once.
Plants typically stretch noticeably in height during this period. If lower leaves yellow rapidly, a corrective feed with a balanced solution can stabilize the plant before continuing the bloom schedule.
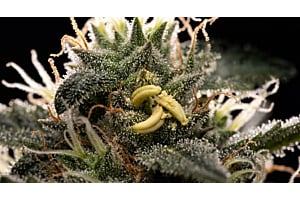
Flowering Stage (Weeks 10–16)
Phosphorus and potassium support bud development, density, and resin production throughout the flowering stage. Apply every 4 to 5 days, allowing the soil to dry slightly between sessions.
Some growers add a bloom booster mid-season to support denser buds, but introduce it gradually and monitor for nutrient burn. Brown, crispy leaf tips are a clear sign to pull back. Avoid foliar sprays during this stage since moisture on developing buds risks mold.
Late Flower and Flush (Final 1–2 Weeks Before Harvest)
Stop all nutrients 10 to 14 days before harvest and switch to plain, pH-balanced water. This allows the plant to process stored nutrients and contributes to a quality yield.
Heavy rain in the final two weeks may have already acted as a partial flush. Check runoff PPM to confirm. Below 150 PPM means the soil is clear and the cycle is complete. Trichome color is your most reliable harvest indicator: when most have shifted from clear to cloudy with some amber present, you're in the harvest window.
Best Base Soil for Outdoor Grows
A well-prepared growing medium reduces how much supplemental feeding your outdoor grow actually needs. A solid base mix:
- 40% quality potting soil or loam
- 25% compost
- 20% perlite
- 15% worm castings
Work this into your beds or containers before the growing season starts. It covers most nutrient needs through the seedling and early vegetative stages without additional feeding.
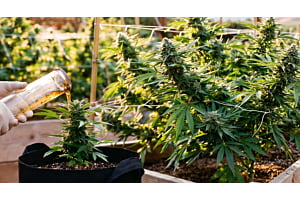
Organic Supplements for Outdoor Crops
Once plants are established and actively growing, top-dress with worm castings every 3 to 4 weeks to maintain a steady, low-risk nutrient supply. Compost teas applied weekly support microbial activity in the soil and help roots access what's already there.
Consistent soil management is key in outdoor cannabis grows, especially as plants transition from early development into heavier feeding phases. Maintaining a stable root zone environment helps plants absorb nutrients more efficiently and supports steady, predictable growth through the season.
Three Additions That Support Your Soil All Season
A few additions at the start of the season can carry your outdoor grow a long way:
- Mycorrhizae powder worked into the planting hole at transplant establishes a living fungal network that extends beyond where roots can reach on their own, improving nutrient and water uptake and helping plants thrive against environmental stressors.
- Slow-release fertilizers are worth adding if you want a lower-maintenance schedule. They break down gradually and are far more forgiving than synthetics if you apply slightly too much.
- Cal-Mag supplements added consistently throughout the season cover the secondary nutrient bases and help prevent the deficiencies that outdoor cannabis plants are most prone to.
Regardless of what amendments you use, soil testing every 4 to 6 weeks helps catch any gaps before they show up on your leaves.
pH and PPM: A Quick Outdoor Reference
PPM measures how many nutrients are dissolved in your water or soil solution. EC measures the same thing in a different unit. pH determines whether your plants can actually access those nutrients. Get the pH wrong, and it doesn't matter how strong your nutrient mix is - plants simply won't absorb them. This is called nutrient lockout.
For soil grows, keep the pH between 6.0 and 7.0. A basic pH pen and regular PPM checks from your runoff are enough to keep things on track.
| Growth Stage | Ideal Soil pH | Target PPM | EC Range |
| Seedling | 6.0–6.5 | 100–300 ppm | 0.2–0.6 |
| Vegetative | 6.0–7.0 | 400–800 ppm | 0.8–1.6 |
| Flowering | 6.0–7.0 | 800–1,100 ppm | 1.6–2.2 |
| Late Flower / Flush | 6.0–7.0 | 0 ppm (plain water) | 0 |
These are reference ranges, not exact targets. If runoff PPM reads high for your current growth stage, reduce feeding or skip a session. If it reads low and plants look deficient, increase your dose gradually. A consistent monitoring routine is one of the most reliable factors in outdoor grow success.
Why Outdoor Grows Need Their Own Feeding Schedule
An outdoor grow isn't just an indoor grow moved outside. Rain, climate, pot size, soil type, and available light all influence how plants take up nutrients and how often they need to be fed.
Rainfall and Soil Runoff
Rain is the most disruptive variable in any outdoor plan. A heavy downpour can flush nutrients through the soil before plants absorb them, especially in containers where drainage happens fast.
After significant rainfall, skip your next scheduled session. Check plants for any deficiencies before resuming. During a prolonged wet period, reduce frequency and monitor runoff PPM to stay on track.
Temperature and Light
Nutrient uptake slows below 60°F or above 85°F. During a cold snap, cannabis plants can show deficiencies even when proper nutrients are present in the soil. A drop in temperature affects absorption before it affects appearance.
Hold off on feeding and wait for conditions to stabilize. In hotter growing environments with high light intensity, plants move through nutrients faster, and feeding frequency may need to increase slightly during peak summer weeks.
Pot Size, Ground Planting, and Feeding Frequency
How often you feed depends on where your plants are growing:
- Smaller containers (around 5 gallons) dry out faster, so crops typically need feeding every 5 to 7 days during the vegetative stage.
- Larger containers (10 gallons or more) retain moisture longer, so you can extend the interval.
- Plants growing directly in the ground access a much larger soil volume and its existing microbial community. They generally need less supplemental feeding than container plants.
How to Read Your Plants and Adjust
Cannabis plants signal clearly when something is off. Learning to distinguish overfeeding from underfeeding is an essential skill and one of the most reliable ways to keep your outdoor grow on track.
Signs You're Overfeeding
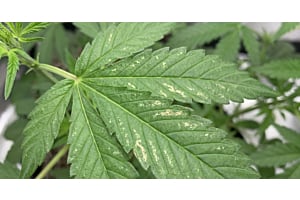
Nutrient burn shows as brown, crispy tips on leaf ends. Don't confuse it with wind burn, which affects the whole leaf edges more evenly. As it progresses, browning moves inward, and growth can stall even when the plant looks green and healthy.
Stop feeding immediately, flush with plain water, and allow the soil to dry before resuming at a reduced dose. When in doubt, feed less.
Signs You're Underfeeding
General yellowing of older, lower leaves during the vegetative stage typically signals nitrogen deficiency. Yellowing between leaf veins points to calcium or magnesium. Purple stems can indicate a phosphorus issue or simply cold temperatures. Monitor overnight lows and check whether a temperature drop aligns with the timing before adjusting your nutrient mix.
For corrective sessions, introduce a balanced solution at half strength. Wait 5 to 7 days and assess before increasing. Also, check soil pH before adding more nutrients. Lockout from pH drift is a common cause that more feeding alone won't fix.
Your Outdoor Grow Starts Now
A well-structured feeding schedule doesn't need to be complicated. Match your nutrients to each growth stage, adjust for your growing environment, and let your plants guide the process. The factors that matter most are consistency, timing, and paying attention to what your plants are telling you.
Seed Supreme stocks a wide range of outdoor cannabis seeds, including feminized and autoflowering varieties suited to a range of climates. Find the right genetics for your season and put this schedule to work.
FAQs
What Should You Feed Outdoor Marijuana?
Outdoor marijuana plants need nitrogen, phosphorus, and potassium as primary nutrients, with calcium and magnesium as essential secondaries. Trace micronutrients, including iron, zinc, and manganese, also play a role, though in smaller amounts.
When Should You Stop Feeding Marijuana Plants?
Stop feeding 10 to 14 days before harvest and switch to plain water only. This flush cycle allows plants to process stored nutrients and supports a cleaner, higher-quality yield.
How Do You Make Outdoor Buds Grow Bigger?
Buds develop on their own timeline, but a consistent nutrient plan through the flowering stage - with proper phosphorus and potassium levels, regular watering, and no overfeeding - gives them the best conditions to reach their full potential.