Knowing how to trim weed properly is the difference between buds that smoke smooth and buds that taste harsh and look rough. Whether you're wet trimming right after harvest or dry trimming once your flowers have cured, this final hands-on step plays a major role in flavor, appearance, and the overall quality of your finished buds.
Trimming cannabis plants is often written off as a simple cleanup process, but it's actually a crucial stage that affects everything from smoothness to shelf life. Done properly, it ensures your hard-grown flower reaches its full potential from plant to jar.
Why Trimming Cannabis Plants Matters
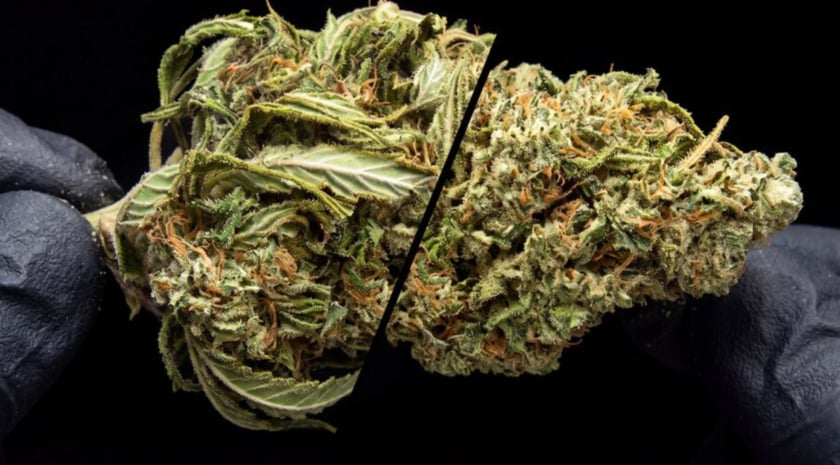
Trimmed buds look cleaner, taste better, and deliver a smoother experience.
Trimming cannabis plants is what turns a fresh harvest into a finished product. After weeks of growing cannabis through vegetative growth and into the flowering stage, cannabis plants are still covered in fan leaves, sugar leaves, and other plant matter that supports the growth cycle.
By harvest time, those leaves have done their job, and the cannabis trimming process helps reveal the actual buds.
The visual difference is immediate. Removing large fan leaves and shaping around the sugar leaves lets the actual buds stand out. Well‑trimmed cannabis flowers look tighter, cleaner, and more refined, showing the care that went into the entire grow.
It’s About Quality, Not Just Looks
Flavor is another major reason trimming cannabis plants matters. Excess plant matter contains chlorophyll, which can lead to a grassy taste and that all-too-familiar hay smell if not properly managed.
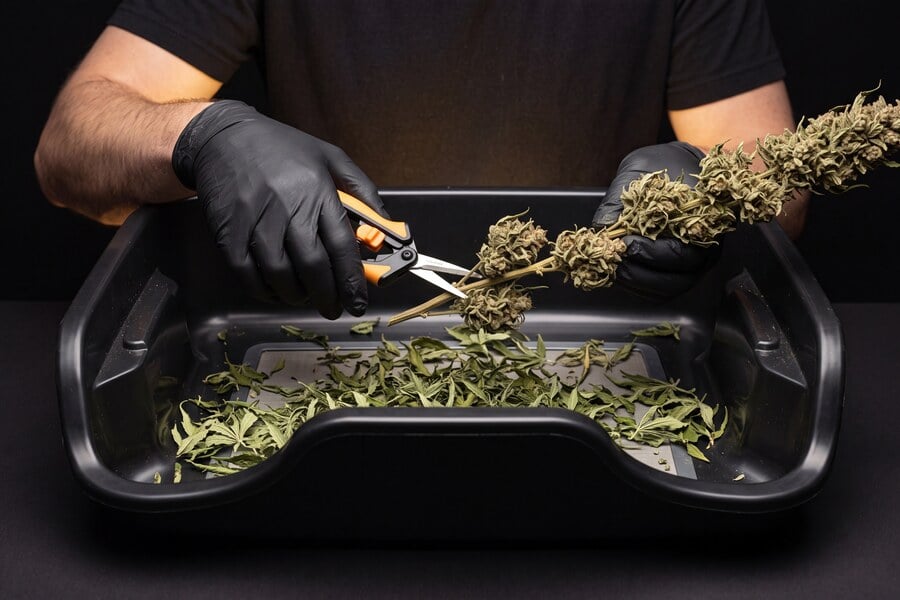
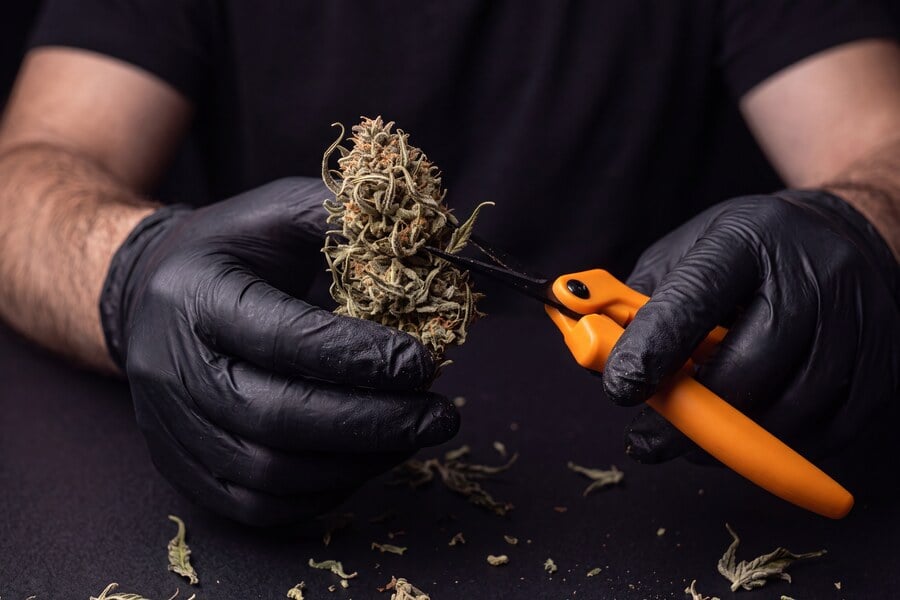
Carefully cutting away cannabis leaves for a cleaner, better-quality finish.
Flavor is another major reason trimming cannabis plants matters. Excess plant matter contains chlorophyll, which can lead to a grassy taste and that all-too-familiar hay smell if not properly managed. By removing unnecessary leaf material before or during the drying process, you set the stage for smoother smoke and cleaner terpene expression.
Trimming also plays a critical role in moisture control. Dense buds surrounded by too many sugar leaves can trap humidity inside, especially if humidity levels aren’t carefully monitored. Poor airflow during drying increases the risk of mold and uneven curing.
Strategic trimming improves air circulation, helping your cannabis flowers dry gradually and evenly.
When done right, trimming isn’t just cosmetic; it protects potency, improves aroma, and helps preserve everything your plant produced during the flowering stage.
What Is Cannabis Trim?
Before we dig into technique, a quick terminology note. "Trim" gets used two different ways in the cannabis world:
- Trim (verb): the process of cutting away excess leaf material from your buds after harvest. This is what the rest of this guide covers.
- Trim (noun): the leafy byproduct you end up with once the trimming is done - mostly sugar leaves and a small amount of smaller popcorn bud. Also called weed clippings or shake (though shake usually refers to broken-off bud rather than leaf).
Cannabis trim isn't waste. It's coated in trichomes and is the raw material for a lot of valuable products: rosin, dry sift, bubble hash, edibles, tinctures, and kief for topping bowls. Experienced growers treat trim as a second harvest and store it in a sealed container in the freezer until they're ready to process it.
When people search "what is trim weed" or "what is cannabis trim", they usually mean the noun: the leaf material left over after trimming. When they search "how to trim weed", they mean the verb, the technique. This guide covers the technique in full, and the byproduct (the trim itself) is one of the reasons doing it properly matters: clean trimming produces clean trim.
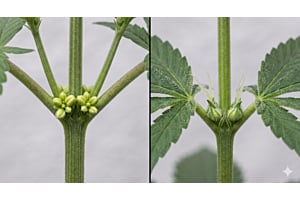
Trimming vs. Pruning: What’s the Difference?
New growers often confuse trimming with pruning cannabis. While both involve cutting parts of the plant, they happen at different stages and serve different goals.
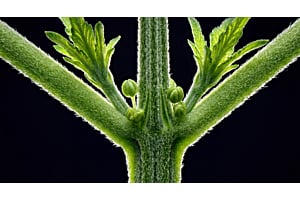
What Is Pruning in Cannabis Cultivation?
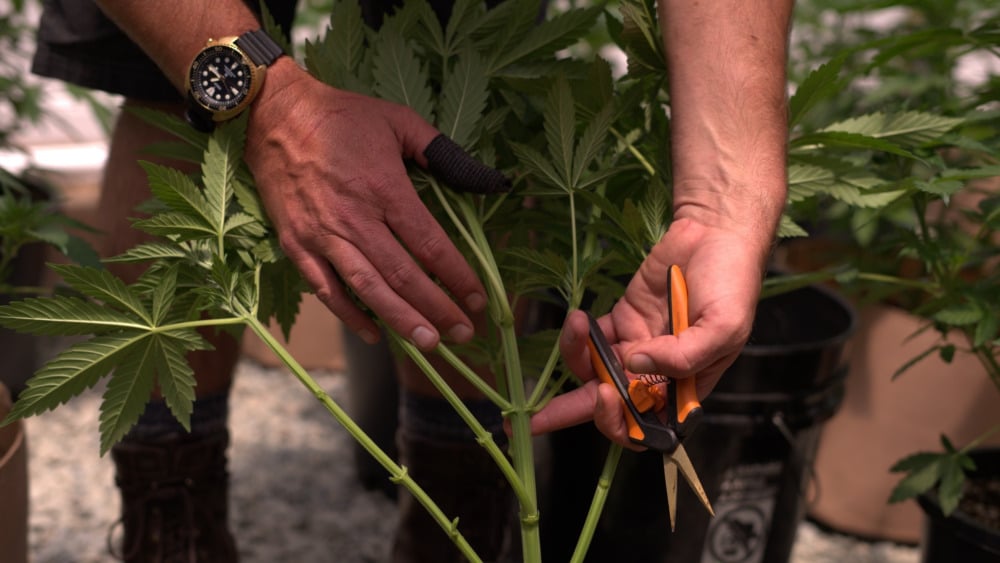
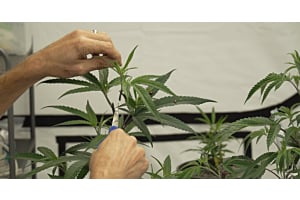
A cannabis branch being carefully trimmed with scissors to help the plant grow healthier.
Pruning cannabis plants happens earlier in the growth cycle, typically during vegetative growth. The goal is to shape the plant and improve performance, not prepare it for drying. Pruning encourages more light penetration, stronger main branches, and improved airflow. It helps the plant focus its energy on productive growth.
When you prune cannabis plants, you remove:
- Lower branches that receive less light
- Lower leaves that aren’t contributing much energy
- Weak stems that won’t support dense flowers
When to Prune Cannabis Plants
Pruning cannabis is best done during vegetative growth and the early flowering stage. It's part of active plant management while the cannabis plant is still alive and growing. Many growers prune to:
- Increase yield
- Direct energy to top colas
- Improve structure
For the related training side - bending and tying branches rather than cutting them - see our low-stress training guide.
When to Trim Cannabis
Trimming, on the other hand, happens at harvest time. Once you harvest, you’re no longer shaping growth; you’re preparing buds for drying and curing.
Timing matters with both techniques. Pruning too late into flowering can stress plants and slow bud development, while trimming too early after harvest can make handling fresh buds more difficult. Knowing when to perform each task helps maintain plant health and preserve flower quality.
Quick Summary: Pruning cannabis supports growing. Trimming supports post-harvest quality.
Wet Trimming vs. Dry Trimming: Which Is Better?
One of the biggest decisions when trimming cannabis plants is whether to use wet trimming or dry trimming. Both methods work, but it depends on your environment and goals.
What Is Wet Trimming?
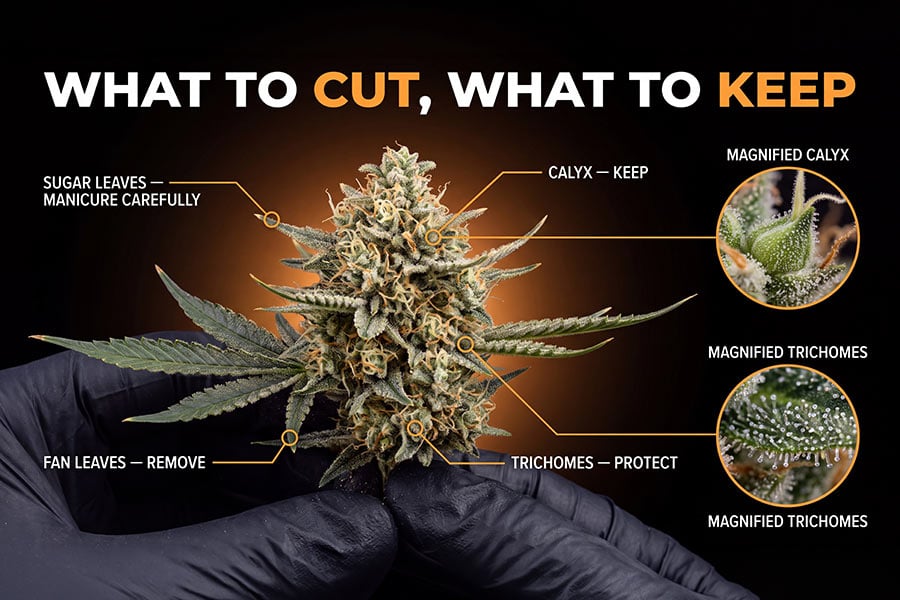
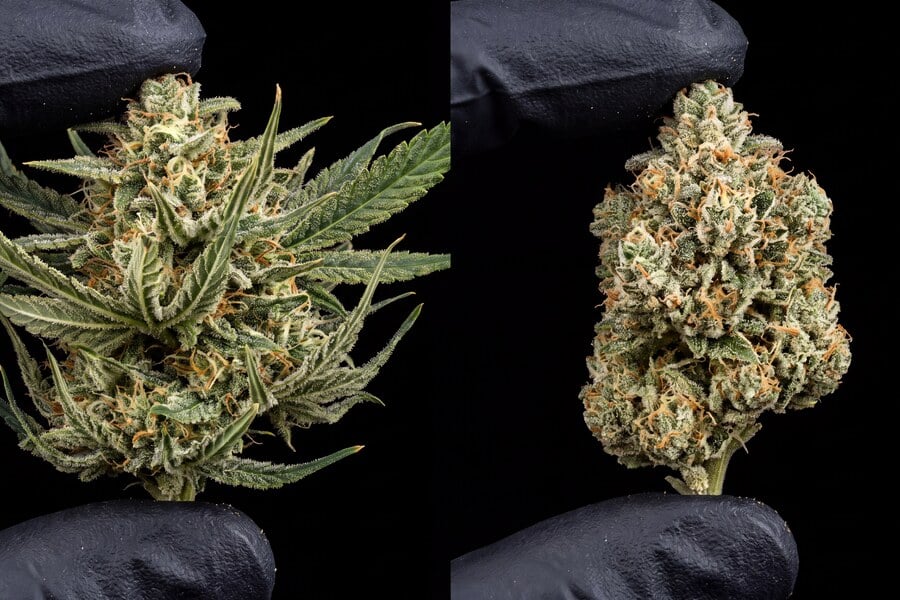
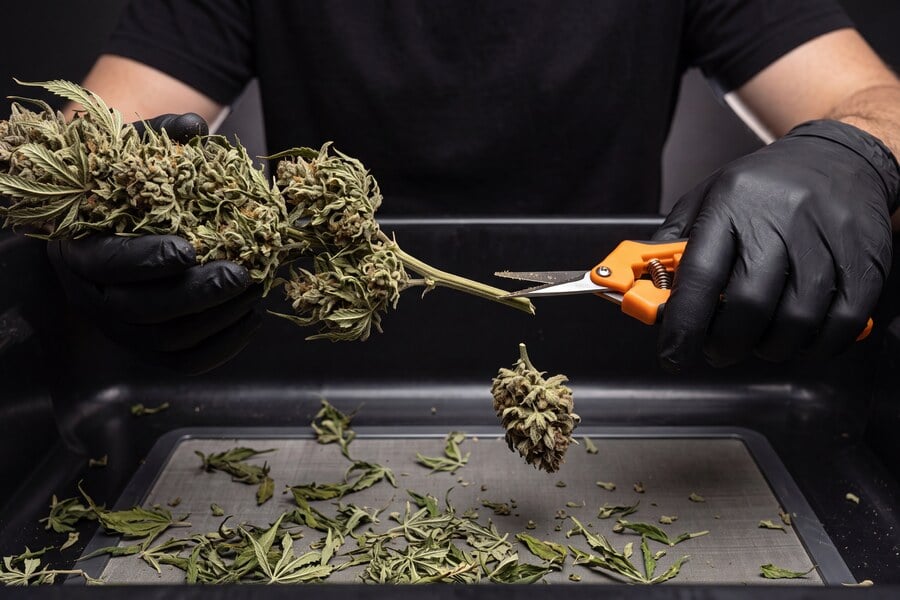
Image showing Cannabis trimming, shows exactly what to cut and what to keep while the bud is still fresh.
Wet trimming means you start trimming immediately after harvest.
You cut down the whole plant or individual branches and remove all the sugar leaves while the buds are still fresh and moist. The leaves are easier to see and access before they curl inward during drying. Removing excess leafy material right away reduces moisture retention and lowers mold risk.
Wet trimming is ideal when:
- You live in a humid climate
- Humidity levels are difficult to control
- You want to speed up the drying process
- You have limited drying space
- It’s your first time, and you find wet leaves easier to handle
What Is Dry Trimming?
Carefully trimming away dried leaves to reveal clean, ready-to-use cannabis buds.
Dry trimming means hanging branches (or the whole plant) to dry first.
After a few days (typically 7–14), once the buds are dry to the touch and stems begin to snap, you start trimming. Leaves curl around the buds during drying, which some growers believe protects trichomes and sticky resin. Dry trimming is preferred because it can help preserve flavor and aroma.
Dry trimming works best when:
- You live in a dry climate
- You want a slower, more controlled drying process
- You’re aiming for maximum terpene preservation
- You have adequate space and airflow
Hand Trimming vs. Machine Trimming
Hand Trimming
Hand trimming is the traditional method most home cannabis growers prefer. Using sharp scissors or spring-loaded trimming shears, you carefully remove sugar leaves and shape each bud individually.
This approach gives growers maximum control, helps preserve delicate trichomes, and usually results in cleaner, more refined flowers. For smaller harvests or premium buds where appearance matters, hand trimming is often the go‑to method.
Machine Trimming
Machine trimming focuses on speed and efficiency. Electric trimmers use motorized blades to quickly remove excess leaf material as buds pass through the system. A bowl trimmer, one of the most common options for small to mid‑scale growers, uses a rotating grate and a stationary blade. Buds are placed inside and gently spun so protruding leaves are trimmed underneath.
While machine trimming saves time and reduces hand fatigue, it can be less precise and may knock off some sticky resin in the process. For large harvests, machines are practical. When the goal is maximum quality and presentation, hand trimming still tends to be the gold standard.
Supplies You Need for Trimming Cannabis Plants
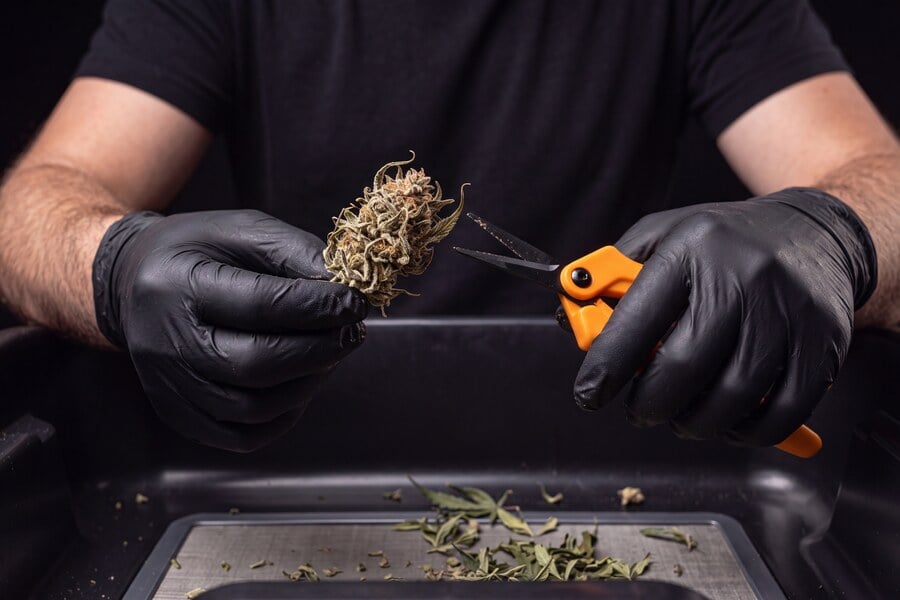
Handheld trimming scissors cutting cannabis leaves to shape and clean harvested buds.
Essential Tools
- Sharp scissors or trimming shears (spring-loaded models reduce hand fatigue)
- Disposable gloves (sticky resin builds up quickly)
- A trim bin to catch falling leftover leaves
- Containers for separate pile sorting
Optional but Helpful Equipment
- Turkey bags or airtight containers for temporary storage
- Paper towel for cleaning sticky buildup
- Isopropyl alcohol to clean scissors
- Comfortable seating and strong light
Why Using the Right Tools Matters
Using the right tools makes a noticeable difference in both efficiency and final quality. Sharp scissors or spring-loaded shears create clean cuts that protect the structure of your buds and preserve sticky resin, while dull blades can crush stems and damage delicate trichomes.
A trim bin keeps your workspace organized and prevents valuable trim from going to waste, and disposable gloves save you from constantly scrubbing resin off your hands.
The right tools don’t just make trimming easier; they reduce fatigue, improve precision, and help ensure your trimmed buds look, smell, and cure exactly the way they should.
The Best Way to Trim Weed: Step-by-Step Instructions
Trimming is where patience meets precision. The goal is the same, no matter if you’re working with a whole plant or individual branches: remove excess leaf material while preserving the structure, potency, and visual appeal of your buds.
Taking your time during this stage of the marijuana trimming process will pay off in smoother smoke, better aroma, and cleaner-looking flower.
Step 1: Prepare Your Workspace
Before you start trimming, set up a clean, comfortable workspace with plenty of light. Good lighting helps you clearly see sugar leaves and avoid cutting into the actual buds. Lay out your trim bin, sharp scissors or trimming shears, disposable gloves, and containers for sorting.
Trimming can take several hours depending on your harvest size, so a tidy, organized setup reduces mistakes and fatigue. Put on gloves early since sticky resin builds up quickly and can make handling buds more difficult over time.
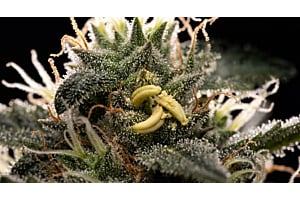
Step 2: Harvest and Section the Plant
At harvest time, confirm your cannabis plants are truly ready. Look for mature trichomes (milky with some amber) and darkened white hairs on the flower. Once ready, cut down the marijuana plant at the base or remove individual main branches one at a time.
Many growers prefer to cut manageable branches rather than handle the whole plant at once. This gives you better control and keeps the trimming process organized. Remove large stems that won’t be part of the drying setup and prepare your branches for leaf removal.
Step 3: Remove the Bigger Fan Leaves
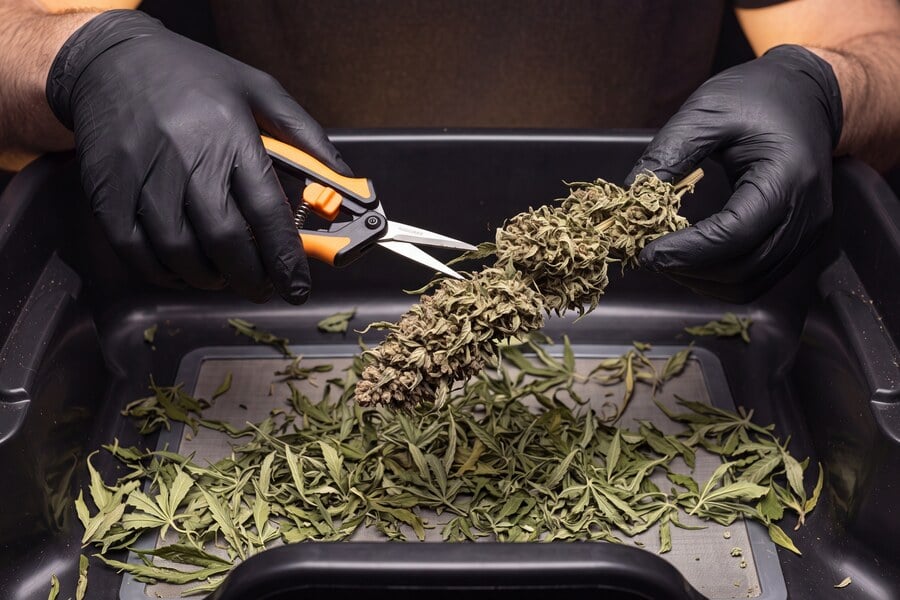
Cutting away the bigger fan leaves makes the buds easier to see and trim.
Start with the most obvious foliage: the bigger fan leaves. These large leaves have long stems and little to no resin. They’re easy to identify and quick to remove by hand or with scissors.
Clearing fan leaves first exposes the flowers underneath and makes it easier to see what you’re doing. This step instantly reduces bulk and improves airflow if you’re planning to hang branches to dry.
Cutting leaves into smaller sections improves airflow and helps the buds dry evenly.
Step 4: Trim the Sugar Leaves Carefully
Now the detailed work begins. Sugar leaves are smaller and typically coated in sticky resin, which is why they sparkle under the light. Using sharp scissors, trim sugar leaves back so they sit flush with the buds without cutting into the flower itself.
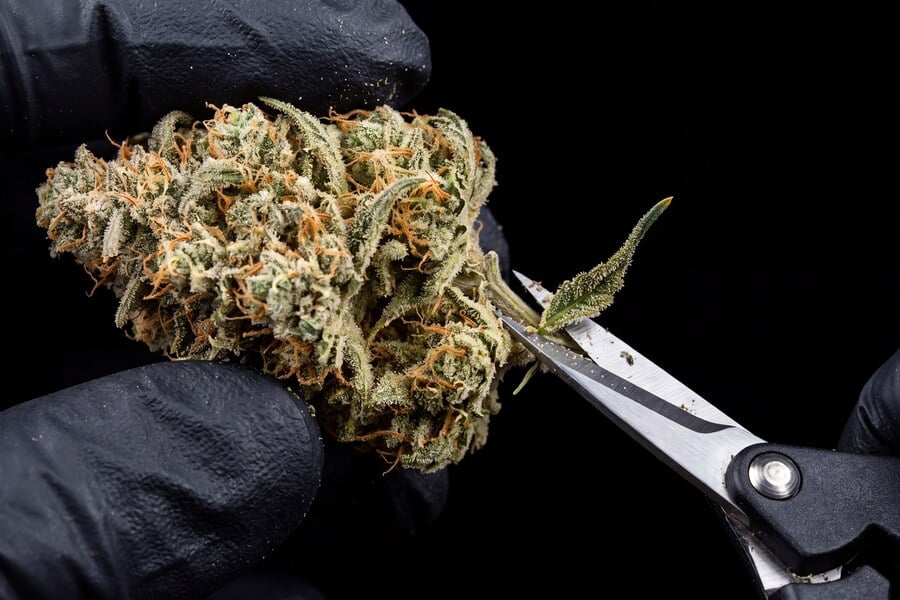
A small leaf is carefully trimmed from the cannabis flower to keep the bud clean and neat.
Work slowly and rotate the bud as you go to maintain a natural, rounded shape. Some growers remove all the sugar leaves for a tight, professional finish, while others leave a slight layer for a frostier look. The key is consistency and avoiding over-trimming.
If resin begins building up on your scissors, wipe them clean with a paper towel or use alcohol to maintain clean cuts.
Step 5: Clean Up Stems and Refine the Shape
After leaf removal, inspect each bud for thick stems or smaller stems sticking out awkwardly. Trim excess stem length without compromising bud integrity. Clean cuts improve presentation and make drying and curing more uniform.
This is also the moment to refine the overall shape. Aim for compact, well-defined buds without stray leaf tips. Precision here enhances both appearance and airflow.
Step 6: Sort Into Separate Piles
Keeping everything organized prevents valuable trim from mixing with unwanted plant debris. Many growers underestimate how useful quality trim can be later on.
As you work, create a separate pile for:
- Finished buds
- Sugar leaf trim (great for edibles or extracts)
- Stems and waste material
Step 7: Prepare for the Drying Process
At this point, your buds are ready for the next stage. Whether you wet trimmed and need to begin drying, or you dry trimmed after harvesting, proper storage and airflow are critical. Our complete guide to drying and curing weed walks through the humidity ranges, burping schedule, and timing to lock in flavor and potency.
Avoid direct light during the drying process, as light can degrade cannabinoids and terpenes. Aim for a slow, steady dry (typically 7–14 days) until smaller stems snap instead of bending.
Taking your time during each of these steps ensures your trimmed buds maintain their potency, structure, and aroma.
Common Mistakes When Trimming Cannabis (And How to Avoid Them)
Harvesting Too Early in the Flowering Stage
- Problem: Cutting cannabis plants before true harvest time reduces potency, yield, and overall quality.
- Solution: Wait until the flowering stage is fully developed and check trichome maturity before you start trimming your buds.
Over‑Trimming the Buds
- Problem: Trying to create perfectly smooth trimmed buds can lead to cutting too deep into the flower, removing valuable sticky resin and trichomes.
- Solution: Focus on removing sugar leaves, not carving into the buds themselves.
Leaving Too Much Leaf Material
- Problem: Too many sugar leaves left on the buds can trap moisture during the drying process. This raises mold risk and may cause that unwanted hay smell.
- Solution: Aim for a balanced trim that removes excess leaf material while still protecting the structure of the flower.
Using Dull Scissors or Dirty Tools
- Problem: Dull scissors crush stems instead of making clean cuts, which can damage the buds and smear resin.
- Solution: Use sharp trimming shears or sharp scissors, and clean them regularly to keep the cannabis trimming process precise.
Ignoring Humidity Levels During Drying
- Problem: Even perfectly trimmed buds can suffer if humidity levels aren’t controlled during the drying process.
- Solution: Keep humidity steady so the flower dries slowly and evenly, protecting both flavor and quality.
Rushing the Process
- Problem: Trying to trim too quickly often leads to uneven cuts, missed leaves, and damaged buds.
- Solution: Take your time. For many cannabis growers, careful hand trimming is part of the craftsmanship behind great cannabis cultivation.
What to Do After You Trim: Drying, Curing, and Burping
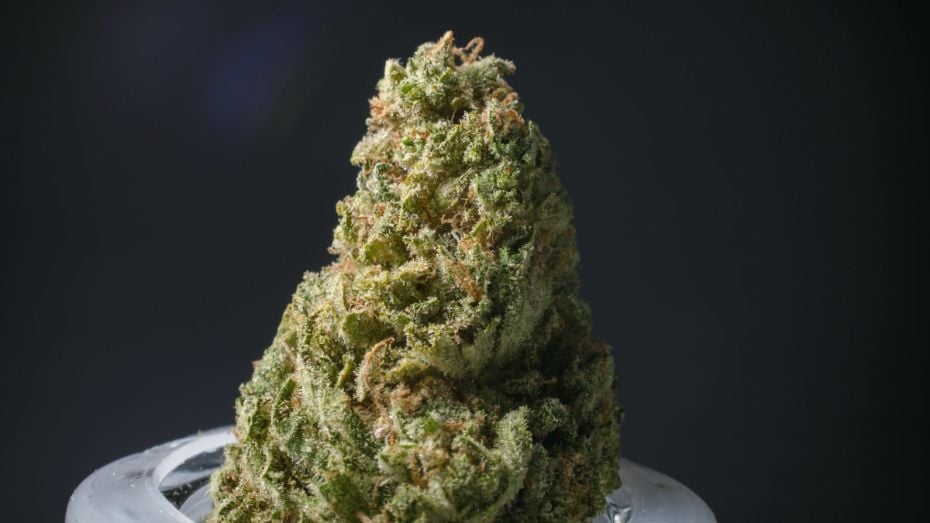
Neatly trimmed cannabis bud displaying the final result after removing surrounding leaves.
Trimming may feel like the finish line, but in reality, it’s the beginning of the final transformation. What you do after you trim has a major impact on flavor, smoothness, potency, and long-term storage quality. Even perfectly trimmed buds can lose their appeal if the drying and curing stages aren’t handled with care.
The Drying Process Explained
If you wet trimmed, once it is complete, your cannabis flowers need to dry slowly and evenly. Hang branches upside down or place trimmed buds on drying racks in a dark room with stable conditions:
- 60–70°F temperature
- 55–60% humidity
- Gentle airflow
- No direct light
The drying process typically takes 7–14 days, depending on bud density and environmental conditions. Patience is essential here. If buds dry too quickly, the outer layer hardens while moisture remains trapped inside. When properly dried, smaller stems should snap cleanly rather than bend.
How to Cure Cannabis Properly
After drying, curing begins. Transfer your trimmed buds into airtight glass jars or turkey bags, filling them about 70–75% full to allow some air space. Store containers in a cool, dark place away from direct light.
Curing allows the remaining moisture inside the buds to redistribute evenly. Over time, this process enhances terpene expression, improves smoothness, and stabilizes cannabinoids. A proper cure can take anywhere from two weeks to several months, with noticeable improvements in aroma and flavor during the first month.
What Is Burping and Why Does It Matter?
During the first two weeks of curing, open your jars once or twice daily for 10–15 minutes. This process is known as burping and releases excess moisture and replenishes oxygen inside the container.
If humidity builds up inside the jar, buds can develop mold or degrade in quality. Burping helps regulate internal moisture levels and prevents that stale, hay smell that can result from trapped humidity. As the cure progresses and moisture stabilizes, you can reduce burping frequency to every few days.
Avoiding Common Post-Trim Issues
The most common post-trim mistake is rushing the process. Fast drying under high heat or low humidity levels may seem convenient, but it often locks in chlorophyll and leads to harsh smoke. On the other hand, overly humid environments can undo all your hard trimming work by increasing the risk of mold.
Controlled humidity levels, darkness, and steady airflow are the foundation of successful drying and curing. When handled properly, this final stage elevates your cannabis from freshly cut flower to smooth, aromatic, well-preserved buds ready for long-term storage or enjoyment.
Final Thoughts: Mastering the Art of Trimming Weed
Trimming is the final refinement step in growing cannabis, where patience, precision, and care turn hard work into high-quality buds. From selecting strong seeds to guiding cannabis plants through every stage of cannabis cultivation, each decision you make influences the structure, aroma, and overall finish of your harvest.
At SeedSupreme, our mission is to support growers at every stage, from selecting trusted seeds to harvesting, trimming, and curing with confidence. Whether you're planning a beginner-friendly first grow or scaling up to premium feminized genetics, every harvest starts with the seed.
Mastering how to trim properly ensures your buds reflect the full potential of the genetics you started with. When you combine quality seeds, attentive cultivation, and thoughtful post-harvest handling, you set yourself up for consistently exceptional results.
Trimming Weed FAQ
How long does it take to trim a pound of weed?
Hand trimming a pound of weed takes most experienced trimmers around 8 to 16 hours, depending on bud density, trim style, and how clean you want the finish. Loose, airy buds are faster to trim than dense, sugar-leaf-packed colas. Machine trimmers can process a pound in under an hour, but at the cost of trichome loss and a slightly rougher finish. Most home growers end up with a few ounces rather than full pounds, which typically translates to a full evening's work per plant.
What's the difference between trimming and pruning a pot plant?
Pruning happens during vegetative growth and the early flowering stage, while the plant is still alive and you're shaping it for bigger yield and better airflow. Trimming happens at harvest, when the plant has been cut down, and you're preparing the buds for drying. Pruning supports growth; trimming supports post-harvest quality. It's common for new growers to confuse the two, but they're separate jobs done weeks apart.
Do you have to trim the weeds at all?
Technically, no, untrimmed buds will still smoke and still get you high. But trimming is almost always worth doing. Untrimmed weed has more chlorophyll, harsher smoke, lower THC concentration per gram, and a greater risk of mold because trapped sugar leaves hold moisture. If you're growing for your own stash or to share, even a quick rough trim will noticeably improve the finished product.