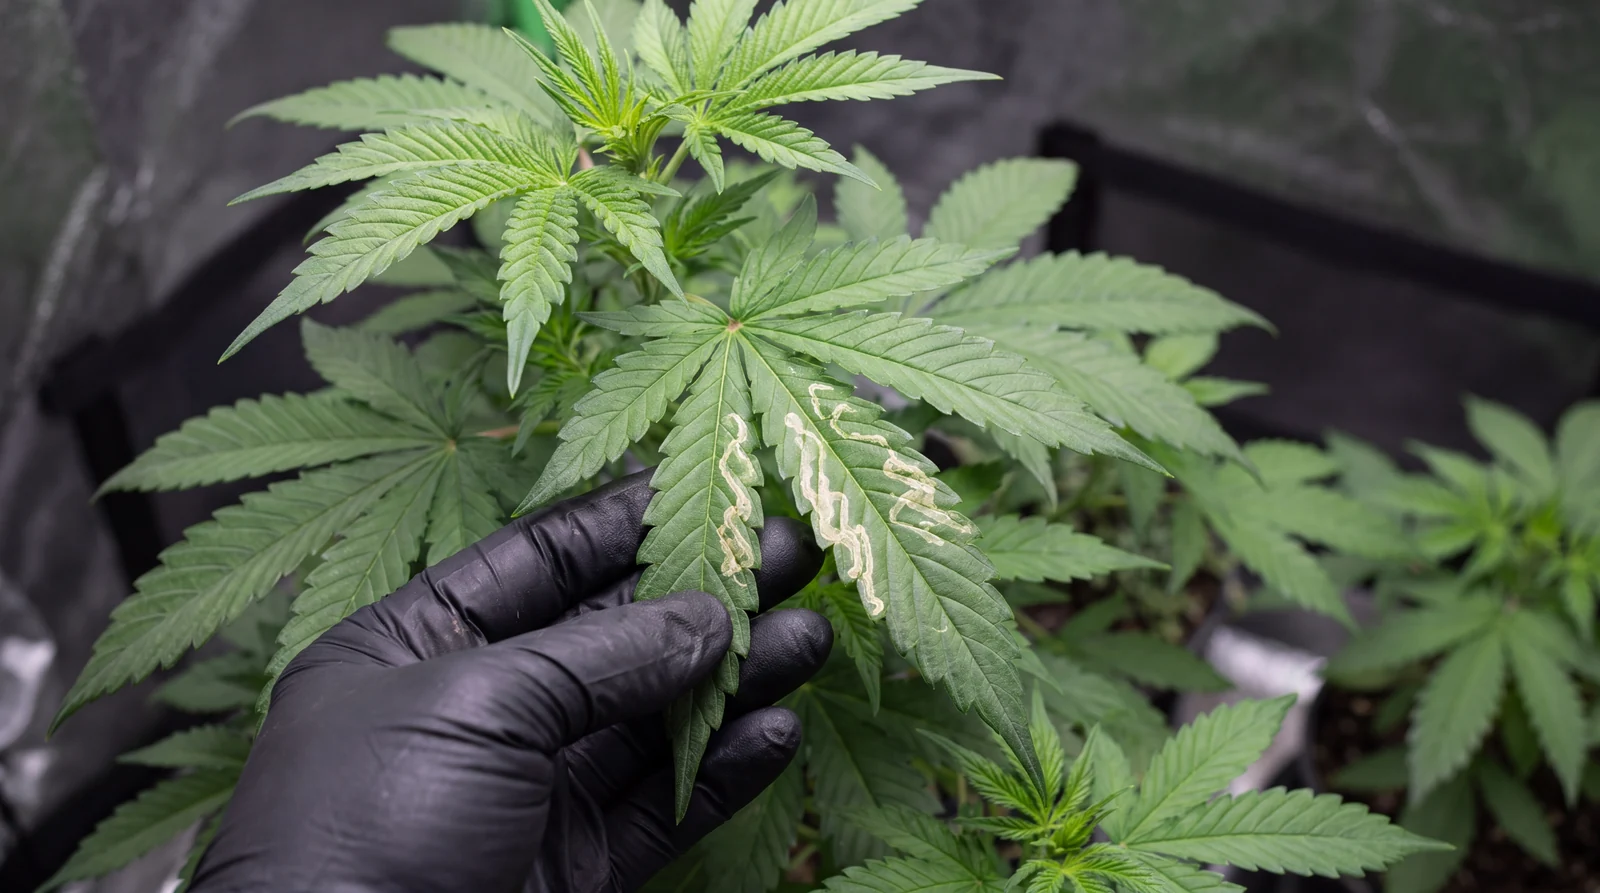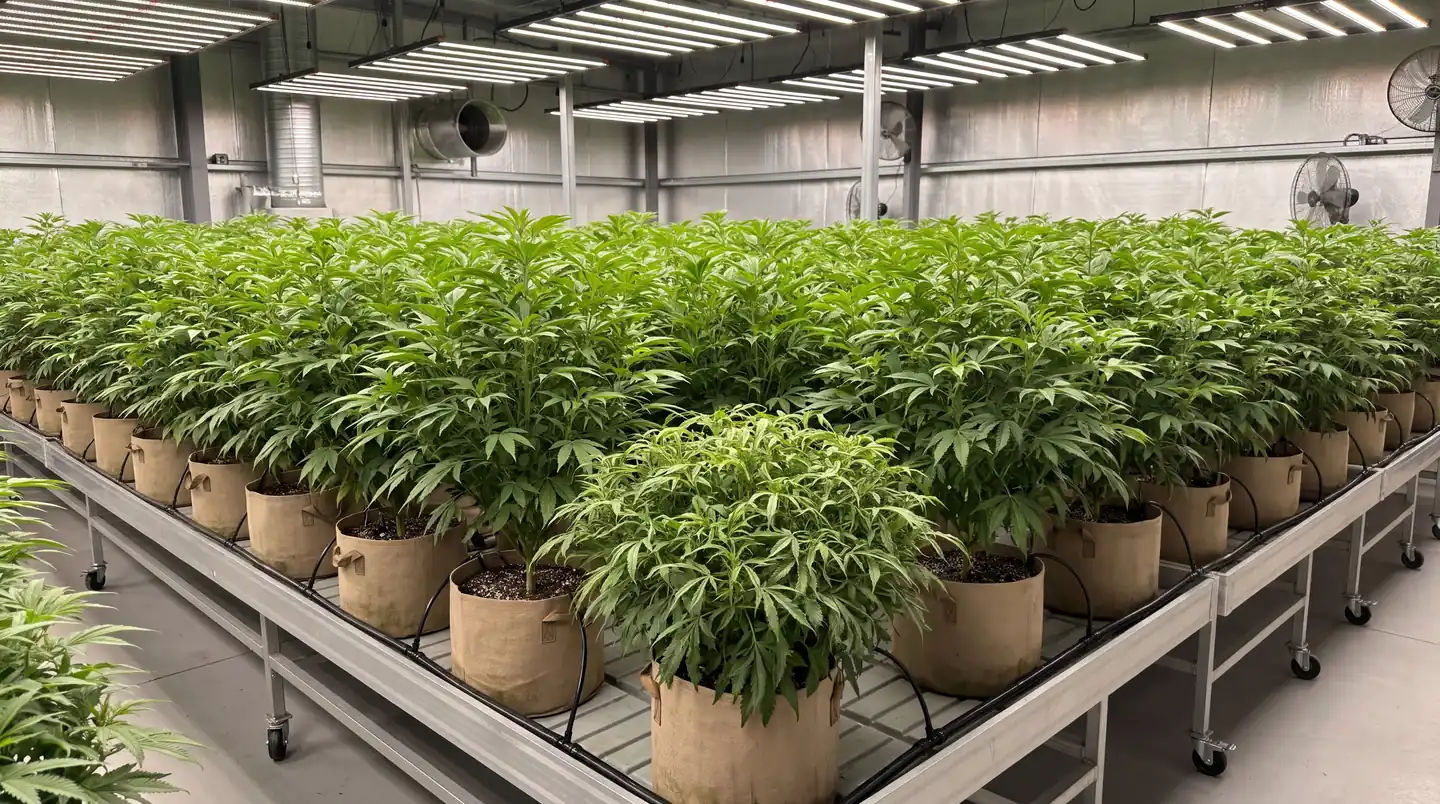
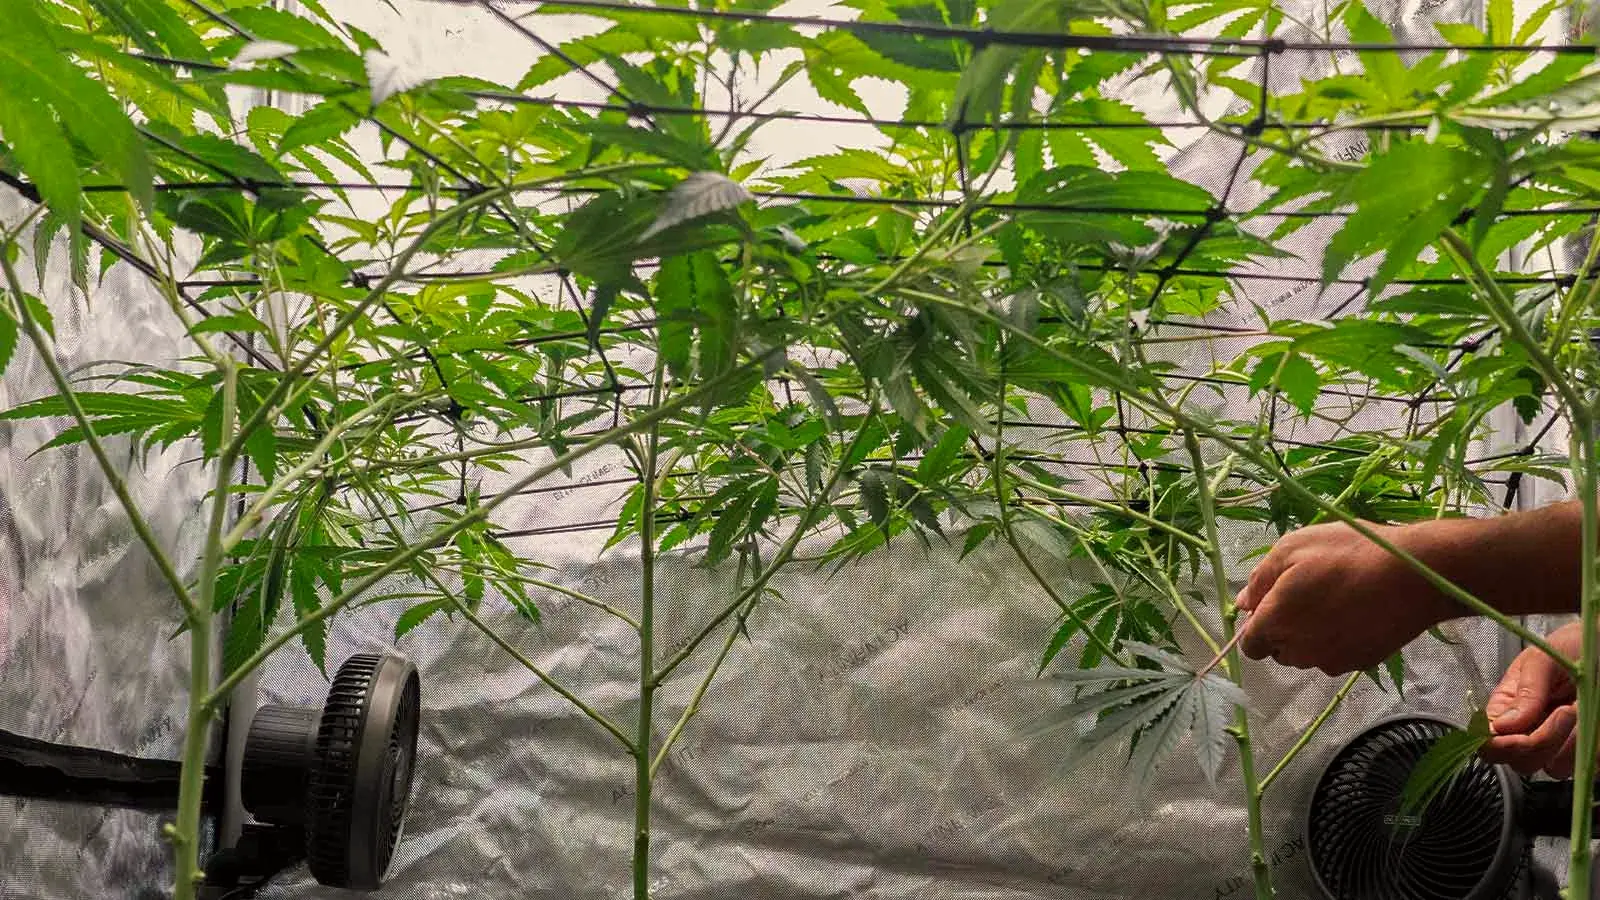
ScrOG or Screen of Green is a method that trains cannabis plants to grow horizontally across a mesh screen or scrOG net instead of letting them climb vertically. The objective is a flat, evenly lit canopy carrying many similar-sized colas instead of one dominant top with shaded growth and smaller, undeveloped buds.
Scrogging suits growers with a few photoperiod plants in height-limited indoor spaces, though it also works outdoors. But for the scrOG technique to be effective, you’ll need to run a longer vegetative stage to fill the screen.
A scrOG grow has four stages: train your plants during veg, weave new growth through the net, flip to 12/12 once the net is partly filled, then strip shaded growth. Below, you’ll find details on net setup, scrogging indoors and outdoors, common mistakes, scrOG vs SOG, and the best feminized weed seeds for a scrOG grow.
What Is the ScrOG Method & What Does the Screen Actually Do?
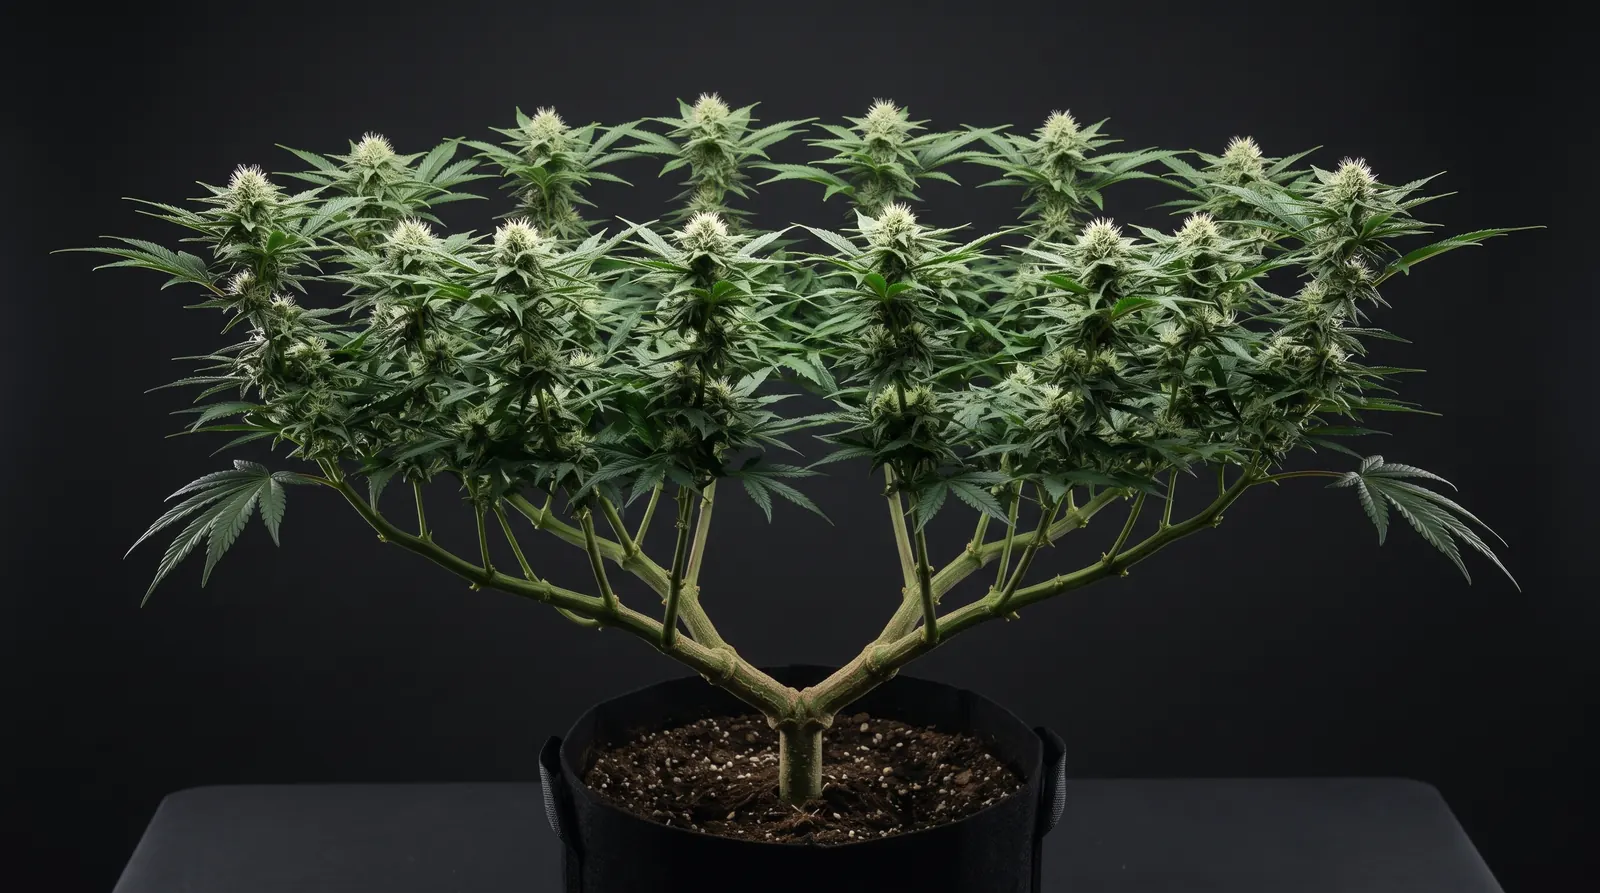
ScrOG, short for “screen of green,” is a low-stress training method where cannabis plants are woven sideways through a horizontal mesh screen or net instead of growing upward. The screen holds every branch at a similar height, so growth is even and light spreads across many bud sites, producing more similar-sized colas instead of one dominant top.
Scrogging does two things:
- Breaks apical dominance. The main top produces hormones that slow the growth of the branches below it. Bending it down to the level of the other branches removes that advantage, so side branches can develop into strong colas too.
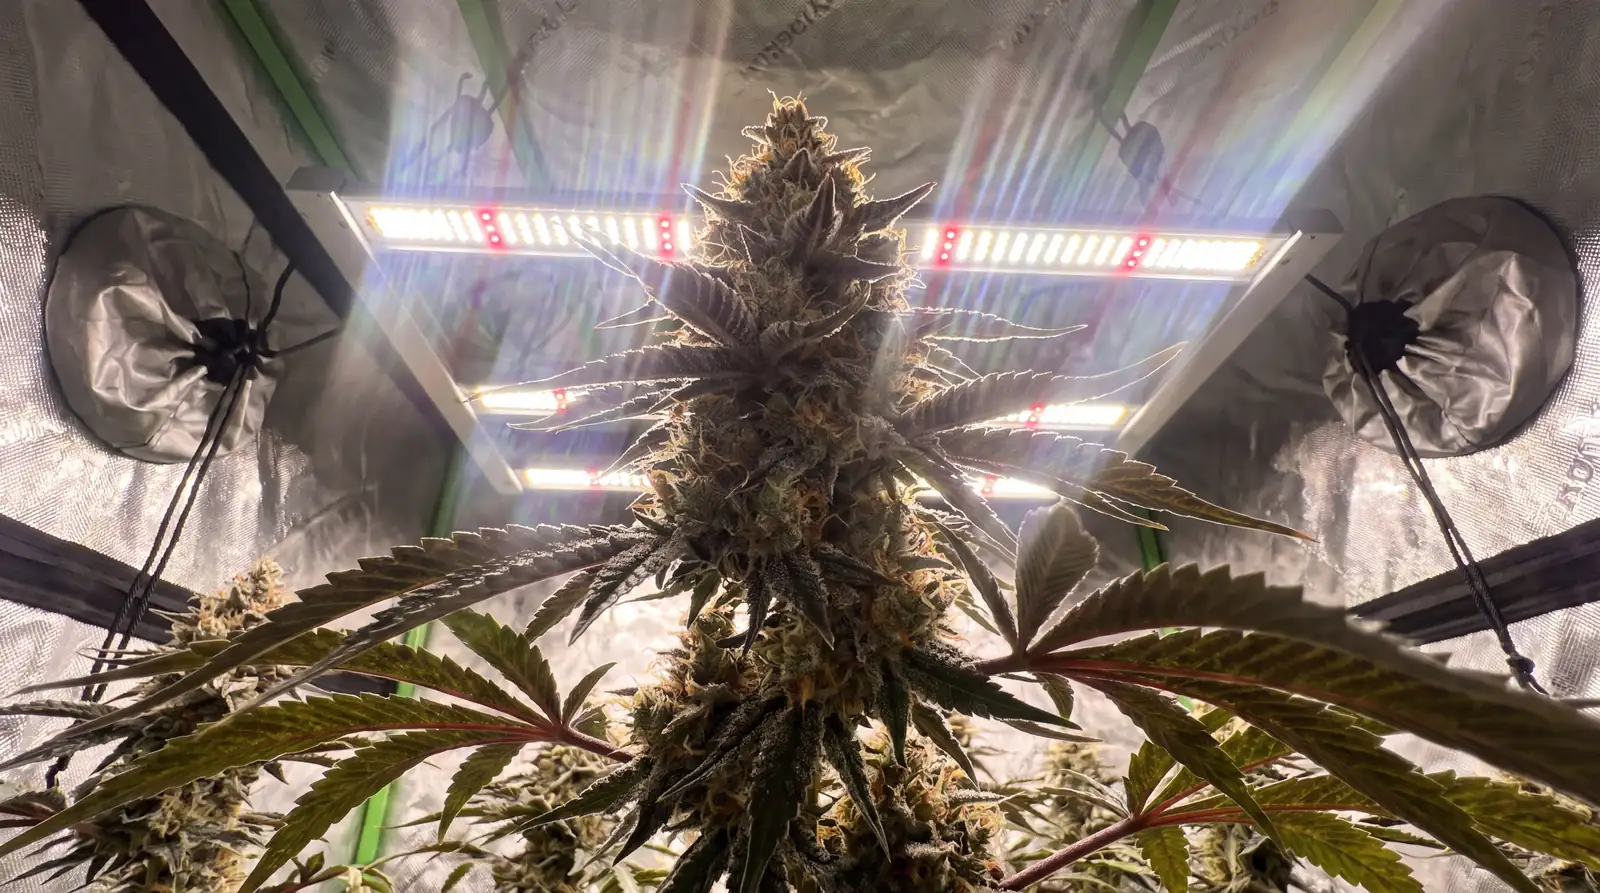
- Evens out light distribution. With every tip the same distance from the light, lower bud sites no longer sit in the main top’s shade. This matters most indoors, where the light is fixed in one place. Outdoors, the sun’s changing angle already reaches more of the plant.
Does Scrogging Improve Yields?
Yes, scrogging can improve yields. Spreading growth across many bud sites at the same height turns what would be small, shaded lower buds into colas that develop fully. It also lets you fill your whole growing space with a productive canopy instead of one tall plant surrounded by empty space.
The size of the gain isn’t guaranteed, though. It depends on how well the screen is filled before flowering, as well as genetics, lighting, and overall growing conditions.
What’s the Difference Between a ScrOG Net and a Support Net?
A scrOG net is installed low and empty before plants reach it, so it can guide growth sideways during veg. A support net is installed higher over a canopy that already exists, and it only holds up heavy colas in flower.
| ScrOG Net | Support Net | |
| When it goes in | Low and empty, before plants reach it | Higher, over a canopy that already exists |
| What it does | Guides growth sideways in veg | Holds up heavy colas in flower |
| Shapes the canopy? | Yes | No |
The same netting can do either job. Many growers use both, with a scrOG net for training and a second net above it for support.
Is Scrogging Good for Beginners?
Yes, scrogging is good for beginners because it’s a low-stress method that only bends stems without breaking or cutting them. Your weed plants aren’t put under heavy stress and a badly placed branch can simply be repositioned.
The main demand is time: plants need regular weaving through the screen and a longer veg to fill it. Some growers also top their plants (cutting off the main tip so the plant splits into more branches that fill the screen faster). But it’s optional, so you can start a scrOG grow without any topping.
Choosing and Setting Up Your ScrOG Net
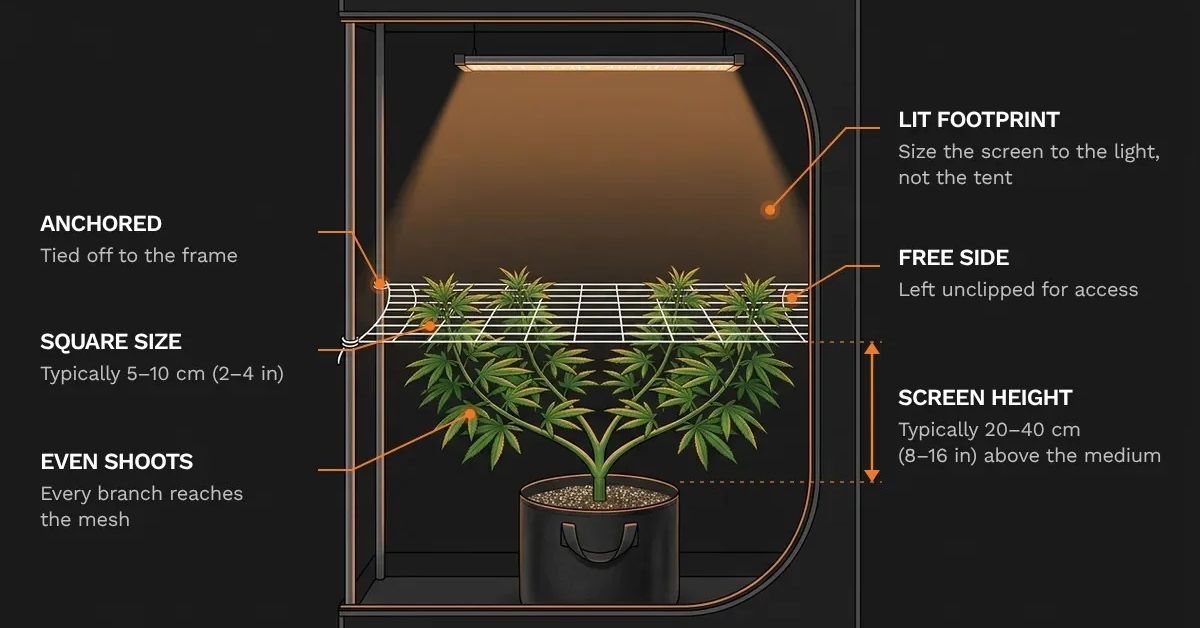
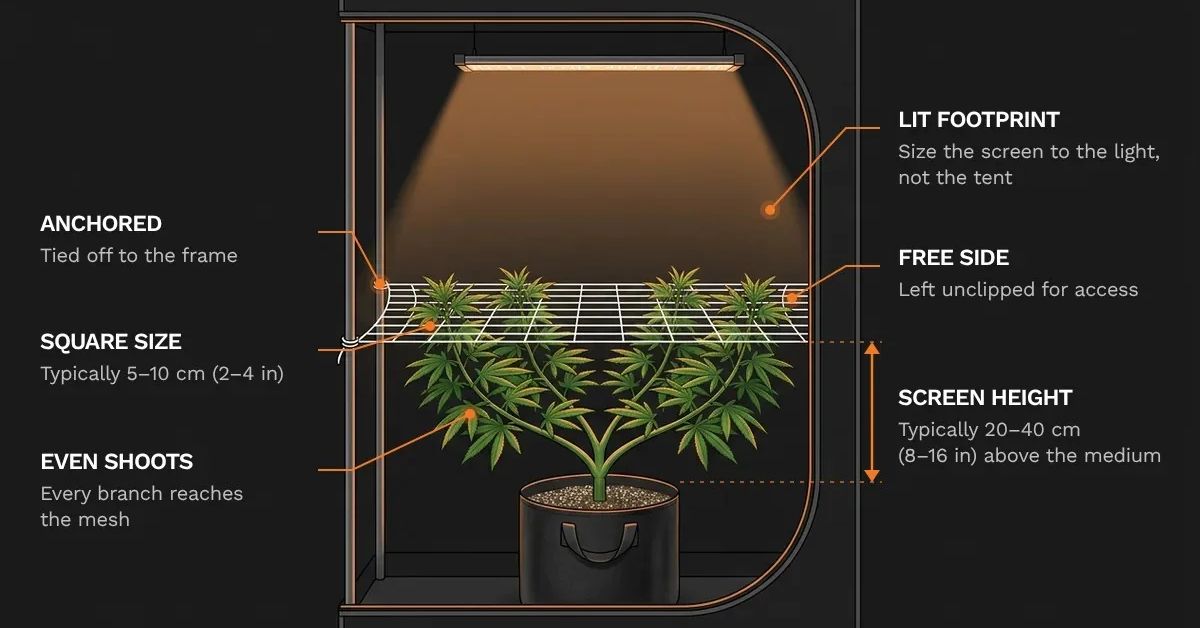
Choose a rigid or tightly strung scrOG net that covers your light’s full footprint, then fix it taut and level above the pots before the plants reach it. It has to hold its shape under a full flowering canopy without sagging, so how firmly it’s tensioned and anchored matters more than the actual material.
Which Type of ScrOG Net Should You Use?
Soft trellis netting pulled tight is the cheapest and quickest option for an indoor scrOG grow. A rigid frame grid is better for permanent or repeated setups, and it’s also the best choice outdoors, where wind, rain, and larger plants put more strain on the screen. Avoid elastic netting unless the canopy stays light, because it sags as the buds gain weight.
| ScrOG Net Type | Tension | Reusable? | Best for |
| Soft plastic or nylon trellis netting | Holds if pulled tight and anchored, but can loosen over a long run | No, often cut away at harvest | Cheap, quick tent setups |
| Elastic or stretch netting | Gives under load and sags as the canopy gains weight | Usually, but tension degrades | Light canopies only |
| Rigid wire or wooden frame grid | Keeps its shape with no re-tensioning | Yes | Permanent or repeated setups, outdoors |
| DIY string on a built frame | As tight as you build it, and easy to re-tension | Yes, with restringing | Odd-shaped spaces and custom sizes |
How Big Should the Screen and Mesh Squares Be?
Size the screen to your light’s footprint, not the tent, because canopy outside the light’s coverage gains very little. Mesh squares of around 2–4 inches are typical. Smaller squares give finer control over where each shoot sits but take more tucking. Larger squares are quicker to work, but branches can slip sideways and shade each other within one opening.
How High Should the ScrOG Net Be?
Screens are commonly mounted about 8–16 inches above the surface of the medium. A lower screen starts training earlier and keeps the whole plant short, which helps when height is tight. A higher screen lets more structure build underneath before weaving starts, but it uses up vertical space you may need between the canopy and the light.
How Many Plants Can Share One ScrOG Net?
One plant can fill a small scrOG screen on its own, while larger screens usually take 2–4 plants. The right number depends on veg length, pot size, and any limit on plant numbers you have to work within. Fewer plants need a longer veg to fill the net, while more plants fill it faster.
| ScrOG Setup | Pot size | Veg time | Best for |
| 1 cannabis plant | 6.5 gallon | 5 to 8+ weeks | Small tents (2x2 ft) or strict plant-count limits |
| 2 to 4 cannabis plants | 3 gallon | Shorter than a single plant | 3x3 or 4x4 ft tents and faster turnaround |
Space marijuana plants evenly so each one has an equal section of the net to fill, such as one plant per quarter in a 4x4 ft tent. This keeps the training and canopy even. If you’re running more than one plant, grow the same strain or clones from one mother. Different genetics stretch, feed, and finish at different rates, which makes an even canopy much harder to hold.
How to Install and Tension Your ScrOG Net
Pull the scrOG net tight and anchor it to a frame, tent poles, or wall fixings before the plants reach it. A net that sags into a bowl creates the uneven canopy scrogging is meant to prevent, and fitting one over existing growth is much harder.
To keep access to the pots and lower parts of the plants, mount the net on a removable or hinged frame so you can lift it without losing tension.
How to ScrOG Cannabis Step by Step
Once your scrOG net is installed, scrogging follows four steps: veg and pre-train your weed plants under the screen, weave growth through it to fill the mesh, flip to 12/12, then clear the understory below the canopy. Move from one step to the next based on how the plants are growing rather than by a set date.
Step 1: Veg and Pre-Train Your Plants Under the ScrOG Screen
During veg, bend and tie branches outward with low-stress training to keep your plants flat. You can also use topping or FIMming in early veg to multiply the main shoots. Keep vegging until several branches of similar heights reach the mesh screen together. This gives you an even spread of growth to work with.
- Tie branches outward. Bend the shoots away from the center and tie them down so they spread toward the edges of their section of the scrOG net.
- Keep vegging until the branches reach the mesh. Move on to weaving once growth starts poking through the screen, not after a set number of weeks.
- Top or FIM if you want more branches (optional). Cutting off the growing tip, or pinching out most of it with FIM, splits the dominant cola into several main shoots. Do it early in veg so the plant has time to recover. You can skip this if your plant already branches heavily.
Give your cannabis plants time to recover after topping, and avoid any high-stress training close to the flip. Your crops should be growing vigorously when they reach the screen. The wider and flatter the canopy already is at that point, the less you’ll need to force stems into place during weaving.
Step 2: Tuck and Weave to Fill the Screen
Each time a shoot grows an inch or two above the mesh, bend it back down and tuck it under into the next empty square so it grows up through that one instead. Keep going until the screen is filled, with every tip held at the same height. You’ll know it’s working when growth spreads sideways across the screen instead of climbing through it.
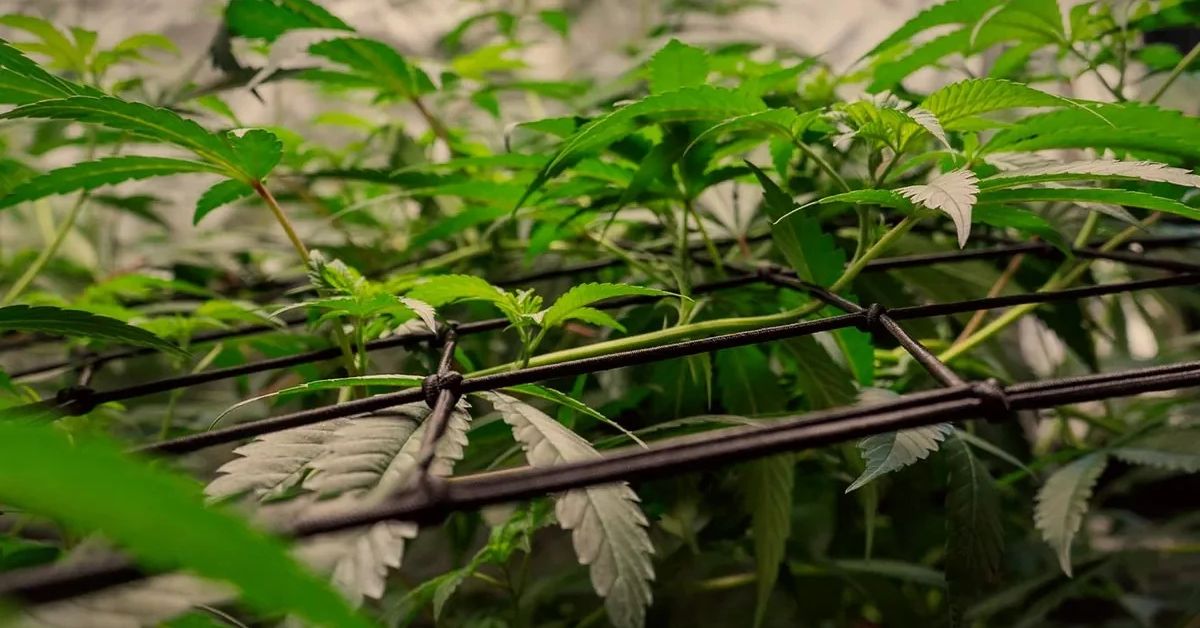
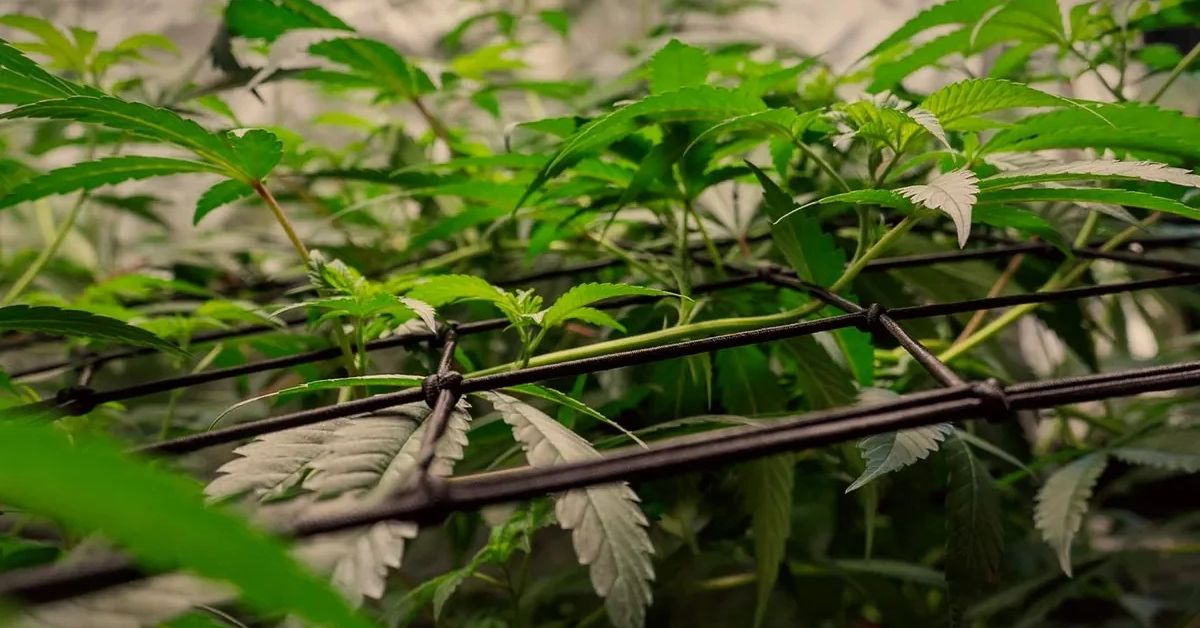
Tuck shoots while they’re long enough to bend but still flexible. A shoot that has only just poked through is too short to move safely, and one left standing for a week has already stiffened at the base. Check the screen every day or two during active growth, because a shoot that hardens in the wrong position stays there.
Fill the outer squares first and let the middle catch up. The edges are the hardest place to reach once the canopy thickens, and the easiest to leave bare. Judge every tuck against the neighboring tips too, since the goal is an even height, not just a filled square.
| Do | Don’t |
| Bend soft new growth, not the woody base | Don’t force a branch flat in one movement |
| Support the stem with one hand while guiding it with the other | Don’t tuck a tip that hasn’t fully cleared the mesh |
| Move a stubborn branch a little at a time over several sessions | Don’t drag a branch across two or three squares at once |
If a branch cracks, a partial break can usually be pushed back together, supported and taped, and the branch will keep growing. Leave the tape on until a firm knuckle forms over the break, which shows the stem has healed.
Step 3: Flip to 12/12 at the Right Fill Level
Flip to 12/12 before the screen is fully filled — exactly how much headroom you leave depends on genetics. Photoperiod plants keep stretching well after the flip, and that stretch is what fills the rest of the mesh. The stretchier your genetics, the earlier you should flip.
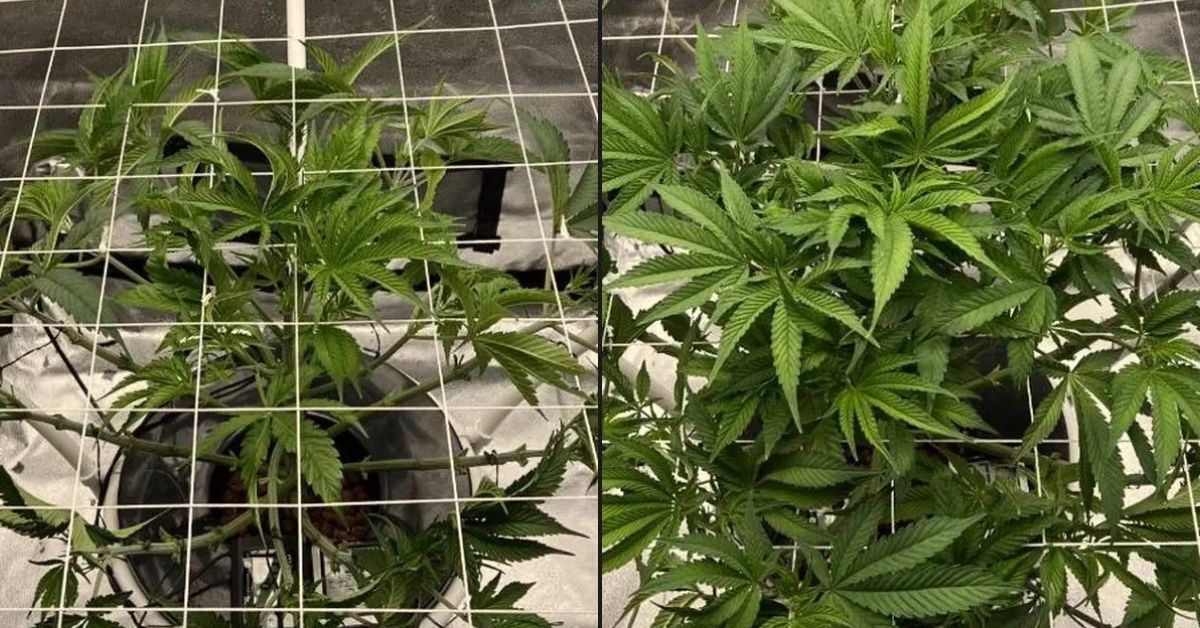
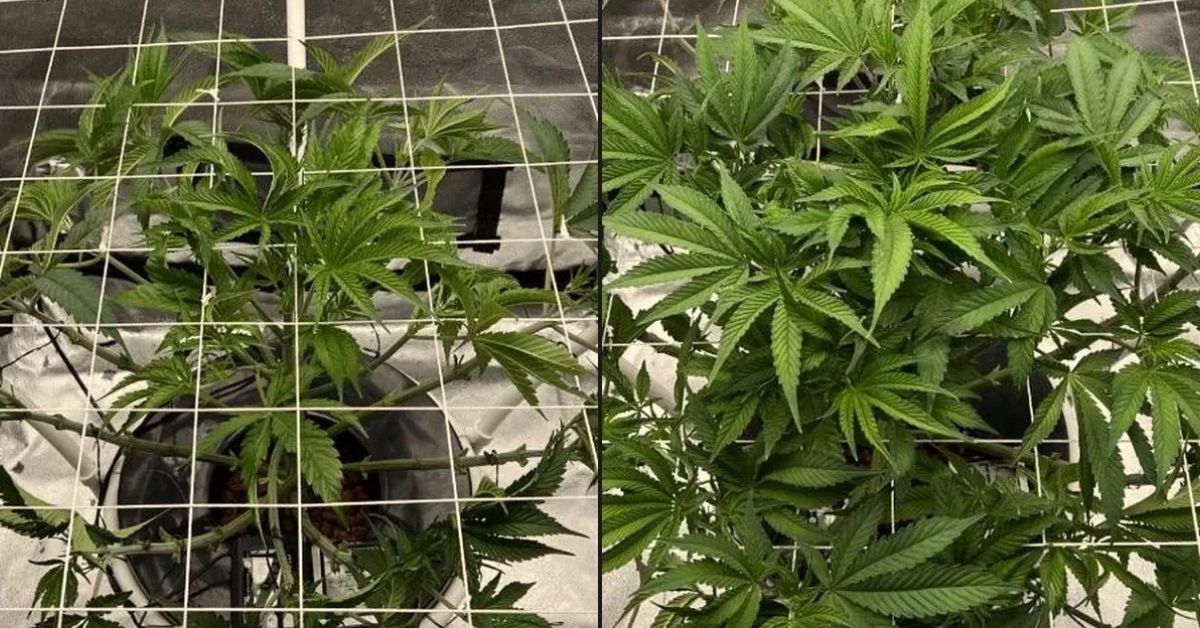
Cannabis plants beneath a ScrOG net before the light flip and after the canopy has stretched to fill the screen.
Use this table as a general guideline only:
| Genetics | Stretch After the Flip | Flip to 12/12 When: |
| Indica-dominant or shorter plants | Adds 25% to 100% in height and width | Later, when scrOG net is two-thirds to mostly full |
| 50/50 Hybrids | In between | In between |
| Sativa-dominant or taller plants | Can double, triple or more in size | Earlier, when scrOG net is a quarter to half full |
If you flip too early, the stretch runs out before the edges fill, leaving an empty scrOG screen under the light. If you flip too late, the canopy climbs above the net into a crowded, shaded layer. Keep tucking through the flowering stretch, which is the busiest weaving period of the grow. Raise the light as the canopy rises so the whole surface stays an even distance from it.
Stop weaving new growth through the scrOG net about 2–3 weeks into flower. By then, bud sites have set and stems have stiffened, so bending them gains nothing and risks snapping off flowering tips.
Step 4: Clear the Understory and Support the Canopy
Once the canopy closes over the scrOG screen, remove the growth underneath that gets insufficient light to develop, so a plant’s resources go to its main tops. This is called lollipopping, and it usually happens in the early weeks of flower.
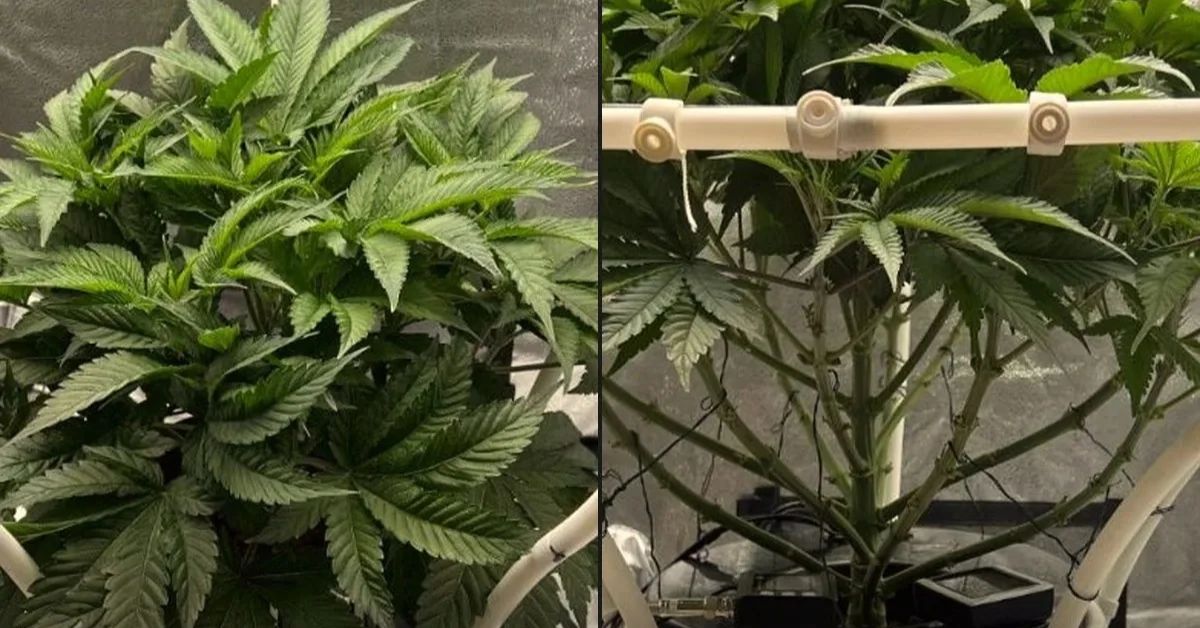
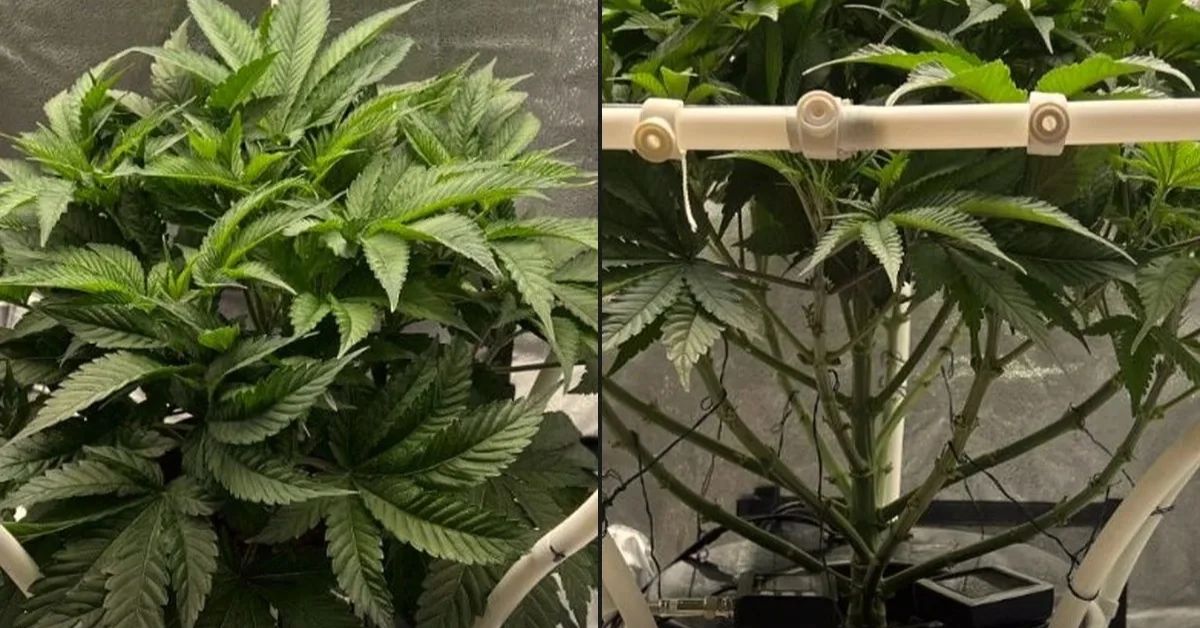
| Remove | Leave |
| Small shoots and thin lower branches below the screen | Healthy fan leaves that aren’t shading anything |
| Small, airy buds (larf) on lower stems | Everything above the screen that’s developing normally |
| Large fan leaves lying across the screen and shading a neighboring bud site |
Defoliation above the screen stays selective. Work in stages, one session at a time, instead of stripping everything at once. Heavy removal during flower stresses the plant, and a recovering plant isn’t putting weight into its buds. A cleared understory also improves airflow beneath the canopy and makes the pots and lower stems easier to reach.
As the colas gain weight, they tend to lean and fold right at the mesh line. If you’re using a support net, add it above the canopy now, or use stakes or ties for a few heavy tops. From here, the grow is on maintenance until harvest time.
How to Start an Outdoor ScrOG Grow
An outdoor scrOG grow uses the same weaving technique, but the screen’s main job changes. Instead of evening out light from a fixed lamp, it keeps plants low, wide, and stable in the open. That means building a sturdier frame and sizing the screen for a long natural veg, since the season decides when flowering starts.
Here’s how to use the Screen of Green method outdoors:
- Build a ground-anchored frame. Drive the frame’s posts into the ground instead of relying on clips or tent poles. A loaded canopy catches wind like a sail and holds water like a tray after rain, and both pull on the same anchor points.
- Size the screen to the season. Outdoor photoperiods veg for longer, so screens are usually much larger than indoor ones. There’s no flip to time, so build a screen the plant will fill by the time the days shorten, not one it covers by midsummer with weeks of veg still ahead.
- Weave at a slower pace. Outdoor growth fills the net gradually. The sun reaches the plant from changing angles through the day, so keeping growth low and spread out matters more than a perfectly flat canopy.
- Keep the plant reachable. Build the frame so you can get to the plant from at least one side to water, check for pests, and harvest. Working under an outdoor scrOG net is much harder than reaching into a tent.
Outdoor growers typically work under a strict plant count, not a canopy area limit, so getting more usable bud out of each plant is the whole point. That’s the real case for taking the extra time on the frame: a well-built scrOG net turns a legally capped handful of plants into a full harvest instead of a few lonely colas.
Common Scrogging Mistakes & How to Fix Them
The most common scrogging mistakes include flipping at the wrong fill level, a sagging or poorly planned screen, weaving in the wrong direction, and removing too much growth at once. You can partly fix most of them mid-grow by adjusting your training, but timing and setup mistakes are best corrected on your next run.
| Scrogging Problem | Likely cause | Fix |
| Canopy stacked above the screen and still climbing | Flipped too late for the plant’s stretch | Raise the light, tuck anything still flexible & improve airflow through the crowded top. Don’t force woody stems. Flip earlier next run. |
| Bare mesh at the end of the flowering stretch | Flipped too early, or veg was too short | Spread any flexible growth into the gaps. Veg longer next run. |
| Screen sagging into a bowl | Not enough tension, or weak anchoring | Re-tension the net & add central support before flowering weight builds. |
| Crowded middle, empty edges | Growth woven inward instead of outward | Redirect new shoots toward the edges while they still bend. |
| One plant taking over a shared screen | Uneven vigor between plants | Weave the stronger plant outward into the weaker plant’s space instead of trying to make the weaker one catch up. |
| Growth stalls after leaf removal | Too much removed at once during flower | Stop cutting & let the plant recover. Remove leaves in stages next time. |
| Can’t reach the pots or lower plant | No access built into the setup | Use a removable or hinged frame next run. Remounting mid-grow usually does more harm than good. |
Is Scrogging the Right Method for Your Grow?
Scrogging is the right method if you’re growing a few larger photoperiod plants in a height-limited space and you can afford a longer veg. If you’re growing autoflowers, need a fast turnaround, or have many smaller plants, the Sea of Green (SOG) method is a better fit.
The Screen of Green method works well when:
- Height is limited. In a tent or low-ceilinged room, the screen turns growth that would go upward into a usable canopy.
- You’re growing a few plants. One well-branched plant can fill a whole screen, which helps where plant numbers are capped.
- You can spend the veg time. Canopy area is bought with extra weeks in veg.
- The genetics are vigorous and branchy. Stretchy, well-branched strains fill the mesh more easily than compact ones that grow a single main cola.
- You’re growing photoperiods. They only flower once you switch to 12/12, so you can keep vegging until the screen is ready.
The main practical drawback is access. Once the scrOG net is in, watering, inspection, and pest control on the lower plant all get more awkward. It’s easy enough to plan around.
ScrOG vs SOG: When Is Sea of Green a Better Fit?
Sea of Green (SOG) fills a grow space with many small plants packed closely together, each grown to flower after a short veg so it develops one main cola. SOG is a better fit than scrOG when you’re growing autoflowers, need a fast turnover, or when you aren’t limited on plant numbers.
| ScrOG | SOG | |
| Plant count | A few large plants | Many small plants |
| Best for | Photoperiods | Autoflowers or small photoperiods |
| Veg length | Long, until the screen is filled | Short |
| Colas per plant | Many, spread across the screen | Mostly one main cola |
| Turnover | Slower | Faster |
| Main workload | Regular weaving and training | Managing more plants |
Autoflowers start flowering according to age rather than waiting for a 12/12 light schedule, so you can’t extend veg to fill a screen. Gentle early screening is possible, but that’s closer to low-stress training on autoflowers than a planned scrOG.
Choose between scrOG vs SOG based on plant count and how quickly you need the space back. A scrOG grow spends veg weeks to buy canopy area, while a sea of green spends plant numbers to buy the same thing.
What Are the Best Cannabis Seeds for a ScrOG Grow?
The best seeds for scrOG are feminized photoperiod seeds with a bushy, branching growth habit, such as indica-leaning strains, slightly sativa-leaning genetics, or balanced hybrids. These fill the screen evenly with the least work, and feminized seeds produce nearly all-female plants, so you’re unlikely to have to pull a male out mid-grow.
- Indica seeds are usually the easiest fit. They grow short and wide with heavy branching and short gaps between nodes, which gives you plenty of bud sites to weave and less stretch to manage after the flip.
- Balanced hybrids are a reliable middle ground, with moderate branching and a predictable stretch depending on strain-specific genetics.
- Sativa seeds typically suit more advanced growers. Their vigorous growth and hard stretch after the flip take more experience to keep under control, but a screen is one of the better ways to manage a sativa indoors. Outdoors, they suit warm climates with a long season, where the screen keeps a tall, vigorous plant low and stable.
Feminized seeds matter more in a scrOG grow than in an untrained grow. Removing a male from a filled screen means cutting woven stems back out of the mesh, which undoes your training and leaves a gap in the canopy.
Choosing the right marijuana seeds is the first step toward the flat, even canopy that makes scrogging worth the extra time. Pair them with a well-tensioned screen and regular weaving through veg and early flower, and the Screen of Green method does the rest.