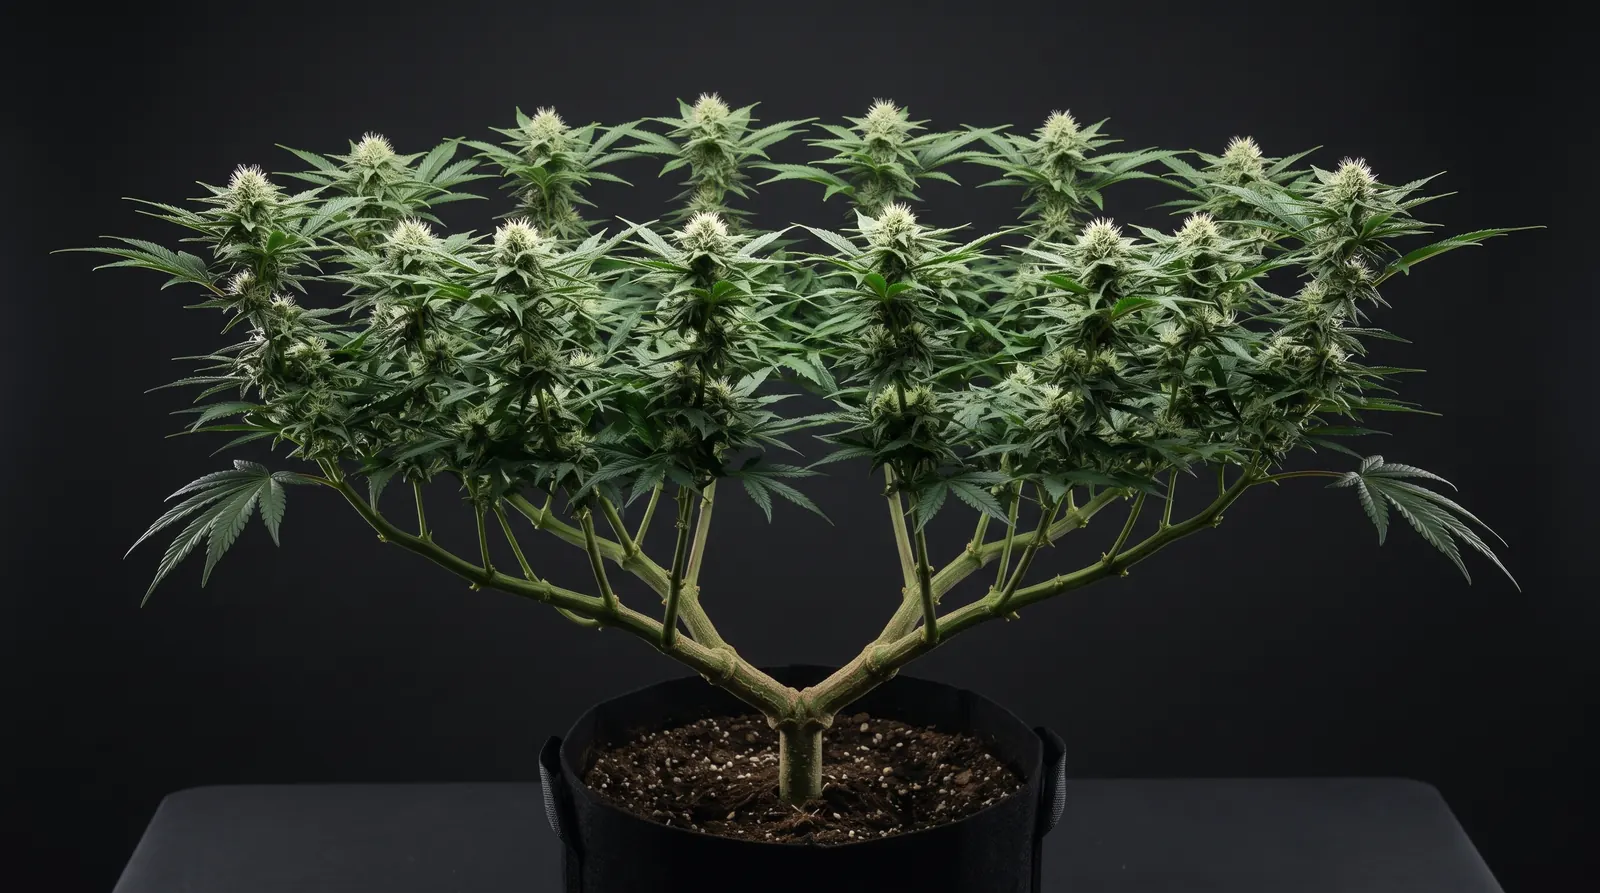
Manifolding cannabis means topping a young plant and training it into one central hub with equal-length arms, so every branch ends in a cola of similar size. Most growers use the terms “manifolding" and “mainlining” interchangeably, though some use “manifold” to refer to faster builds with fewer cuts. Most growers build to 8 colas, and some double again to 16.
A cannabis manifold costs extra veg time, so it suits photoperiod plants grown from feminized seeds far better than autoflowers. This guide covers how a manifold works, every cut in order, the faster nebula manifold and 4-arm builds, mistakes to avoid, and whether it’s the right method for your grow.
What Is Manifolding Cannabis, and What Is Mainlining?
Manifolding cannabis is a high-stress training (HST) method that uses matched, repeated topping cuts and low-stress training (LST) to build a symmetrical plant. Mainlining is the original name for the classic build. You'll also see “manifold” used for quicker variations, and we break those down further on. All the cutting happens in veg, before you flip the lights to 12/12.
A finished cannabis manifold has three features:
- There's one junction node that acts as the hub.
- A bare main stem below it.
- Branches (mains) radiating from the hub at matching lengths.
Symmetry is what makes it a manifold, with an equal path from the hub to every cola, not the number of branches. Both names come from the grow community. A grower known as Nugbuckets first described the technique and called it mainlining. “Manifold” caught on later, as other growers adapted the method and shared their own versions.
"Manifold" describes the hub itself. It's the point where growth splits evenly into equal branches, the same way a manifold in plumbing feeds several pipes from one source.
How Does a Cannabis Manifold Work?
A cannabis manifold works by breaking apical dominance, then keeping every growing tip the same distance from the hub. Left alone, a weed plant pushes most of its growth into the top tip. That's what gives it a Christmas tree shape with shaded lower branches. Topping removes that dominant tip, so the two shoots at the node below grow as equal leaders.
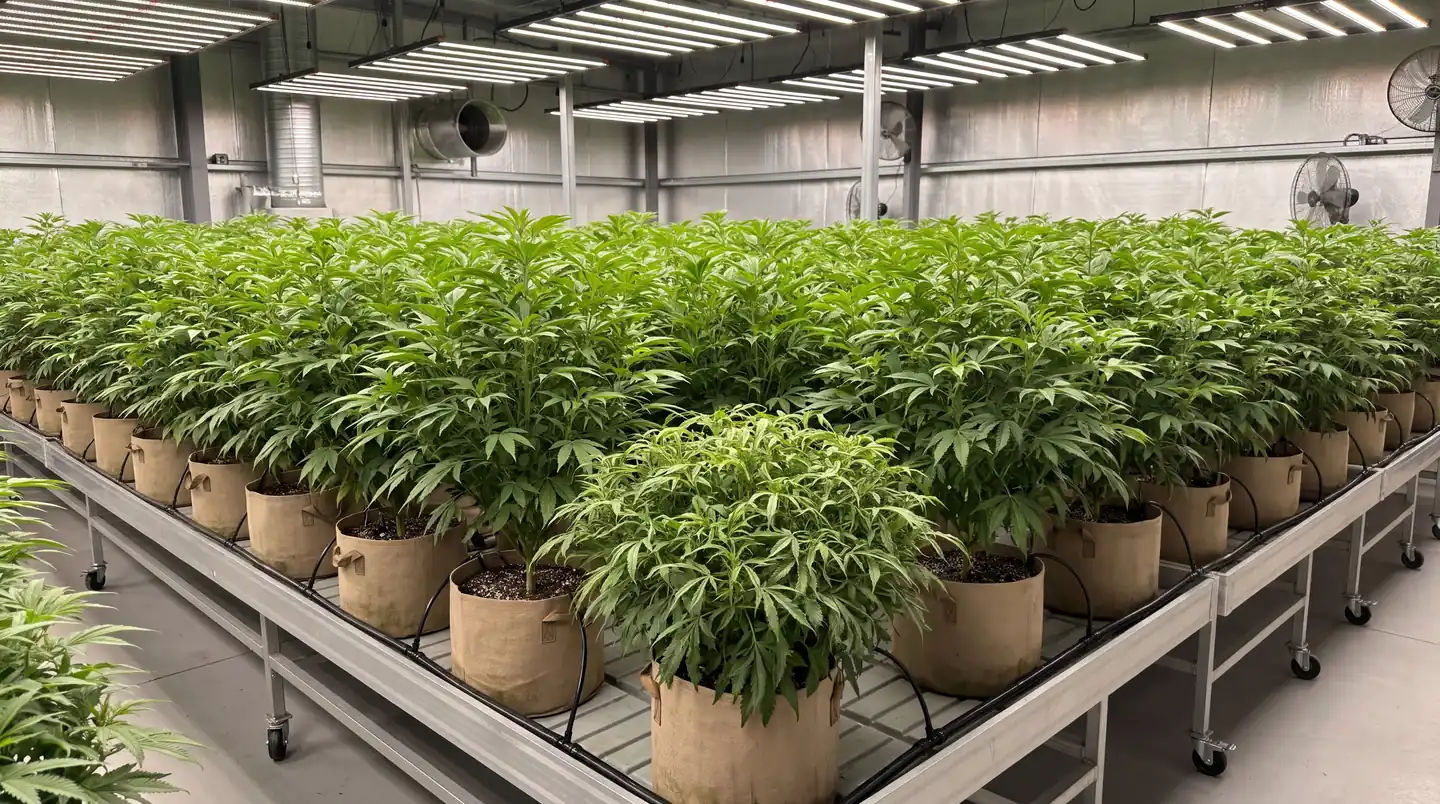
Each later topping round repeats the matched cut on every arm. No tip sits higher or closer to the hub than the others. Tying the mains out low also brings every cola site to a similar height. Indoors, a level canopy shares light more evenly than a plant with a single dominant cola. Outdoors, the light advantage shrinks and the even structure becomes the main payoff.
Manifolding doesn't add light, root volume, or nutrients, so those still set the ceiling on your harvest. What it changes is where the growth goes. A cannabis plant spread over several well-lit tips usually carries more bud weight than one top-heavy stem. The trade-off is extra weeks in veg.
How to Manifold Cannabis Step by Step
To manifold a cannabis plant, top above the third node, strip the stem below the hub, tie the two mains flat, double them to 8 with matched toppings, then level the canopy and flip to 12/12. Each stage waits for the plant to recover. These steps follow the classic mainline build, which doubles the mains every round. Plan on three topping rounds in total.
Here’s what you’ll need: Sharp, sterile pruning snips, soft plant ties or rubber-coated garden wire, and something sturdy to tie to.
Add up the stages and a classic 8-cola cannabis manifold takes roughly 8–10 weeks of veg from sprouting. Here’s how that time breaks down:
| Stage | What You Do | Steps | Typical Timing |
| Seedling to hub | Grow to 5 or 6 nodes, then top above the third | Step 1 | Usually reached 3–4 weeks after sprouting |
| Strip and train | Clear below the hub and tie the two mains flat | Steps 2 & 3 | 10–14 days of recovery |
| 2nd topping | Double 2 mains to 4 | Step 4 | Around 10–14 days |
| 3rd topping | Double 4 mains to 8 | Step 4 | Around 10–14 days |
| Level and flip | Retie the 8 tips and switch to 12/12 | Step 5 | Flip once all 8 arms are growing strongly and the plant reaches about half the available height |
Step 1: Let the Plant Grow, Then Top Above the Third Node
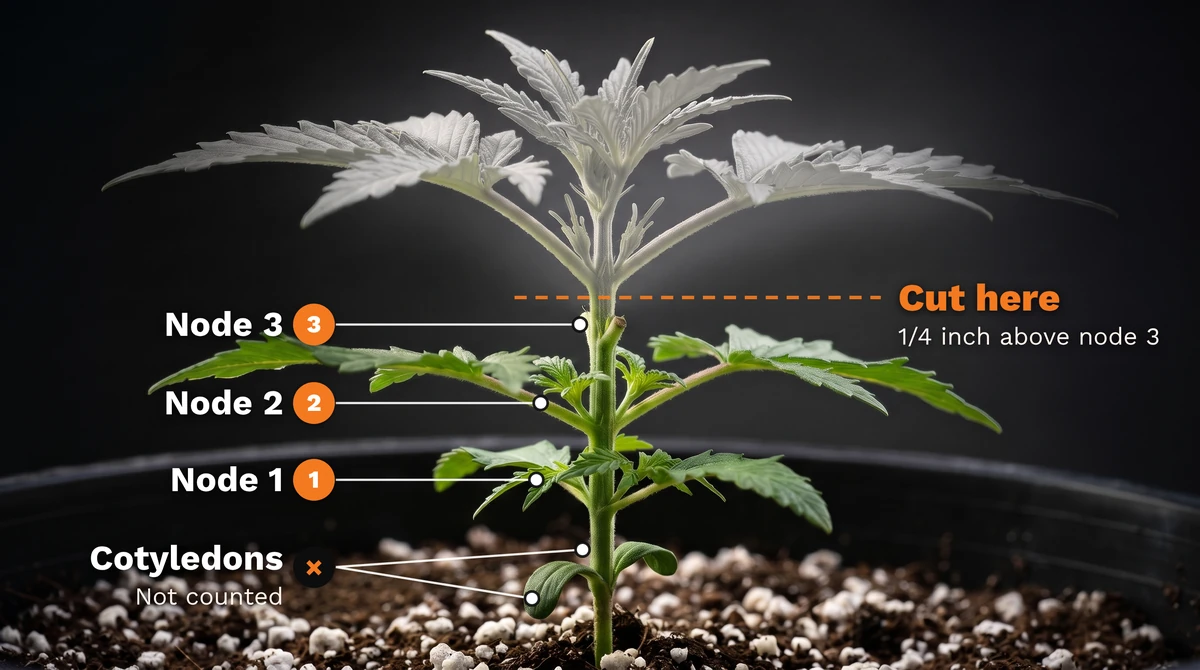
Let your plant grow until it has 5–6 nodes and is pushing strong new growth, which often takes around 3–4 weeks from germination. Then cut the main stem just above the third node. Count nodes from the bottom up. A node is where a pair of fan leaves joins the stem, so the third node is the third pair of serrated leaves. Don’t count the round cotyledon leaves at the base.
Topping above the second node gives a lower, tighter hub with less bare stem, though both versions work. Make the cut with sharp, sterile snips, because a clean cut heals faster and lowers the risk of infection. Leave a tiny stub of stem above it to help protect the new junction from splitting later as the arms thicken.
Some growers wait a little longer, and strain and conditions shift the timing, so read the plant before the calendar. Don’t push much past six nodes, though. Topping later leaves a taller bare stem under the hub, which works against the compact shape you’re building.
Step 2: Strip Everything Below the Hub
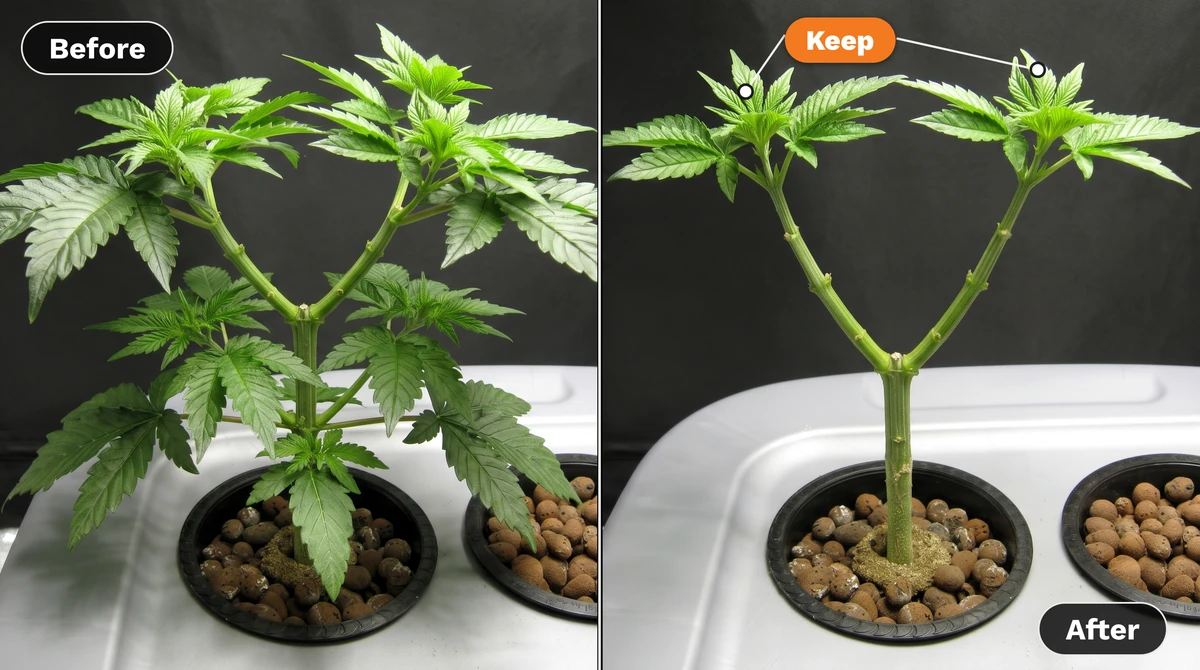
Once the top is off, snip off every side shoot below the hub, so all new growth goes into your two new mains. Leave the fan leaves alone for now — the two at the hub feed the mains you just created, so removing them works against your cut. The lower fan leaves are still feeding the plant too, so let them stay while it recovers.
Trim those fan leaves off to open the base and keep the junction clean— but only once the new canopy shades them out. When you’re done, you’ll have a clean, bare stem, a few fan leaves, and two growing tips in a Y shape. Some growers strip right after topping, and others wait a couple of days for new growth to show.
If the marijuana plant looks stressed, spread the removal over a few days. A freshly cut plant handles gradual pruning better than one big session.
Step 3: Train the Two Mains Flat and Symmetrical
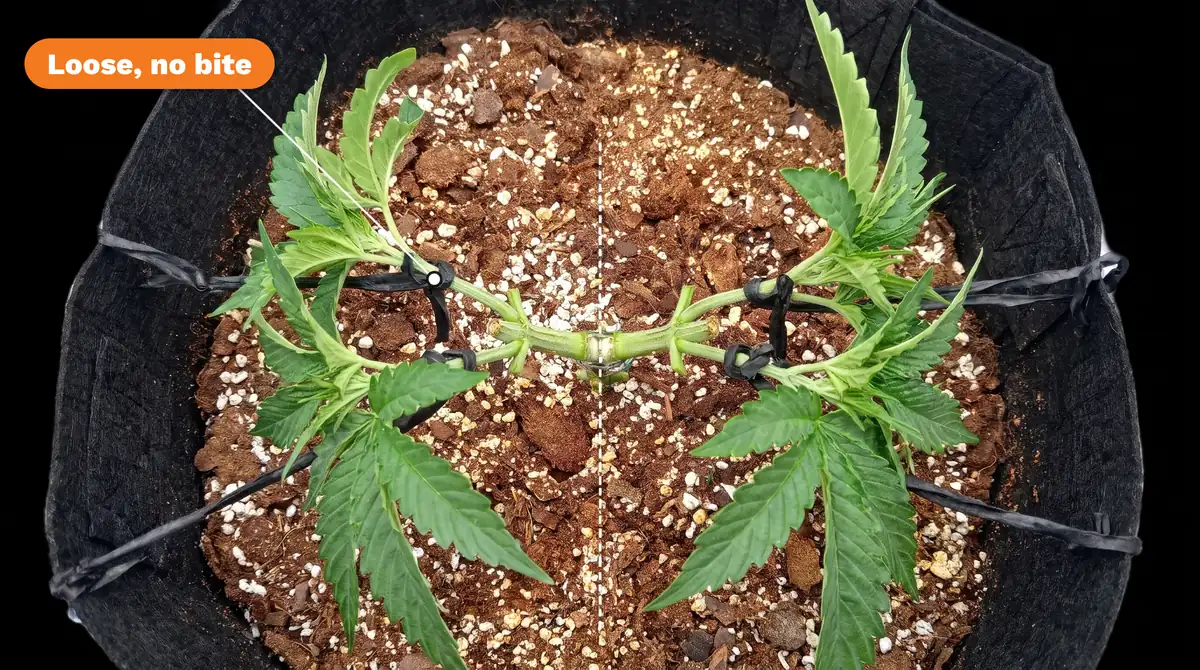
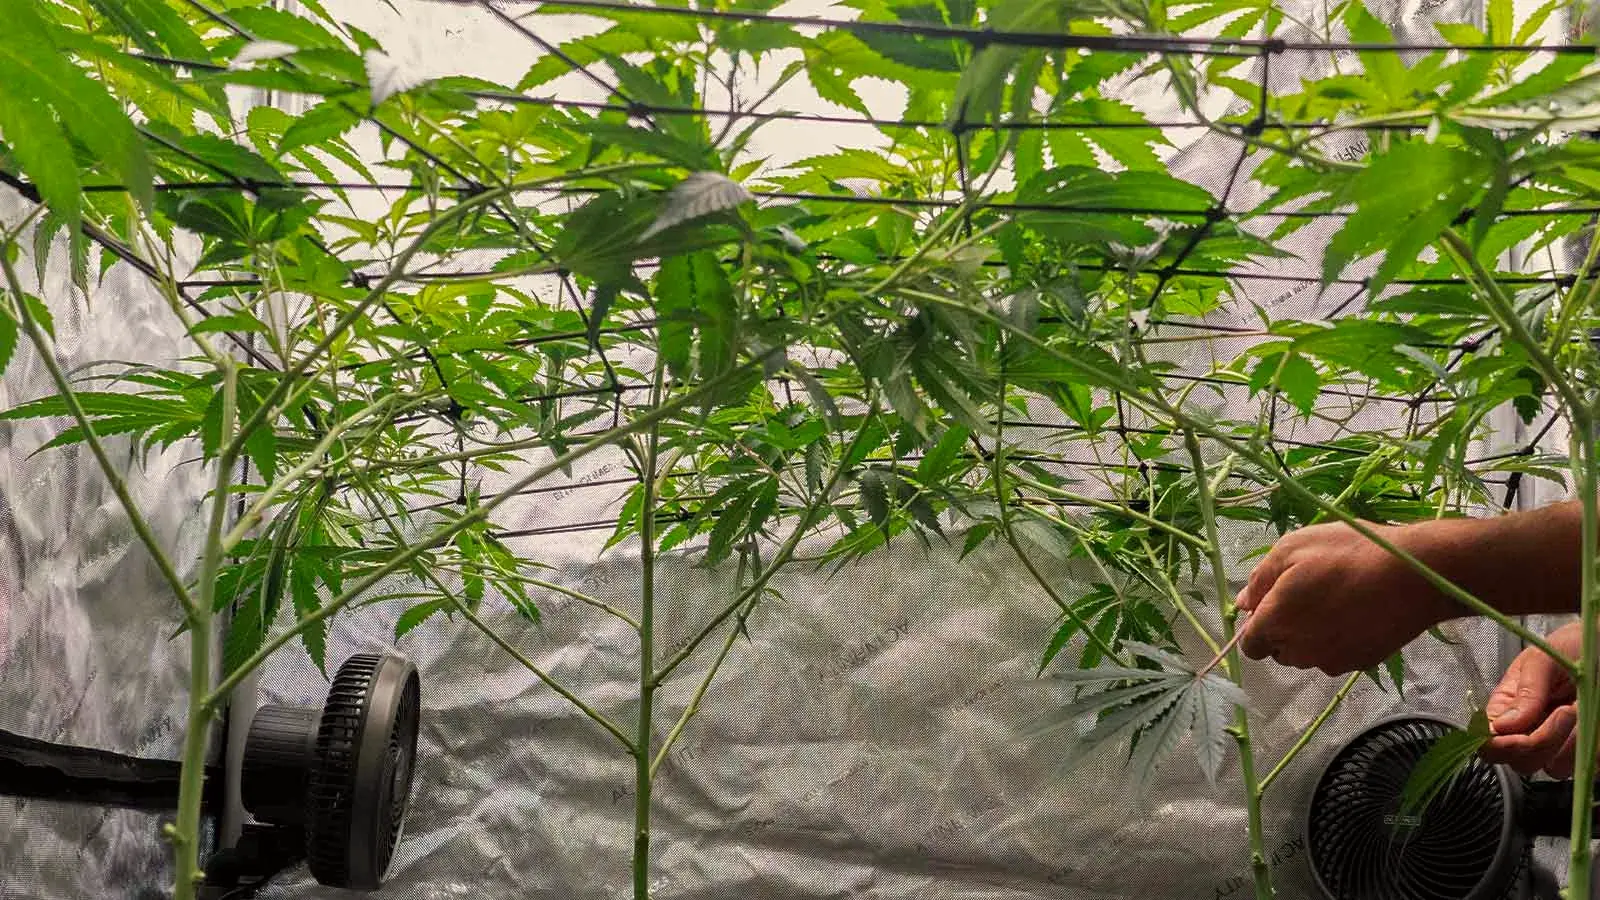
With only two growing tips left, start bending the two mains outward in opposite directions, so the plant forms a T shape. The goal is to have both arms growing flat and level, parallel to the soil or medium. Start now, while the stems are still soft. The symmetry you set here shapes every round that follows in your cannabis manifold.
Take it slowly. Bend each main a little, tie it in place, and add a bit more tension for a couple of days until both arms lie flat. Young branches snap when they’re pulled too far, too fast. Tie to the pot rim or to stakes pushed into the pot.
Keep an eye on balance as both arms grow. If one side outgrows the other, pull the stronger main lower and farther out. Let the weaker one sit higher and more upright. That higher position helps the lagging arm catch up without any cutting.
Don’t move on until both mains are clearly growing well and have each added several new nodes. If one side is still lagging, give it more time.
Step 4: Top Each Main to Double Up to 8 Colas
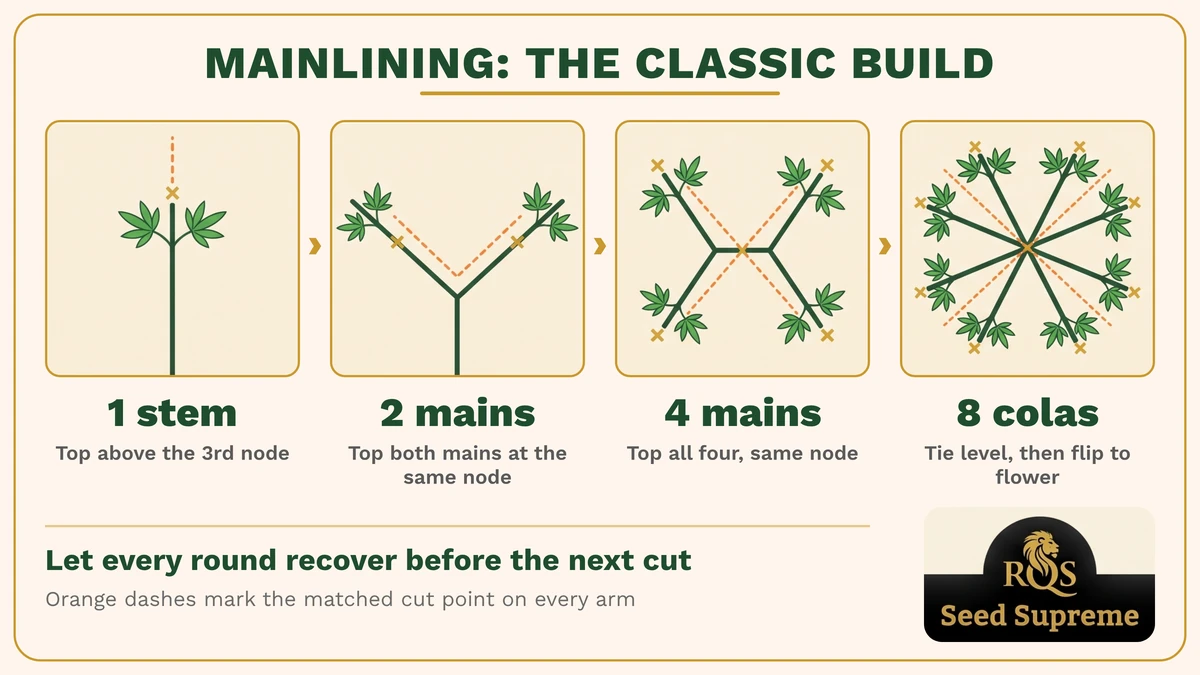
Your next mainlining cuts come once both mains are growing strongly again and each has a few inches of new growth with several new nodes. Top both arms in the same session and above the same node, so they stay equal. Most growers cut just above the first node on each arm. That leaves the two shoots at that node to become new mains.
Each round doubles your mains or branches:
- First topping (step 1): One stem to two mains. This cut breaks apical dominance and sets the hub.
- Second topping: Two mains to four. Each main splits at the same node, so all 4 stay equal in length.
- Third topping: Four mains to eight. The same matched cut on every arm gives you your final 8-cola cannabis plant.
The rule is simple: same round, same node, every arm. That’s what separates a manifold from a plant that’s just been topped a few times. If one main isn’t ready, hold off on all of them. An arm cut before it’s ready tends to stay behind for the rest of the grow.
As the new branches grow, tie each one outward the same way you trained the first two mains. Give the plant 10–14 days to push strong new growth before each round. Most growers stop at 8 colas, but a fourth round takes you to 16 colas.
Step 5: Level the Canopy and Flip to 12/12
Once all 8 mains (or 16, if you went further) are growing strongly again, you’re done cutting. From here it’s small adjustments only. Retie and reposition the arms until all the tips sit at roughly the same height. Close is good enough. The cannabis plant keeps growing and shifting, so a perfectly flat canopy won’t stay that way.
Time the flip by height, because plants keep growing taller after you switch to 12/12. Indica-leaning plants typically grow 25–100% taller during this stretch. Sativa-leaning plants can double, triple, or even quadruple in height. Flip at about half your available height for most hybrids, and sooner for tall, sativa-leaning genetics. That leaves room for the flowering stretch.
Leaf removal is optional at this point. Tuck or trim a fan leaf only if it sits right over a cola site.
After the flip, watch the stretch closely for the first 2–3 weeks. Gently bend down any cola that pulls ahead while the stems are still flexible. Once the stretch slows, shift your focus to supporting the colas as they fill out.
Mainline vs Manifold Builds: Classic, Nebula & 4-Arm Compared
The classic mainline gives you the most even 8-cola weed plant but takes the most veg time. The nebula manifold reaches the same 8 colas with one fewer topping round, and the 4-arm manifold starts fastest but asks the most from your first cut. The steps above follow Nugbuckets’ classic doubling method, and the table shows how the other builds differ from it:
| Build | First Cut | Topping Rounds | Cola Count | Benefits & Trade-Offs |
| Classic mainlining (Nugbuckets) | Above the 3rd node, keeping 2 shoots | 3 (1→2→4→8) | 8, or 16 with a 4th round | Most symmetrical, most veg time |
| Nebula manifold | Above the 3rd node, keeping 2 shoots | 2 (1→2→8) | 8, or 16 with a 3rd round | Saves a recovery cycle, slightly less even |
| 4-arm manifold | Above the 4th node, keeping the shoots at nodes 3 and 4 | 2 (1→4→8) | 8, or 16 with a 3rd round | Fastest start, but a harder first cut |
All three builds can go on to 16 colas with one more doubling round. Whether that’s worth it depends on your space and veg time.
Classic Mainline: Best for Your First Build
The classic mainline is the easiest build to get right on a first run, and it gives you the most symmetrical plant. It’s the method in the steps above. Every round repeats the same matched cut, so an uneven or lagging arm shows up early, and you can correct it before the next round.
The cost is time. With three separate recovery cycles, this classic manifolding method is the slowest route to 8 colas. Choose it if symmetry matters most or you’re still learning to read nodes.
Nebula Manifold: Best When Veg Time Is Tight
The nebula manifold reaches 8 colas in two topping rounds, which usually saves 1–2 weeks of veg. It starts with the same first cut and strip as the classic build; the difference comes in the second round:
- Wait until each main has four nodes.
- Top each main above its third node.
- Remove the growth at the second node on both sides.
- Keep the shoots at the first and third nodes to give you 8 tops.
The trade-off is precision. Each second-round cut has to land on the right nodes, and the arms don’t leave the hub quite as evenly, so you’ll lean harder on tying to level the canopy. It suits growers who are confident in reading nodes and want to shorten veg.
4-Arm Manifold: Fastest Start, Most Training
The 4-arm manifold gives you four arms from the very first cut. You top above the fourth node, strip everything below the third node, and keep the shoots at both the third and fourth nodes, so four arms break at once. One more round of matched toppings takes them to 8.
The trade-off is balance. The upper pair usually grows a little harder than the lower pair, so expect extra training to even out the four arms before you top again. This build suits growers who are comfortable correcting an uneven start with ties.
Common Manifolding Mistakes and How to Fix Them
Most manifolding mistakes come from cutting before the plant has recovered or letting the two sides drift out of balance. The good news is that you can catch and fix most of them in veg, before they affect your harvest.
| Manifolding Mistake | Likely Cause | How to Fix It |
| Uneven mains, one side dominating | Rounds done at different times or at different nodes | Pull the stronger arm lower and farther out, keep the weaker one higher, and hold off on the next round until they match |
| Growth stalls after a cut | Too much removed at once, or the next cut came before recovery | Stop cutting, keep conditions steady, and wait for strong new growth before the next round |
| A main cracks or snaps while bending | Bent too far or too fast, or bent after the stem hardened | Splint and tape it right away, check the tape isn’t too tight, and start bending earlier next run |
| New shoots keep sprouting below the hub | Side shoots regrowing at the lower nodes | Snip them off as they appear so growth stays in the mains |
| Out of veg time, or the canopy outgrew the space | Doubling started late or went too far for the room | Stop at the count you have and flip, because an even 4-cola plant beats a rushed 16-cola plant |
| Colas stretch unevenly or too close to the light after the flip | Tips weren’t level at the flip, or the flip came too late for the plant’s stretch | Bend tall colas down early in the stretch while stems are flexible, raise the light if you can, and flip earlier next run |
A stem that creases without fully splitting usually heals into a firm knuckle and keeps growing. It’s the same response growers trigger on purpose with super cropping, so a kinked main is usually still worth keeping.
Don’t scrap a cannabis manifold just because it isn’t perfectly even. A slightly lopsided plant still gives you several strong colas. If you run short on time or space, you can stop partway too. A half-finished manifold is simply a topped, trained plant, and it’ll still flower like one.
How Manifolding Compares to Topping, LST, SOG & ScrOG
Manifolding isn’t an alternative to topping and LST. It’s a disciplined, symmetrical use of both, and it fits under a ScrOG net without competing with it. SOG is the one true opposite, filling a space with many small plants instead of building structure on a few.
| Training Method | What It Does | Cuts the Plant? | Works With Manifolding? |
| Topping | Removes a growing tip so 1 main stem becomes 2 | Yes | Yes, it’s the cut manifolding is built on |
| LST | Bends and ties growth into place without wounding it | No | Yes, it’s how the arms are held flat |
| ScrOG | Uses a net to hold and spread the canopy | No | Yes, the manifold gives the net an even frame |
| SOG | Fills a space with many small, mostly untrained plants that flower early | Sometimes, to clear lower growth | No, it has the opposite goal |
Topping on its own says nothing about symmetry, matched node positions, or clearing the stem below the cut. Manifolding uses all three rules, and those rules are what make it a manifold:
- Cutting (topping) decides how many growing tips you have.
- Bending (LST) decides where they sit.
- A net (ScrOG) holds them in one level plane.
If you don’t have the veg time for a full manifold, LST alone or a single topping still widens the canopy without repeated recovery cycles.
Is Manifolding Right for Your Grow?
Manifolding is right for you if you’re running a few photoperiod plants and have several weeks of veg to spare. If you’re on a tight schedule, growing autoflowers, or using smaller containers, another training method like LST or topping alone may be better.
The cuts are easy. Waiting out each recovery is the hard part.
| Manifold If You Have… | Choose Another Method If You Have… |
| Several spare weeks of veg | A tight veg schedule |
| Photoperiod genetics | Fast-growing genetics or autoflowers |
| Canopy width, large containers & strong light | Tight space, small containers, or a weak light |
| A limit on plant count | A higher plant count |
How Much Veg Time Does Manifolding Add?
A classic 8-cola manifold usually adds around 3–4 weeks of veg time compared with an untrained plant. The nebula manifold skips one recovery cycle, so it saves you about two weeks of that. Doubling to 16 colas adds another two weeks for the extra round.
During each recovery, the weed plant puts its energy into healing and branching out rather than growing taller. That’s time spent building structure. The exact figure depends on your strain, environment, container size, and how fast your plants bounce back.
Why Does Manifolding Suit Photoperiods, Not Autoflowers?
Manifolding needs a veg period you can stretch, and only photoperiod plants give you one. Indoors, photoperiods stay in veg until you flip the lights to 12/12, so you decide how long the mainline takes. Autoflowering plants start flowering based on age, not light schedule, so the window for repeated cuts closes fast.
That’s why growers use gentler methods like low-stress training for autoflowers, which widens the canopy without costing recovery time the plant doesn’t have.
What’s the Best Growing Medium for Manifolding Cannabis Plants?
There’s no single best medium for manifolding cannabis. The technique works in soil, coco, and hydro, as long as the roots can keep the plant growing strongly through several recovery cycles. Steady veg growth matters more than the substrate itself, because every round waits on the plant to bounce back.
Coco and hydro setups often push faster veg growth than soil, which can shorten the wait between rounds. They also dry out and shift faster, so a missed watering or a feeding swing shows up quickly on a freshly cut plant. Soil grows slower but buffers mistakes better, and that buffer suits a first build.
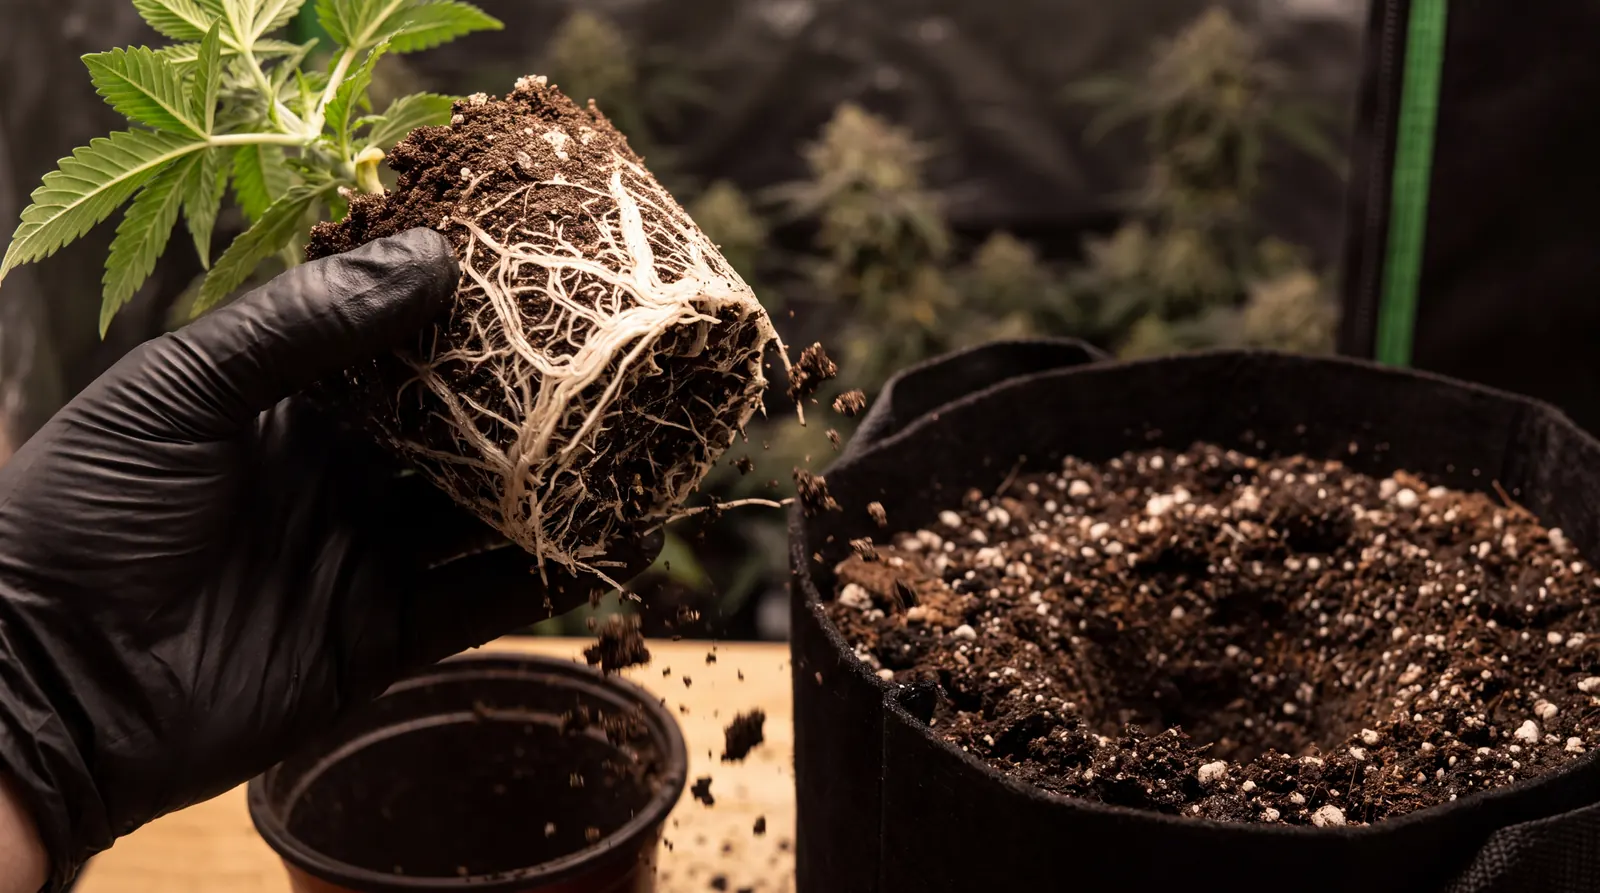
Pot size and transplant timing count for more than the medium. Get your cannabis plant into its final container before or early in the manifold build, and avoid transplanting on the same day you top. Stacking a transplant on a fresh cut slows recovery and stretches your veg schedule.
Space, Light & Strain Choice for Manifolding Weed
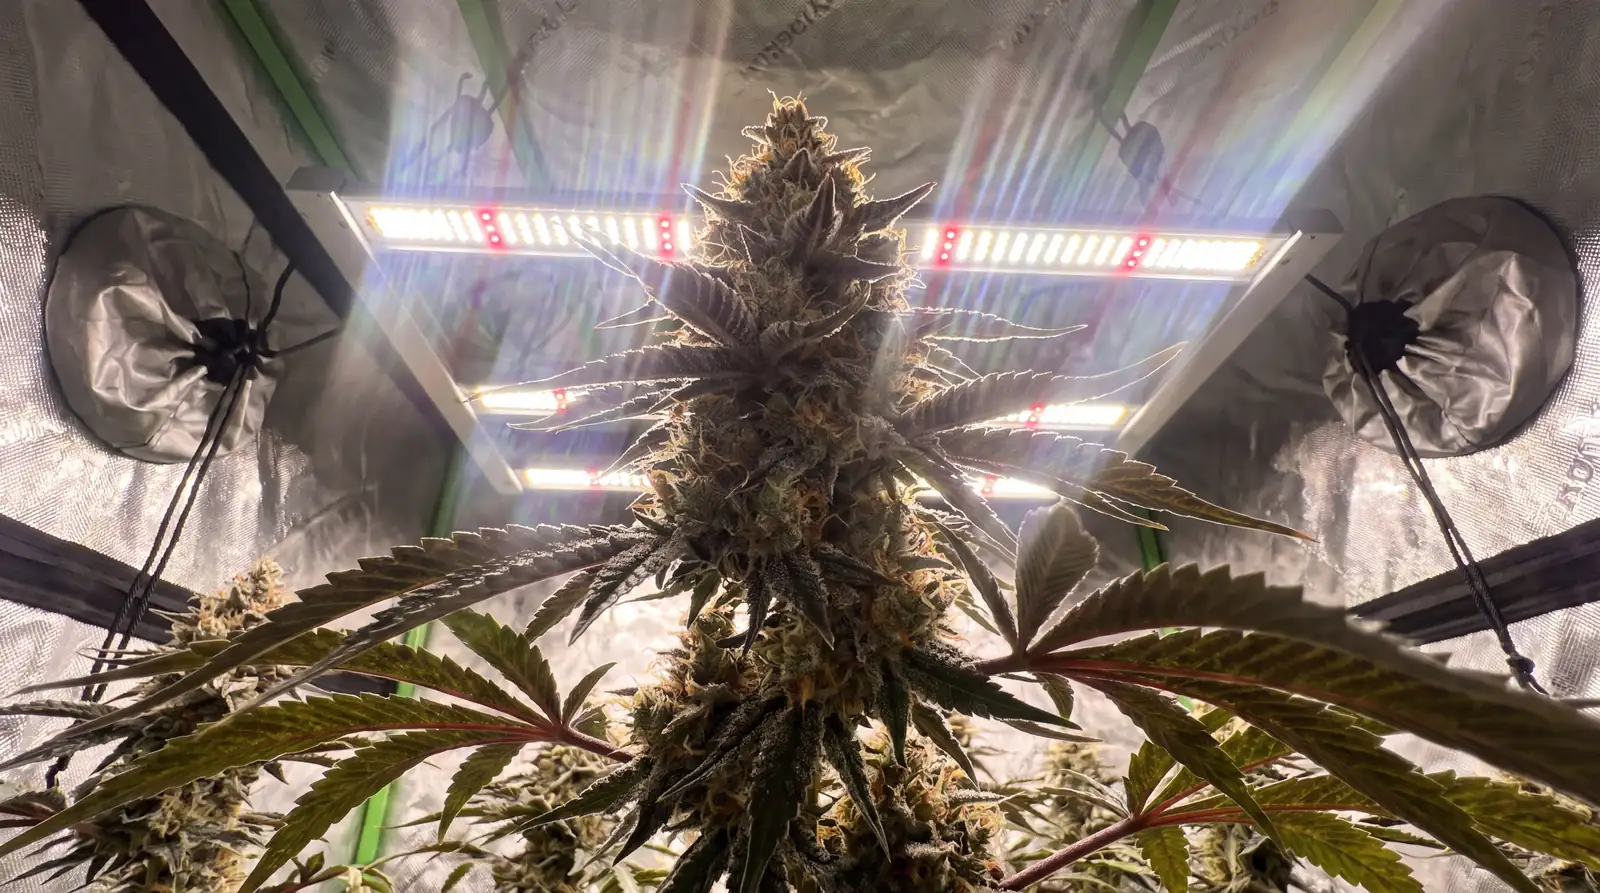
A weed manifold spreads sideways, so give it canopy width and a container big enough to carry the plant through a long veg. Pair that with a strong light, which you’ll need to fill long colas all the way down. Under a small or weak light, a single topping is usually the better plan.
Genetics shape the build from the first cut. Vigorous photoperiod strains with even node spacing grow symmetrical arms, and medium-to-tall plants give you enough stretch for long colas. Just plan your flip around that stretch. Uniform, high-quality cannabis seeds help the arms keep pace with each other, which makes every round easier to time.
Should You Run 8 Colas or a 16-Cola Mainline?
Run 8 colas unless you have extra veg time, canopy width, and container volume for 16. A 16-cola mainline needs one more full doubling round and a lot more room to spread. If all 3 are genuinely available, go for it. If any of the three is short, 8 colas will give you the better plant.