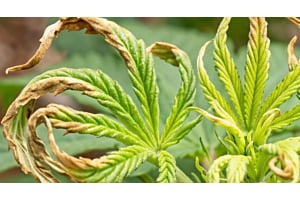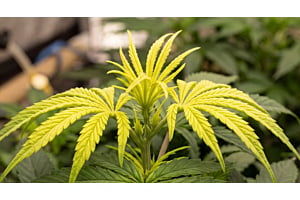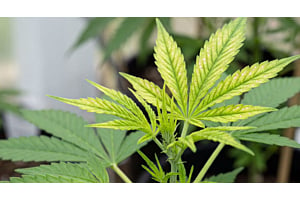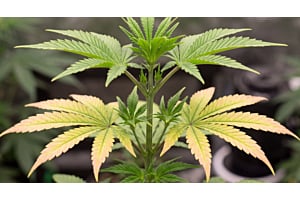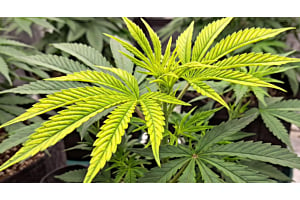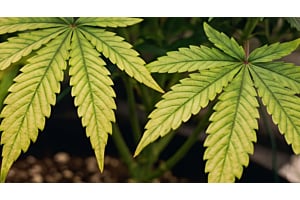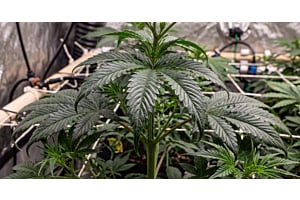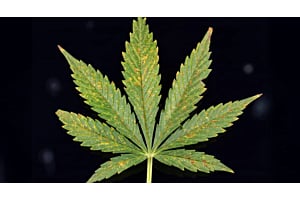
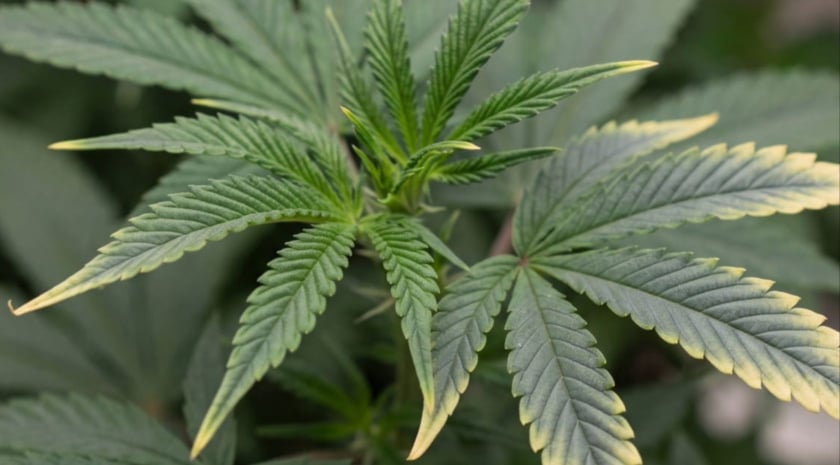
New leaves with dark bluish purple tones, bright yellowing tips, and a metallic-looking sheen are classic symptoms of copper deficiency in cannabis. It looks alarming, though it’s actually quite uncommon. But when it does hit — especially during flowering — a full-blown copper shortage stunts bud development and can seriously hurt your final yield.
The good news is that copper deficiency is fixable. This guide walks through the symptoms, common causes, and steps to get your weed plant back on track.
TL;DR: In cannabis, a copper deficiency is rarely caused by an actual shortage. An out-of-range pH is the most common culprit, though mineral-poor substrates, high organic-matter mixes, RO/filtered water, overfeeding, or overwatering play a role too. Check pH and EC/TDS, flush only if needed, fix your grow medium’s pH, and rule out any other causes before adding copper.
What is Copper Deficiency in Cannabis?
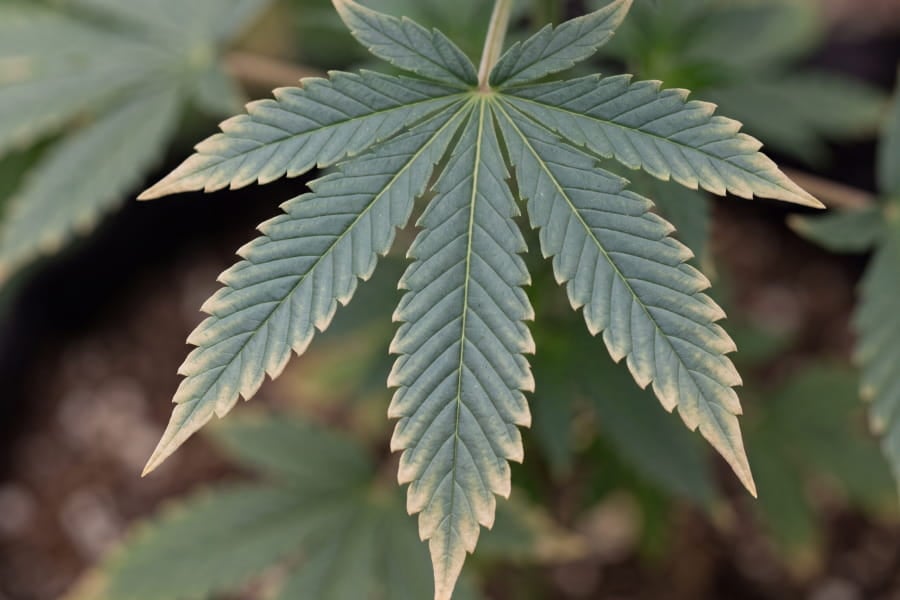
Copper deficiency in cannabis is a nutrient disorder where the plant can’t access enough copper to grow normally. As a micronutrient, copper is only used in small doses, but that dose is essential. Even the best-selling weed seeds need copper to build strong growth and reach their full potential.
It supports carbohydrate metabolism and oxygen use at the cellular level, and plays a vital role in healthy growth, reproduction, and maturity. When copper runs short, growth slows and discolors. In severe cases, the weed plant weakens, leaves wilt and die off, and bud growth comes to a screeching halt.
The Symptoms of Copper Deficiency in Weed Plants
Copper is an immobile nutrient, so the symptoms tend to show on new top growth first. The clearest sign is pale yellow or white leaf tips and edges on young leaves that have otherwise darkened, often with a blue or purple undertone and a shiny, metallic sheen. Other symptoms of a copper deficiency include:
- Limp leaves that curl or roll under.
- Slow, weak, or generally less robust growth.
- Stalled flowering with stunted buds that ripen slowly or stop maturing altogether.
Once a leaf is visibly damaged, that tissue usually won't fully green up again. The recovery signal is new growth coming in healthy, not old leaves reversing.
Is it Copper Deficiency or Another Cannabis Deficiency?
General yellowing or spotting on new growth can point to several different cannabis nutrient deficiencies, so looking at the specific leaf symptoms tells you which nutrient is short (or locked out). Compare the copper deficiency signs with the closest lookalikes below:
| Deficiency | Leaf symptom | Leaf texture/growth | Starts on |
| Copper Deficiency | Pale yellow/white tips, dark leaf body with bluish gray or purple undertones | Limp & wilting, curls under at the edges | New/upper growth |
| Iron Deficiency | Bleached leaves, dark green veins, chlorotic mottling at leaflet base | Normal shape, no distortion | New/upper growth |
| Zinc deficiency | Yellowing leaves, green veins, chlorotic spotting | Severely twisted & shrunken new leaves | New/upper growth |
| Molybdenum Deficiency | Pale yellow leaves, reddish tips spreading inward | Curling, twisted new leaves, stunted growth | New upper/older middle growth |
| Manganese Deficiency | Yellow leaves, green veins, small brown/copper spots, distinct mottling | Brittle, general lack of vigor | New upper/ older middle growth |
Most of these trace nutrient deficiencies share the same underlying cause — pH lockout — which is why correcting pH can resolve a whole cluster of problems at once.
Copper Deficiency vs. Nutrient Burn
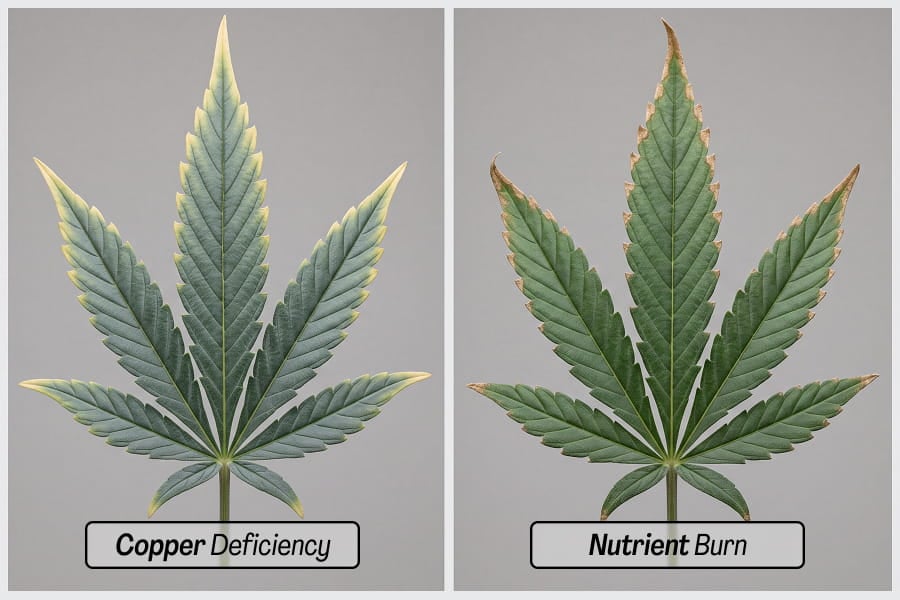
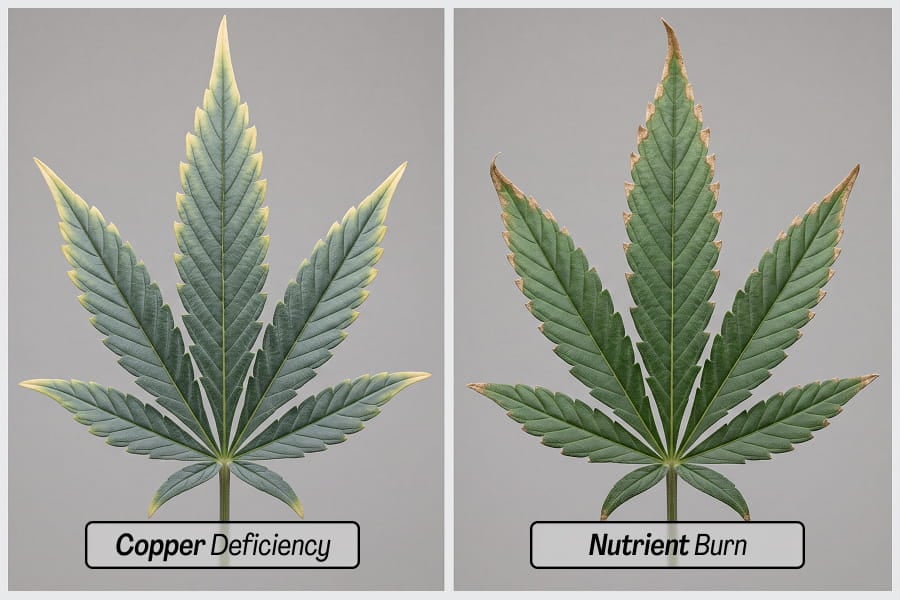
Cannabis growers often confuse copper deficiency with nutrient burn because both start with yellowing tips. The difference is what happens next. With nute burn, the tips turn brown and crispy as the damage progresses. With copper deficiency, the tips stay pale yellow or white, and the rest of the leaf darkens with a blue or purple cast.
If you’re seeing browning dry leaf tips with a normal green leaf body, you’re likely looking at nutrient burn, not copper deficiency.
What Causes Copper Deficiency in Cannabis?
In cannabis, copper deficiency is almost always caused by pH lockout, not a genuine shortage. That's because trace amounts of copper are generally present in tap water and most substrates. Copper stays available in slightly acidic conditions, so when pH climbs too high, the roots simply can't absorb the copper that's already there. A handful of other causes can lock it out too:
- Reverse osmosis (RO) and filtered water strips out the copper that tap water normally supplies.
- Coco, rockwool, and other mineral-poor media have little or no native copper to begin with, so the feed is the only source.
- Peat and high-organic-matter mixes bind copper tightly, cutting how much stays available even when it's present.
- Overfertilizing or overfeeding builds up salts in the root zone that raise EC and disrupt general nutrient uptake, copper included.
- Specific excesses of phosphorus, nitrogen, zinc, or iron can also block copper uptake directly, separate from the salt buildup itself.
- Oxygen-starved or very cold root zones slow copper uptake even when pH and feed levels are correct. Overwatering suffocates the roots, while very cold temperatures slow down root metabolism.
How to Fix Copper Deficiency in Weed Plants Step By Step
To fix copper deficiency in cannabis, test pH and EC first, then flush only if salt buildup is confirmed. Next, correct your grow medium’s pH. This resolves most cases but if symptoms persist after a couple of days, check your water source, growing medium, feed strength, and root health. Only add copper once you've ruled out every other cause. Follow each correction step in order:
1. Test pH and EC/TDS
Use a pH meter and an EC or TDS meter to confirm what you're dealing with before treating anything. A high EC/TDS reading well above your input feed’s EC signals salt buildup, and a pH reading outside your medium's correct range signals pH lockout.
| Growing medium | Ideal pH range | Acceptable pH range |
| Soil (living, organic, or synthetic-fed) | 6.0–6.3 | 5.5–6.5 |
| Coco coir (soilless, organic) | 5.8–6.2 | 5.6–6.4 |
| Hydro (DWC, NFT, rockwool, LECA) | 5.8–6.2 | 5.6–6.4 |
2. Flush Only If Salt Buildup is Confirmed (Otherwise Skip This Step)
If your step 1 reading confirmed salt buildup, flush your cannabis plants with plain, pH'd water until about a third drains out from the bottom. In true hydro, dump and refill the reservoir with fresh, pH'd, nutrient-free solution instead. Skip the flush if step 1 didn’t show buildup, and re-test EC once it's done before moving on.
A flush clears salts, but it doesn't fix pH or cure a deficiency.
3. Correct Your Grow Medium’s pH
How you correct pH depends on your medium. Living or organic soil buffers itself, so you don’t pH your water or use pH Up/Down. Instead, a genuine out-of-range soil pH is corrected slowly with amendments — lime to raise pH and elemental sulfur to lower it. These work slowly over days to weeks, not immediately.
True hydro, soilless media like coco coir, and synthetic-fed soil are different because they don’t buffer themselves, so input nutrients constantly shift pH. To correct pH, test your mixed nutrient-and-water solution with a pH meter and bring it into the right range using pH Up or pH down.
Do this before each feed to keep pH on track, and check pH regularly — weekly for soilless/ coco and daily for hydro. Once you've corrected pH, treat runoff readings as a trend to watch for pH drift, not an exact number to work from feed after feed. Variables like watering and saturation can affect a single reading, which can cause you to overcorrect.
4. Check Your Water Source
If you're feeding with RO or heavily filtered water, that's worth ruling in or out here. Most complete base nutrient lines already include copper in their micronutrient pack — check the label for Cu alongside Zn, Mn, and Fe to be sure. But if you're running a single-part feed, add a complete micronutrient formula that lists copper specifically.
Tap water cannabis growers can skip this step.
5. Account For Your Medium's Copper Supply
If you’re using coco, rockwool, and other mineral-poor media, make sure your base nutrients include copper. In peat-heavy or living soil, switch to a chelated copper source (or add one) — it gets past the binding that usually blocks unchelated copper. Top-dressing with compost or kelp meal works in living soil too, as microbial activity gradually frees up bound copper.
6. Dial Back Heavy Feeding
Check your feed schedule against the label. If you've been running phosphorus, nitrogen, zinc, or iron above the recommended strength, it’s likely blocking copper uptake directly. Cut those back to label strength for a feed or two before adding any copper. Give it a few days to see whether copper deficiency symptoms ease back before doing anything else.
7. Protect the Root Zone
Water once the top inch or two has lost some moisture, not once the medium has fully dried out, so roots get oxygen without drying to the point of stress. Keep root-zone temperature in range too: 68–72°F in hydro, up to 75°F in soil or planting mixes, since very cold roots battle to take up any nutrients, regardless of what's in the feed.
8. Add Copper Last, Only If a Genuine Shortage Remains
If new cannabis plant growth still shows signs of copper deficiency 3 to 5 days after correcting pH and the other causes, add copper directly. Foliar feed with copper sulfate or chelated copper at a light dose, or use a hydro micronutrient formula that includes copper. Start light and reassess before adding more — too much copper locks out iron and can be fatal.
Never spray copper fungicides onto flowers.
How Long Does Cannabis Take to Recover From Copper Deficiency?
A cannabis plant takes about 3 to 5 days to show healthy new growth once the underlying cause of a copper deficiency is corrected. Set your expectations honestly. Already-damaged leaves may never fully return to green, and that’s normal.
You know the problem is solved when new growth comes in healthy and no fresh symptoms appear. A copper problem caught early — especially before or during early flowering — should leave your harvest largely unaffected.
How Do You Prevent Copper Deficiency in Weed Plants?
Preventing a cannabis copper deficiency comes down to two habits: keep pH inside your medium's ideal range and start new feeds at a quarter to half the recommended dose before building up — overfeeding drives the salt buildup and lockout you'd otherwise have to correct later. Keep root zones healthy with enough moisture and oxygen at the right temps, too.
And remember to add a copper source if your water or substrate is mineral-poor. Starting with quality cannabis seeds also gives your plants a strong foundation for healthy growth from the beginning.