Defoliating autoflowers turns a decent harvest into a genuinely impressive one, if you do it right. Autos flower with age, not light, which means their vegetative stage is short and their stress tolerance is limited. Unlike photoperiod plants, there's no extra time to course-correct.
Growers who nail both the timing and the technique consistently pull bigger yields and more potent buds from the same genetics.
This guide covers exactly when to act, what to target, and how to defoliate autoflowers correctly for maximum results.
What Is Autoflower Defoliation?
Defoliation is the deliberate removal of fan leaves from cannabis plants to improve light penetration, airflow, and the plant's ability to direct energy toward its bud sites. In autoflowers specifically, defoliation is used more sparingly than in photoperiod plants because their shorter lifecycle leaves less recovery time after stress, making precision and timing especially important. For autoflowering cannabis plants, it can deliver excellent results, but only with the right timing, technique, and a touch of restraint.
Autoflowers vs. Photoperiod Strains
Unlike photoperiod strains, autoflowers move through their life cycle according to age, not light schedule. Their vegetative stage typically spans a short 3 to 5 weeks, which leaves limited room for recovery before the flowering stage kicks in. That compressed timeline is what makes defoliation riskier with autos and why timing is so critical.
Some growers avoid removing any fan leaves on autos entirely, arguing that every green leaf is energy the plant needs to produce potent buds. Others defoliate their autoflowers regularly and report stronger, more even results. Both camps have a point.
Done with care at the right stage, gentle defoliation can improve canopy light exposure and support bud production. Done carelessly, it can lead to stunted growth for the rest of an auto plant's life.
Why Defoliate Autoflowering Cannabis Plants?
Strategic fan leaf removal improves two things that directly affect yield and potency: how much light reaches the plant, and how freely air moves through it.
Improved Light Penetration Across Lower Bud Sites
Large fan leaves near the top of the canopy often shade lower bud sites. Without enough light, those sites produce smaller, less potent buds despite consuming the plant's energy and nutrients.
Removing obstructive fan leaves allows more light penetration deeper into the canopy, supporting more even bud development across the whole plant and helping lower branches reach their potential.
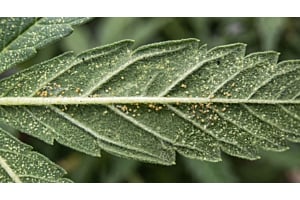
Better Air Circulation and Reduced Mold Risk
Dense foliage traps humidity inside the canopy, creating conditions that favor mold and mildew. Opening up the plant structure improves air circulation, reduces moisture buildup, and protects developing buds all the way to harvest.
Cleaner air exchange means healthier growth and better-quality flower at the end of the cycle.
When to Defoliate Autoflowers: The Two Safe Windows
Timing is the most important decision you will make when defoliating autoflowers. The windows are narrow, and they do not repeat. Miss them, and the safest move is to leave the plant alone and focus on the next grow.
Window 1: Late Vegetative Stage (Weeks 3 to 5 from Seed)
The safest window for defoliating autoflowers is the late vegetative stage, roughly weeks 3 to 5 from seed. By this point, the plant has enough structure to tolerate targeted cuts without losing its capacity to produce energy. The goal here is light defoliation only: remove what is genuinely blocking light or airflow, nothing more.
Avoid trimming autoflowers during the seedling stage or the first two weeks of vegetative growth. The plant is still building its foundation and has little to gain from early intervention.
Window 2: Early Flowering Stage (First Pistils Visible)
A second, conservative pass is possible at the transition into early flower. When pistils first become visible, the plant has entered the flowering stage. Defoliation at this point should be minimal: a few fan leaves directly shading bud sites, and nothing more.
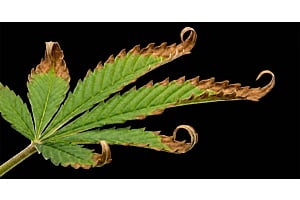
Defoliating autoflowers in mid to late flower disrupts bud development and typically reduces yield. The one exception is yellowing leaves in the final weeks before harvest, which can and should be removed since they are no longer contributing anything useful and can harbor mold.
| Growth Stage | Defoliate? | How Much | Notes |
| Seedling (weeks 1-2) |
No | None | Plant is too vulnerable. Any stress can cause permanent setbacks. |
| Early veg (weeks 2-3) |
No | None | Still building structure. Leave it alone. |
| Late veg (weeks 3-5) |
Yes | Light (10-20% of foliage) | Safest window. Target leaves blocking bud sites and airflow only. |
| Early flower (pistils visible) |
Carefully | Minimal (a few leaves) | Only leaves directly shading bud sites. One conservative pass. |
| Mid to late flower | No | None | Bud development is underway. Any disruption risks yield. |
| Final weeks before harvest | Yellow leaves only | Remove as needed | Dead or dying leaves can harbor mold. Remove them cleanly. |
Best Time of Day to Defoliate Autoflowers
Many growers prefer to defoliate early in the lights-on period, giving the plant time to fully activate before any cuts are made. The idea is that the plant has most of its active period ahead to begin responding before it rests. For outdoor grows, shortly after sunrise follows the same logic.
When to Avoid Defoliation
Skip defoliation entirely if any of the following apply:
- The plant looks stressed, pale, or sluggish for its age.
- It has recently dealt with overwatering, heat stress, or other environmental issues.
- It's underdeveloped relative to its growth stage.
- You're past the early flowering period.
Signs to Look For Before Fan Leaf Removal
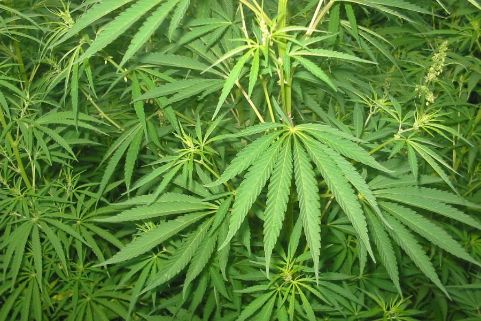
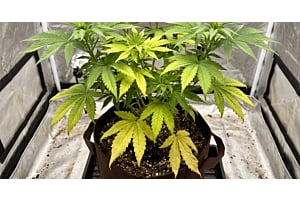
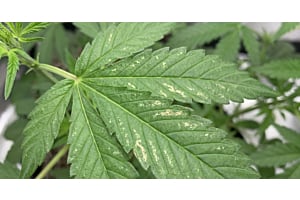
Crowded cannabis plant structure suggesting restricted airflow and uneven light distribution.
Before defoliating your autoflowering cannabis plants, assess whether they're actually ready. Three things to check:
- Dense, overlapping fan leaves. Look down at the plant from above. If fan leaves are stacked and blocking light to the bud sites below, that's a clear case for strategic removal.
- Yellow leaves in the interior. Yellowing leaves tucked inside the canopy are no longer contributing energy to the plant. Removing them reduces disease risk with minimal stress.
- Plant vigor. A candidate for defoliation should look clearly healthy: upright posture, good color, and active growth. If plant health is in question, hold off.
How to Defoliate Autoflowers Safely: Step by Step
Technique matters as much as timing. Even the right cuts made the wrong way can set a plant back. Here's a step-by-step walkthrough for defoliating autoflowers cleanly and with minimal stress.
Step 1: Assess the Plant Before Picking Up Any Tools
Look at the whole plant first. Identify which fan leaves are genuinely blocking light and air to bud sites. If the canopy is already open and manageable, reconsider whether defoliation is actually necessary. Only proceed when there is a clear reason to.
Step 2: Use Clean, Sharp Tools
Use sharp trimming scissors or pruning shears. Dull blades tear plant tissue and slow recovery. Wipe the blades with isopropyl alcohol before starting and between plants. Every cut opens the plant's tissue to potential pathogens, so hygiene is critical.
Step 3: Target Fan Leaves, Not Sugar Leaves]
Start at the lower canopy and work upward. Look for large fan leaves that are blocking light to flower sites, folding inward and trapping air, or creating congestion in the center of the canopy.
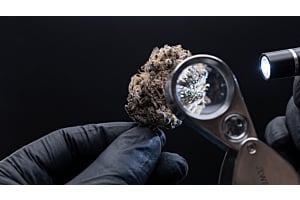
The small, trichome-coated leaves growing directly out of the buds are called sugar leaves. Leave them alone unless they are visibly yellowing or damaged. They protect developing flowers and contribute to resin production.
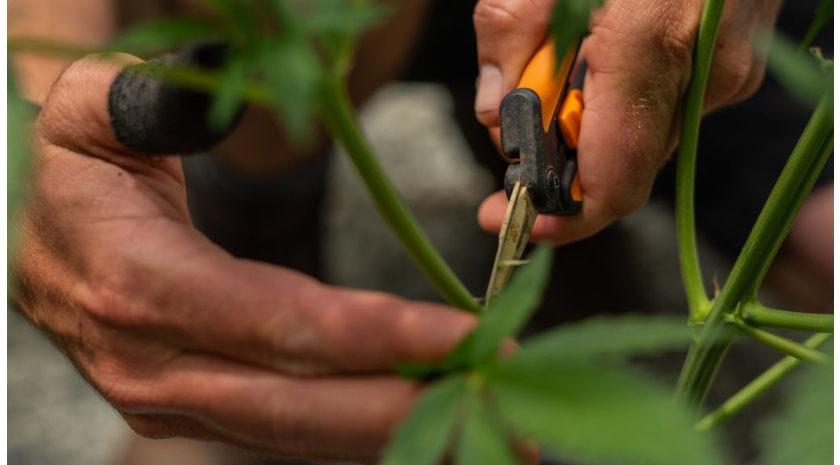
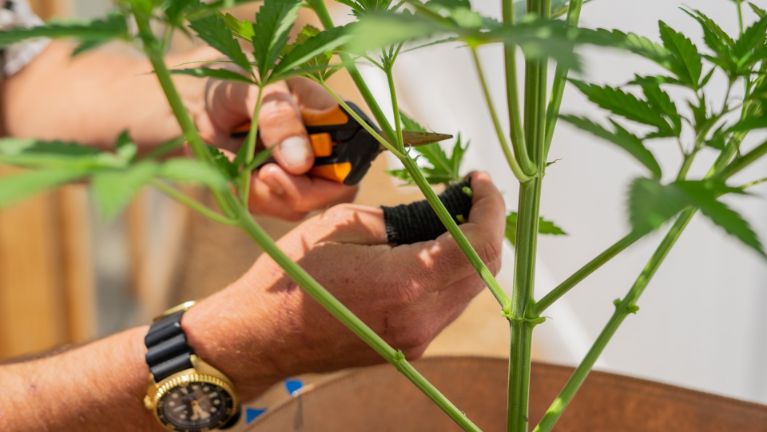
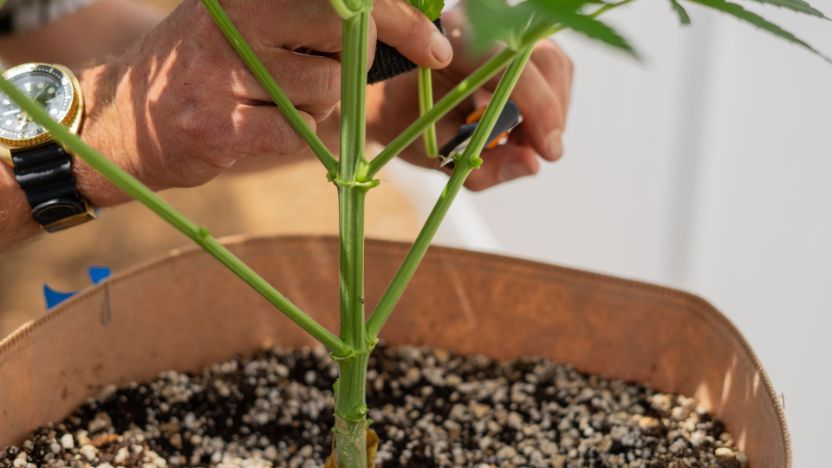
Step 4: Cut at the Base of the Petiole
When you have identified a leaf to remove, cut at the base of the petiole (the thin stalk connecting the leaf to the stem) as close to the stem as possible without nicking it. A clean cut at the petiole base allows the plant to recover faster.
Never tear or pull leaves off by hand. This risks ripping plant tissue and opening a larger wound than necessary.
Step 5: Remove No More Than 10 to 20% Per Session
One of the most common mistakes when defoliating autoflowers is taking too much at once. Autos have a compressed life cycle and limited recovery time, so each session should be conservative and deliberate. Remove only the leaves that genuinely need to go, then give the plant 5 to 7 days to stabilize before considering another pass.
| Parameter | Guideline |
| Foliage removed per session | 10 to 20% of total plant foliage |
| Time between sessions | 5 - 7 days |
| Leaves per pass on smaller plants | A few leaves at a time |
| Cumulative limit across the full grow | No more than 30% total |
How Much to Remove When Defoliating Autoflowers
The 10 to 20% guideline per session is the most reliable rule of thumb for autoflower defoliation. Here is how that translates in practice:
- On a plant with 30 visible fan leaves, remove 3 to 6 in a single session
- Prioritize leaves that are fully blocking bud sites over leaves that are only partially obstructing light.
- Leaves in the lower interior of the canopy that receive essentially no light are good candidates before upper leaves that still contribute to photosynthesis.
After each session, wait and watch. If the plant responds well, a second light pass may be appropriate. If it shows any signs of stress, leave it alone.
Defoliating Autoflowers in Late Flower: Is It Worth It?
Defoliating autoflowers late in the flower stage is generally not recommended. By this point, bud development is underway, and the plant needs every resource it has to finish. Stress introduced in the final weeks before harvest can reduce final weight and potency.
The exception, as noted above, is yellow or dead fan leaves, which should always be removed regardless of stage. A yellowing leaf is no longer photosynthesizing, is consuming space and airflow, and can become a site for mold in a dense canopy. Remove it cleanly at the petiole base and leave everything else alone.
If you missed both defoliation windows and the plant is already mid-flower, the best approach is to leave the canopy intact and focus on environmental controls: airflow, humidity management, and light positioning.
Autoflower Training Techniques That Work Alongside Defoliation
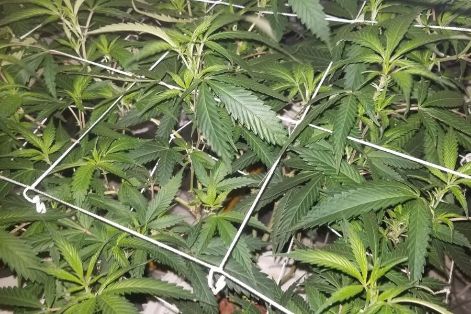
Screen of Green method (ScrOG) trains cannabis branches horizontally to improve light exposure without defoliation.
Not every situation calls for cutting. These three techniques can improve light exposure and airflow with less stress on the plant.
Leaf Tucking
Leaf tucking bends the plant's fan leaves down and out of the way without cutting them. It's non-invasive, requires no recovery time, and is the best first step before reaching for scissors.
The main limitation is that tucked leaves can spring back, and this approach doesn't improve air circulation as effectively as removing unnecessary foliage.
Low Stress Training (LST)
LST bends and ties down the main stem and branches to flatten the plant canopy. This exposes more bud sites to direct light across the whole plant and is one of the safest high-impact techniques for autoflowering weed plants.
No cutting is involved in Low Stress Training, and it works well alongside careful defoliation for growers who want to maximize both light exposure and airflow without stressing the plant significantly.
ScrOG (Screen of Green)
ScrOG uses a horizontal net above the canopy to guide branches into an even, horizontal grid. As the plant grows through the screen, branches fill the available space, creating a uniform canopy where most flower sites receive adequate light.
ScrOG suits indoor plants with limited vertical space particularly well and can increase light efficiency without requiring heavy defoliation.
Schwazzing Autoflowers: High Risk, Specific Use Cases
Schwazzing involves stripping most or all fan leaves at specific points during the flowering stage. Borrowed from high-production photoperiod growing, it is a high-risk approach for autoflowers. The rapid growth cycle leaves little room for recovery, and heavy stripping during flower production can reduce yield rather than boost it.
Some experienced growers have experimented with schwazzing autoflowers on robust, foliage-heavy varieties and seen improved results. But it is not a technique for a first grow with a new variety. If you want to try it, run it on a backup plant alongside a control grown under identical conditions, document everything, and let that data guide future grows.
Common Mistakes When Defoliating Autoflowers
- Over-defoliating in a single session.
Too much removal at once depletes the plant's capacity to produce energy and can trigger a stress response that slows bud growth. Stick to the 10–20% per session guideline and space sessions out. - Defoliating a stressed or weak plant.
A plant dealing with temperature stress, overwatering, or nutrient deficiencies needs its foliage to recover. Defoliating adds stress at exactly the wrong moment. Prioritize plant health before considering any removal. - Treating autos like photoperiod cannabis plants.
Photoperiod plants have extended vegetative growth and can handle heavier, more frequent defoliation. Applying that same approach to autoflowering strains can strip a plant of the resources it needs to finish, often weeks before harvest.
Post-Defoliation Care in the 48 to 72 Hours After a Session
Defoliation doesn't end when you put the scissors down. How you support the plant in the days that follow has a direct impact on how quickly it recovers and gets back to producing. Here's what to prioritize in the 48 to 72 hours after a session:
- Watch for stress signals. Check the plant daily. Wilting, leaf curl, and discoloration near cut sites are all signs that the plant is struggling to recover.
- Reduce watering slightly. With reduced foliage, the plant transpires less water. The root zone will stay moist longer than usual, so allow the medium to dry out a little more before the next watering. Overwatering during recovery is a common and easily avoided mistake.
- Hold off on heavy feeding. Wait for clear recovery signs before resuming full nutrient feeds. Once the plant is clearly stabilizing, resume gradually rather than jumping straight to full strength.
Strain Considerations for Autoflower Defoliation
Not all autoflowering cannabis plants respond to defoliation the same way. Matching your approach to the specific autoflowering strain and your grow environment will always produce better results than following a fixed schedule.
Indica-Leaning Autoflowers
Indica-dominant autos tend to benefit most from defoliation. Their naturally bushy structure and broad fan leaves create dense, overlapping canopies that block light and restrict airflow, exactly the conditions strategic removal is designed to address.
Strains like Blueberry Auto and Banana Kush Auto are good examples: compact, heavy-foliaged plants where opening up the canopy can make a meaningful difference to both yield and bud quality.
Sativa-Leaning Autoflowers
Sativa-dominant autos typically have a more open, airy structure with better natural light exposure throughout the plant. Jack Herer Auto and Durban Poison Auto are both great examples, making leaf tucking or low-stress training a more appropriate first approach.
In high-humidity conditions, removing unnecessary foliage can still meaningfully reduce mold risk regardless of strain. In drier, well-ventilated spaces, the case for defoliation is less urgent.
Defoliate Autoflowers Like a Pro
Defoliating autoflowers rewards precision over enthusiasm. The growers who consistently pull bigger yields and more potent buds aren't removing the most leaves - they're removing the right ones, at the right moment, and giving the plant the time and space to respond.
The technique only works as well as the genetics behind it. Browse the full range of autoflowering seeds at Seed Supreme and find a variety worth growing to its full potential.