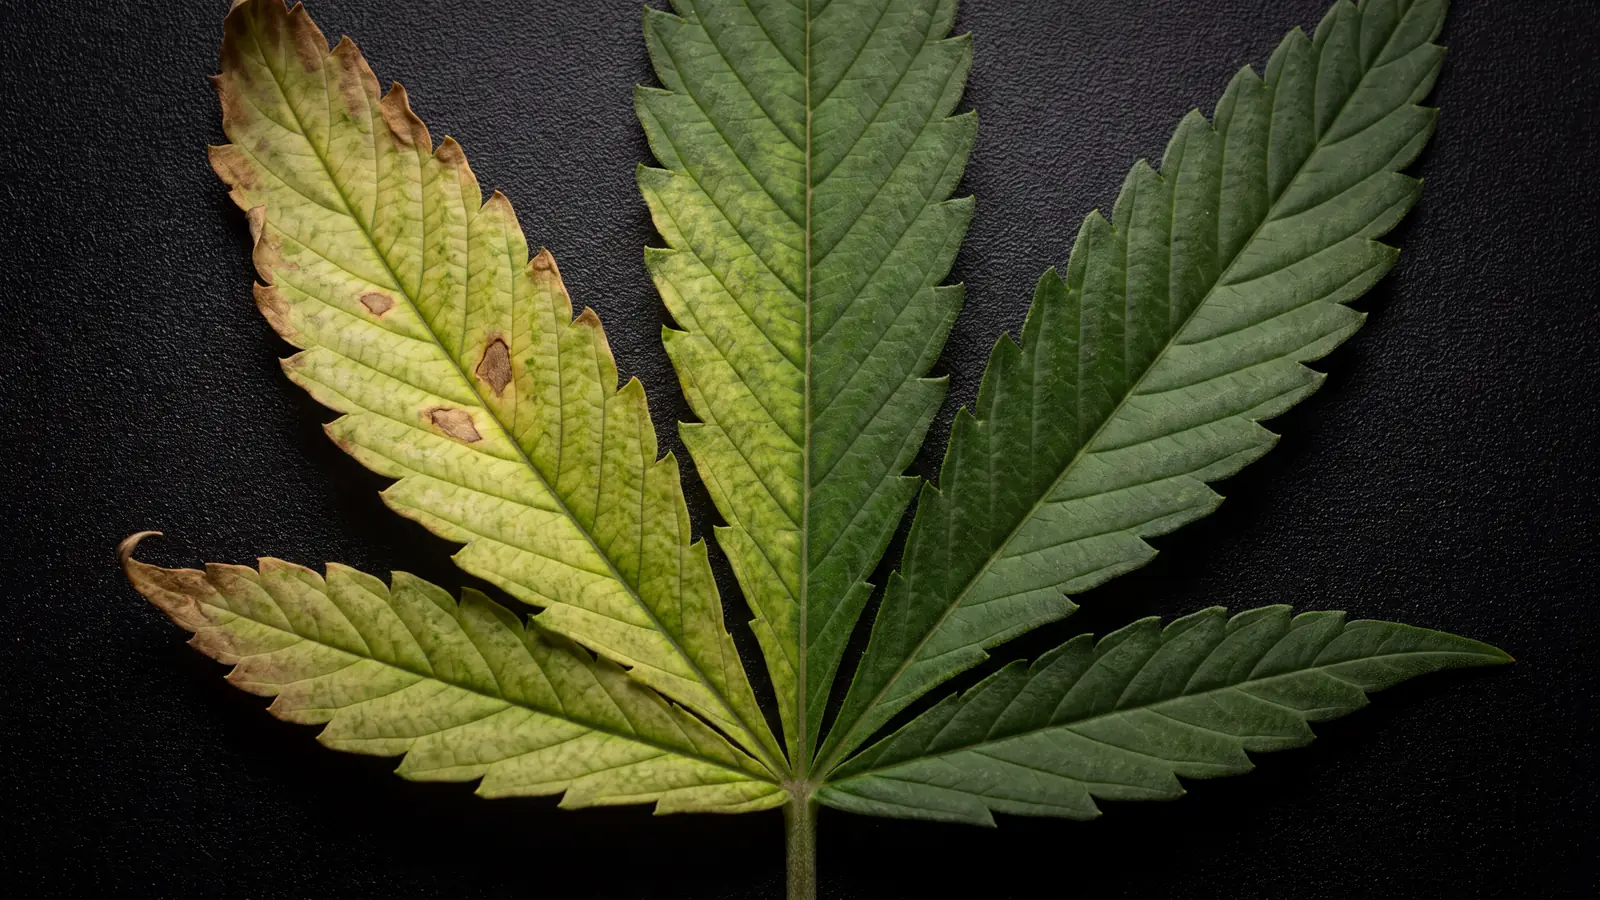
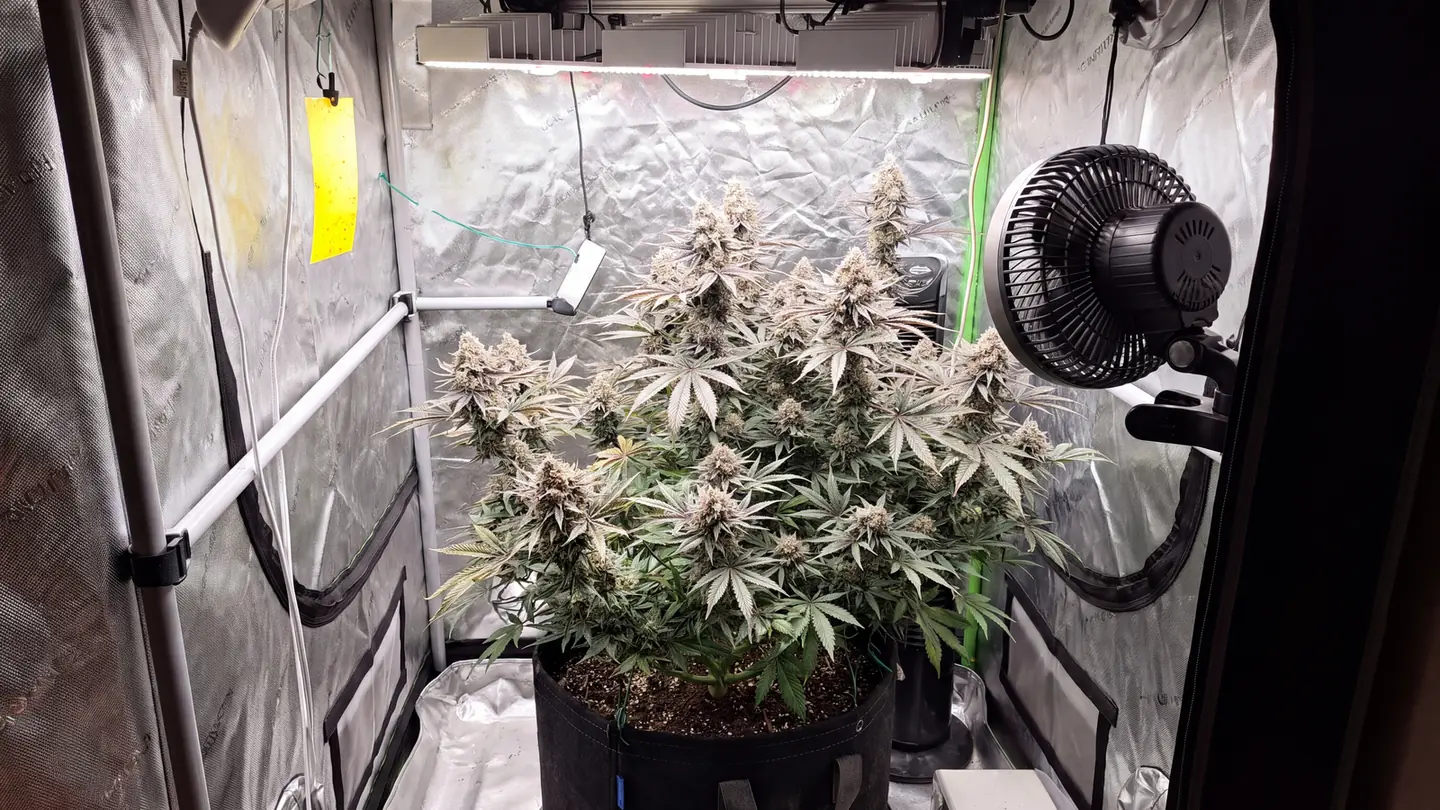
Growing marijuana at home starts with germinating the seed before you raise the seedling, care for your plant in veg and flowering, then harvest, dry, and cure your buds. A typical indoor grow takes about 3–5 months from seed to harvest (longer outdoors and shorter for autos).
Through every stage, your cannabis plant needs the same basics: strong light, moving air, comfortable temperatures, careful watering, and a root zone that drains. In this guide, you'll see that growing marijuana can be easy, and starting with forgiving beginner seeds makes each stage even easier to get right.
Follow the 11 steps below, from setting up your grow space and picking your cannabis seeds, soil, and pots to germination, daily care, plant training, and troubleshooting — before finally jarring your very own homegrown weed.
Growing Marijuana Step by Step: All 11 Steps at a Glance
Growing marijuana takes 11 steps, from learning what the plant needs to curing your harvest. Each step builds on the one before it, so work through them in this order:
- Learn what your cannabis plant needs: Every later choice is about supplying light, air, temperature, humidity, water, and a healthy root zone.
- Choose your grow space: Your space decides how much control you have, what supplies you need, and which seeds will fit.
- Pick beginner-friendly seeds: Seeds matched to your space make every later stage easier.
- Choose your medium and pots: Soil in a well-draining pot gives young roots the most forgiving start.
- Germinate and plant your seeds: Germinating first confirms each seed is alive before it goes into the medium.
- Care for your seedling: The first few weeks build the roots everything else depends on.
- Take care of your plant through veg: Watering, feeding, and training now build the frame that carries your buds.
- Flip to flower: Indoor photoperiods need a light change to start budding, while outdoor photos follow the season and autos switch on their own.
- Monitor your plant and fix problems: Catching issues early protects the buds forming in flower.
- Harvest at the right time: Trichomes and pistils tell you when the buds have peaked.
- Dry and cure your buds: A slow dry and cure decide the final aroma and smoothness.
Step 1: Learn What Cannabis Growth Depends On
Cannabis growth depends on six inputs: light, air, temperature, humidity, water, and a healthy root zone. Learn these first, because every piece of equipment you buy and every care decision you make comes down to supplying them.
Cannabis is an annual that sprouts, grows, flowers, and dies within one season. Outdoors, the sun, breeze, soil and changing seasons supply what it needs. Indoors, you replace them with a grow light, fans, a well-draining pot, and a light timer.
Here's what the environmental conditions should look like at each stage:
| Input | Seedling | Veg | Flower |
| Lighting | Moderate intensity, 18/6 indoors | Strong, 18/6 indoors | Strongest, 12/12 indoors Autos stay on 18/6 or 20/4 from seed to harvest |
| Air | Gentle air movement and fresh air | A fan moving air across the canopy, plus fresh air exchange | Steady airflow through the canopy to keep dense buds dry |
| Temperature | Around 68–80°F with the lights on, a little cooler with them off | Same as seedling | Same, and avoid long stretches above about 85°F |
| Humidity | About 65–70% | 50–70% | 40–50%, when dense buds are most at risk of mold |
| Water | Small amounts close to the stem | Water by pot weight until about 30% drains out, then let the medium dry back | Same routine, with more water as the plant grows |
| Feeding | None for the first week or two | Nitrogen-rich veg formula, starting below the label dose | Bloom formula with more phosphorus and potassium |
| Root zone pH | 6.0–6.3 in soil, 5.8–6.2 in coco or hydro | Same | Same |
Outdoors, the sun sets the light schedule and the weather sets temperature and humidity. Your job shifts from controlling these inputs to choosing a site, a planting time, and genetics that suit them.
Step 2: Choose Where to Grow Weed: Indoors, Outdoors or Greenhouse
Choose the space that can supply all six growth inputs without a weekly fight. Indoors gives you the most control but needs the most equipment. Outdoors costs the least but leaves you at the mercy of the weather, and a greenhouse sits in between.
Decide this before you buy marijuana seeds or supplies, because your space determines which seeds will fit and what equipment you'll need.
Indoor vs Outdoor vs Greenhouse Growing
The biggest differences between indoor, outdoor, and greenhouse growing are how much control you get, what it costs, and when you can harvest.
| Factor | Indoor | Outdoor | Greenhouse |
| Control | Full control of light, temperature, humidity and airflow | Weather decides most of it | Partial, with sunlight plus some shelter |
| Cost | Highest, mostly upfront equipment | Lowest | Moderate |
| Effort | Daily checks and ongoing environment management | Less daily work, more exposure to the elements | Moderate |
| Harvest Timing | Any time of year on your schedule | Tied to the season, with photoperiods finishing in late summer or fall | Mostly seasonal, slightly extendable |
| Main Risk | Heat, poor airflow, equipment failure | Storms, pests, animals, and a wet fall before the plant finishes | Overheating on hot days, humidity swings |
Indoors, headroom is more important than floor space. A 2x2 ft tent comfortably fits one trained plant, but plants stretch once flowering starts, so plan for height first. A sunny windowsill can sprout a seedling, though it rarely gives a plant enough light or airflow to finish well.
Outdoors, your season sets the schedule. Plant after your last frost, and photoperiods will start flowering as the days shorten in late summer. A wet or early fall is the biggest threat to an outdoor harvest, so choose cannabis genetics that finish before your weather turns.
Beginner Grow Supplies for Indoor and Outdoor Grows
A beginner grow needs a way to supply light and airflow, a pot or patch of ground that drains, good soil, and a few inexpensive instruments. Here's what that looks like for one plant in each setting:
| Supply | Indoor | Outdoor |
| Space | A grow tent or small enclosed space you can keep completely dark during the dark period | A private spot with direct sun for most of the day and some shelter from strong wind |
| Light | A grow light sized for the footprint, hung so you can raise and lower it, plus a timer | The sun |
| Airflow | A clip-on circulation fan, plus an extraction fan or another source of fresh air | Natural breeze, so avoid enclosed corners where air sits still |
| Pot and medium | A fabric pot and pre-amended potting soil (see Step 4) | A large container or prepared ground with good drainage (see Step 4) |
| Instruments | A thermometer and hygrometer, ideally one that logs highs and lows | A weather forecast you check for frost, heat, and heavy rain |
| pH testing | A pH meter or test kit | A pH meter or test kit |
| Watering | A watering can with a fine rose | A watering can or hose that reaches your plant easily |
| Support and protection | Soft plant ties for training | Stakes or netting for support, plus fencing or covers against pests and animals |
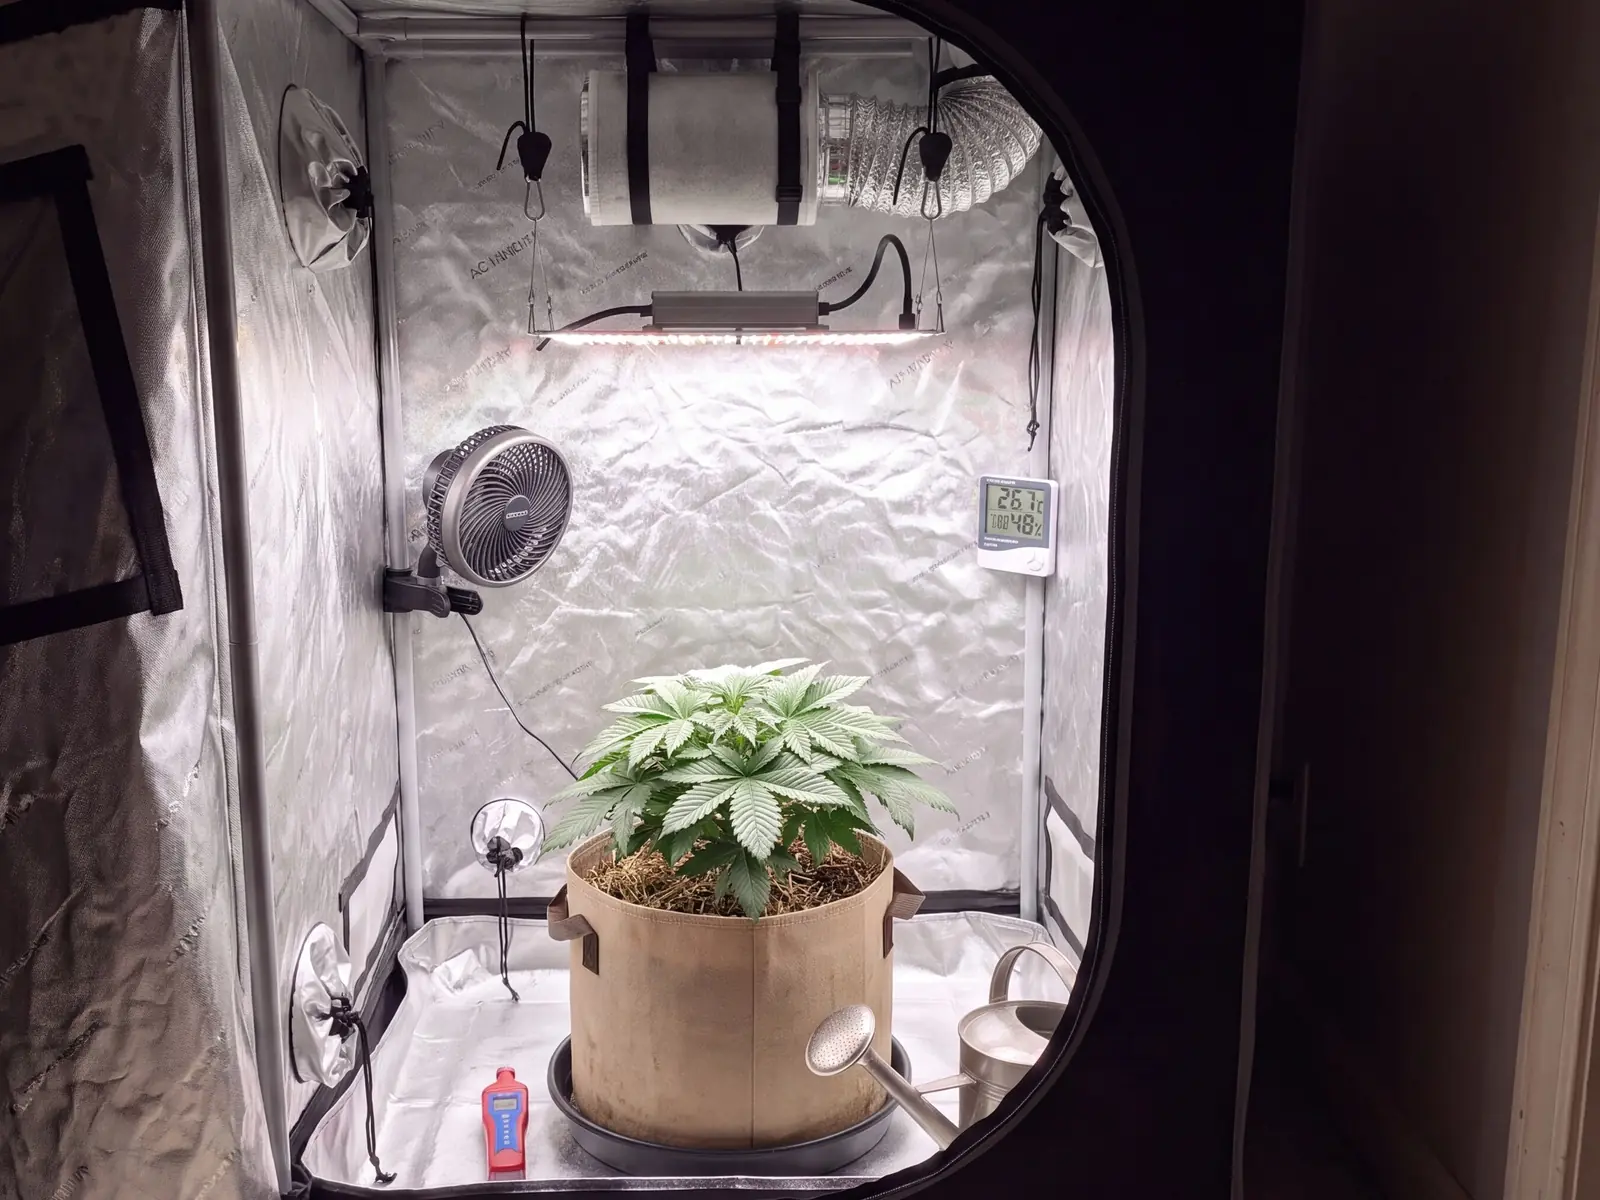
The instruments are the part most beginners skip, and they're also the cheapest. A thermometer, hygrometer, and pH meter help you spot most of the problems in Step 9 days before they show up on the leaves.
Step 3: Pick Beginner-Friendly Seeds to Grow
With your space decided, pick seeds that suit it. Every cannabis seed comes down to two separate choices: feminized or regular, and autoflowering or photoperiod. For a first grow, feminized photoperiod seeds or autoflower seeds known for vigor and resilience are the easiest place to start.
These traits are independent, so one never implies the other. At Seed Supreme, all of our feminized seeds are photoperiodic, and all of our autoflowering seeds are feminized too. Either way, you skip the job of sorting out males.
Feminized vs Regular Seeds
Feminized cannabis seeds grow into female plants around 99% of the time, and females are the plants that produce buds. That's a big win for a one-plant grow, where a single male means a wasted cycle. You'll still check your plants as they flower, but you won't spend weeks hunting for males.
Regular weed seeds give you a roughly even split of males and females, so you'll need to tell a male vs female weed plant apart before any pollen spreads. They're mostly useful if you'd like to breed your own seeds.
Autoflowering vs Photoperiod Seeds
Photoperiods are the ‘standard’ cannabis plants that flower when nights get long, while autoflowers flower based on age. A photo plant stays in veg as long as its dark periods stay short, then starts flowering once it gets around 12 hours of uninterrupted darkness a day. Indoors, switching the lights to 12/12 triggers it. Outdoors, the shortening days trigger it for you.
Autoflowers carry ruderalis genetics that start flowering on an internal clock, usually around 3–5 weeks after sprouting. Most autoflowers are beginner-friendly — they’re often resilient, smaller than photoperiods, and you can run them on one light schedule throughout their short lifecycle, which takes around 8–10 weeks from seed to harvest indoors or out.
The catch is lighter yields per plant and a short window to fix any glaring early mistakes. That said, autos reward a slightly different approach, and learning how to grow autoflowers week by week helps you get the most from it.
Photoperiods give you full control over plant size indoors and a whole summer of growth outdoors, so they usually yield more than autos. The trade-off is a longer grow, though that extra veg time also gives you more room to correct beginner mistakes before flowering.
Matching Cannabis Seeds to Your Space
Match your cannabis seeds to the space you chose in Step 2, then look for easy-to-grow traits. A small space, a short outdoor summer, or a first run you'd like finished fast all point toward auto seeds. Feminized photoperiod seeds suit beginner growers who want to control environmental conditions and plant size, or who are just keen to learn the flip.
Growing outside? Choose outdoor marijuana seeds suited to your climate and season length. Beyond that, look for strains known as vigorous, resilient, and easy to grow. Those words describe how a plant behaves under your care, which is exactly what you need on a first run.
Step 4: Choose Your Growing Medium and Pots
With your space and weed seeds chosen, pick the medium your roots will grow in and the pots that hold it. For a first grow, good-quality pre-amended potting soil in a fabric pot is the most forgiving combination, indoors or out.
Your seed type shapes this choice too. Autos go straight into their final pot, while photoperiods can start small and move up, so decide on containers before you germinate.
Soil vs Coco vs Hydro for Beginners
Soil is the best growing medium for beginners because it holds nutrients, buffers pH, and gives you room to make small mistakes. Coco and hydro can grow plants faster, but they ask for more precise feeding and pH control from day one.
| Grow Medium | How It Works | Feeding | Beginner Fit |
| Pre-amended soil | Holds water and nutrients and releases them slowly | Usually none through seedling and early veg, then every other watering | Most forgiving and the best first choice |
| Coco coir (often mixed with perlite) | An inert medium that drains fast and holds plenty of air | Nutrients from early on, usually with most waterings | Fast growth, less margin for error |
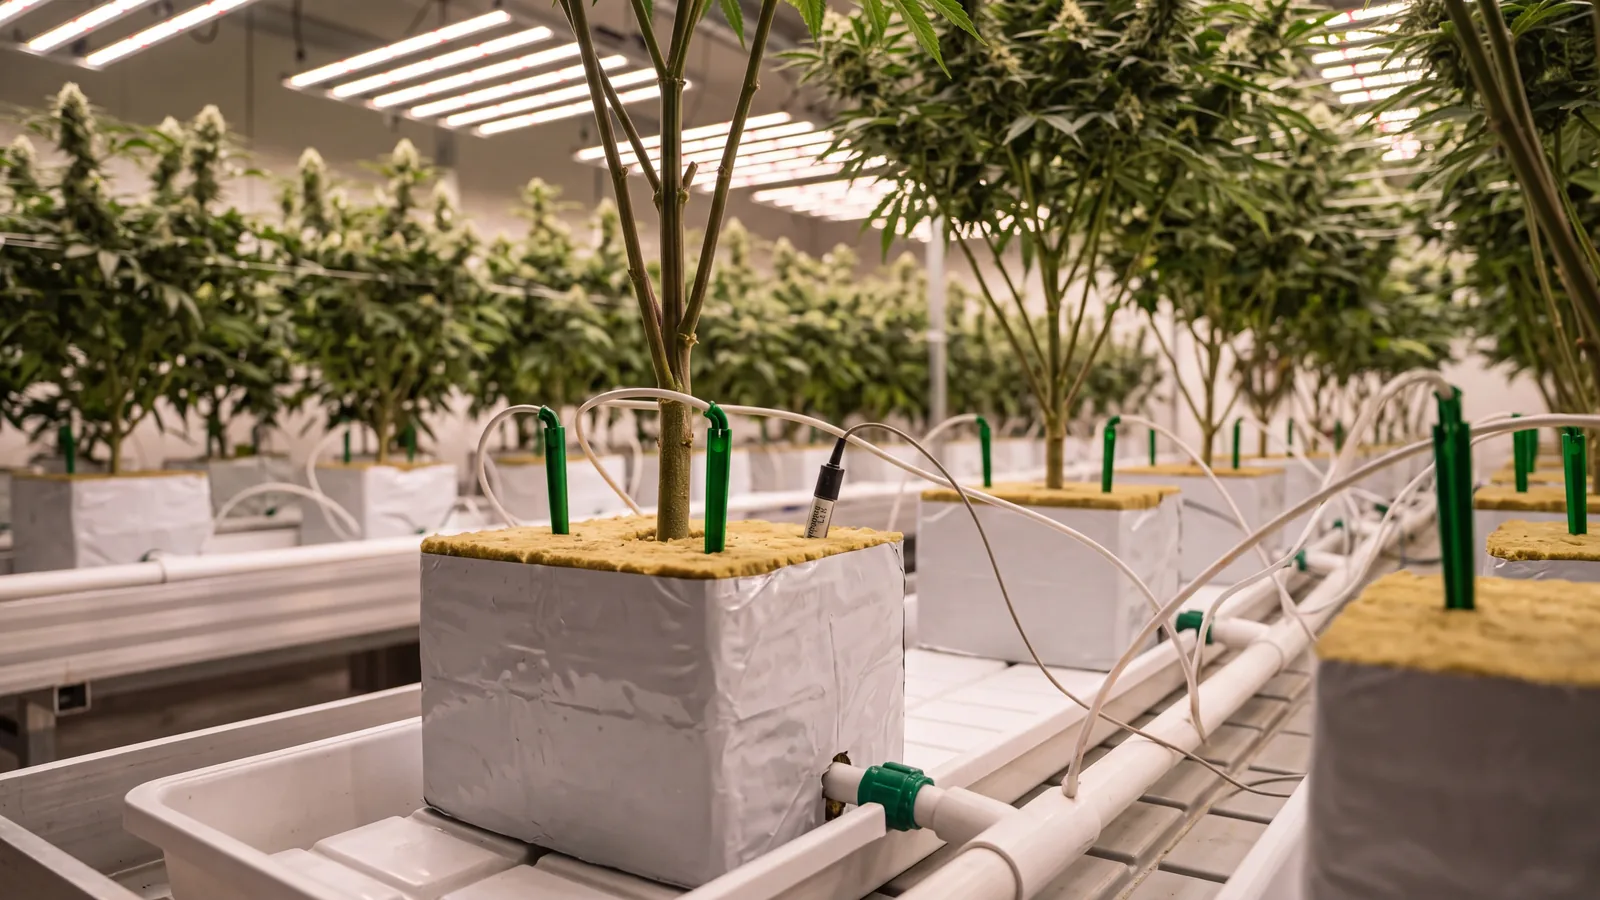
| Hydro | Roots grow in water or an inert substrate with nutrient solution | Constant nutrient solution you monitor closely | Fastest, but problems and equipment failures hit quickly |
Use a potting soil made for containers, not garden soil or topsoil, which compacts in a pot and holds too much water. Outdoors, you can also grow straight in the ground. That gives roots unlimited room, but only where the soil drains well, so loosen the planting spot and mix in compost or fresh potting soil first.
Choosing Pots and Pot Sizes
Choose a pot with plenty of drainage, sized to your plant type and your space. Fabric pots are the easiest for beginners because air moves through the sides, roots stay healthier, and the medium dries back faster, which makes overwatering harder. Plastic pots work too, as long as they have drainage holes and you water by pot weight.
| Plant and Setting | How to Start | Final Pot Size |
| Autoflower, indoors | Plant straight into the final pot | 3–5 gallons |
| Photoperiod, small indoor space | Start in a small pot, then move up once roots fill it | 3–5 gallons |
| Photoperiod, larger indoor space | Start in a small pot, then move up once roots fill it | 5–7 gallons |
| Autoflower, outdoors | Plant straight into the final pot or the ground | 5 gallons or larger |
| Photoperiod, outdoors | Start in a small pot, then move out after your last frost | 10 gallons or larger, or in the ground |
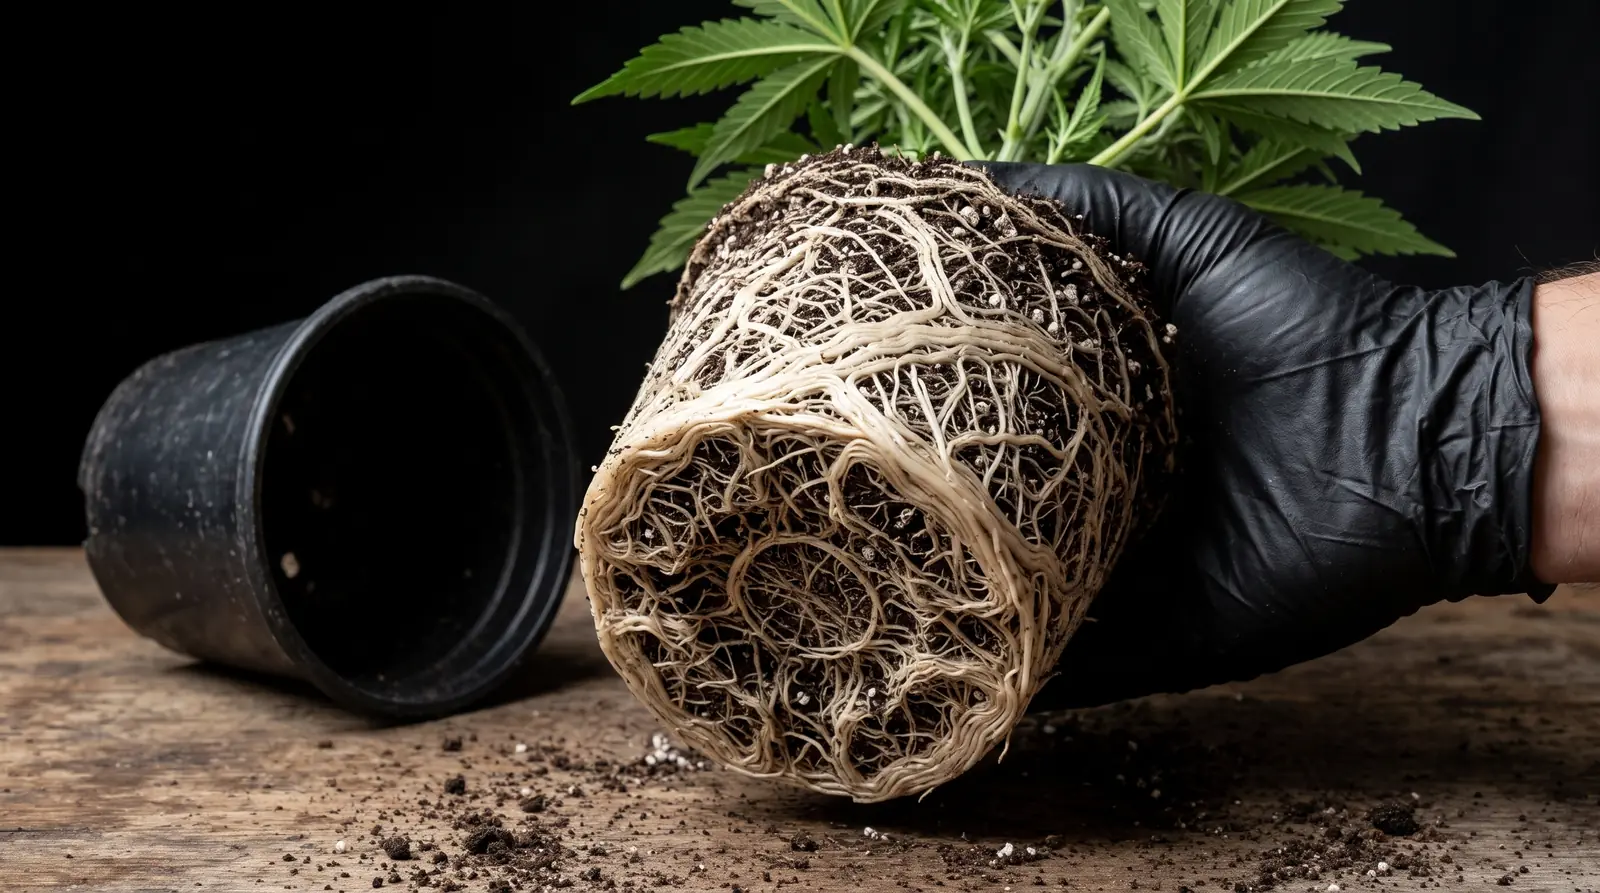
Bigger pots give roots more room and dry out more slowly. That's also why photoperiods often start in smaller containers, because a tiny seedling in a big pot of wet soil can sit soggy for days. Autos skip transplanting altogether. Every move disturbs the roots and costs recovery time they don't have.
Step 5: Germinate and Plant Your Weed Seeds
Once your weed seeds arrive and your space, soil, and pots are ready, germinate the seeds first, then plant each one when a small taproot appears. Keep the seeds warm (around 70–77°F), dark, and evenly moist, and they'll usually crack open within 1–7 days.
Germinating before you plant allows you to confirm that every seed has popped, and the paper towel germination method is the one Seed Supreme’s germination guarantee is built around.
Paper Towel Germination Step by Step
The paper towel method is the easiest way for beginners to germinate seeds, because you can watch each one crack open. Here's how to do it:
- Dampen two paper towels until they're wet but not dripping, then squeeze out the excess.
- Lay the seeds between the sheets with space between each one.
- Slide the towels between two plates or into a closed container to hold in moisture.
- Store them somewhere dark and warm, around 70–77°F. A closet shelf usually works, as long as it doesn't heat up in bursts.
- Check on your marijuana seeds once a day and re-dampen the towels if they start to dry out — just don’t leave them in standing water.
- Plant each seed once its taproot reaches about a quarter inch.
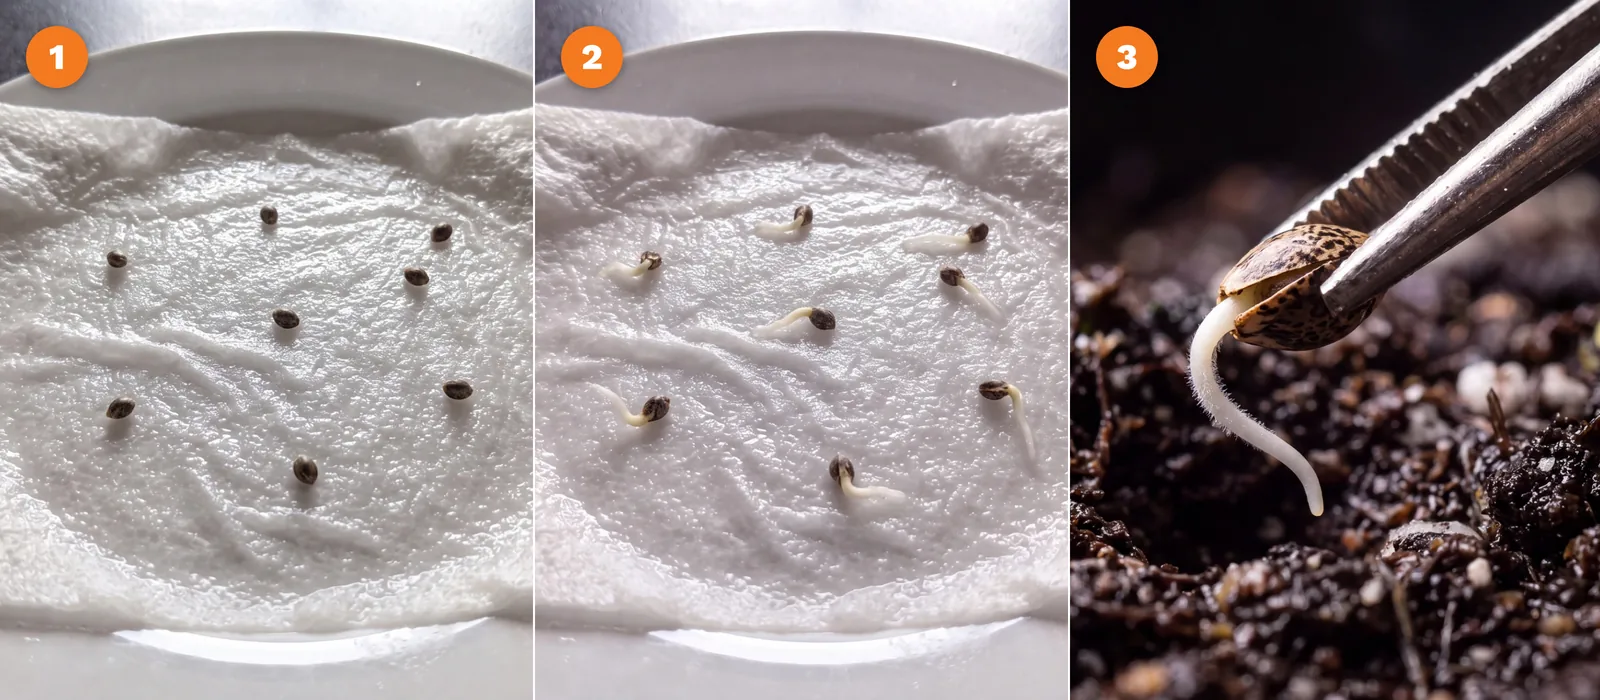
Older or harder seeds sometimes benefit from a 12–18 hour soak in plain water first. This softens the shell and helps the seeds take on moisture before they go into the paper towel.
How to Plant a Weed Seed Once It Sprouts
Plant a sprouted seed taproot-down about half an inch deep in moist medium, then cover it loosely without pressing down. Lift the seed by its shell with tweezers or clean fingers, and never touch the root. Mist the surface, and the sprout usually breaks through within a few days.
Plant into the container you chose in Step 4, a final pot for autos or a small starter pot for photoperiods.
Why Cannabis Seeds Fail to Germinate
The reasons why cannabis seeds fail to germinate usually boil down to temperature issues, moisture problems, or rough handling. Check for these before you try again:
- Too cold: Low temperatures stall germination completely.
- Dried out: The towel or medium went dry at some point.
- Drowned: The seed sat in standing water or waterlogged medium.
- Planted too deep: The sprout ran out of energy before reaching the surface.
- Damaged taproot: The root was touched, bent, or broken during planting.
Most of these are easy to fix on the next round. Give each seed a full week in the paper towel before you write it off, because some crack later than others. If a sprouted seed never breaks the surface, plant the next one a little shallower and keep the medium moist, not soggy.
Step 6: Care for Your Cannabis Seedling
Once the sprout breaks the surface, give it gentle moisture, moderate light, and no nutrients for its first week or two. The seedling lives off its cotyledons — the two rounded leaves that open first — and starts pushing out serrated true leaves within about 3–10 days of sprouting.
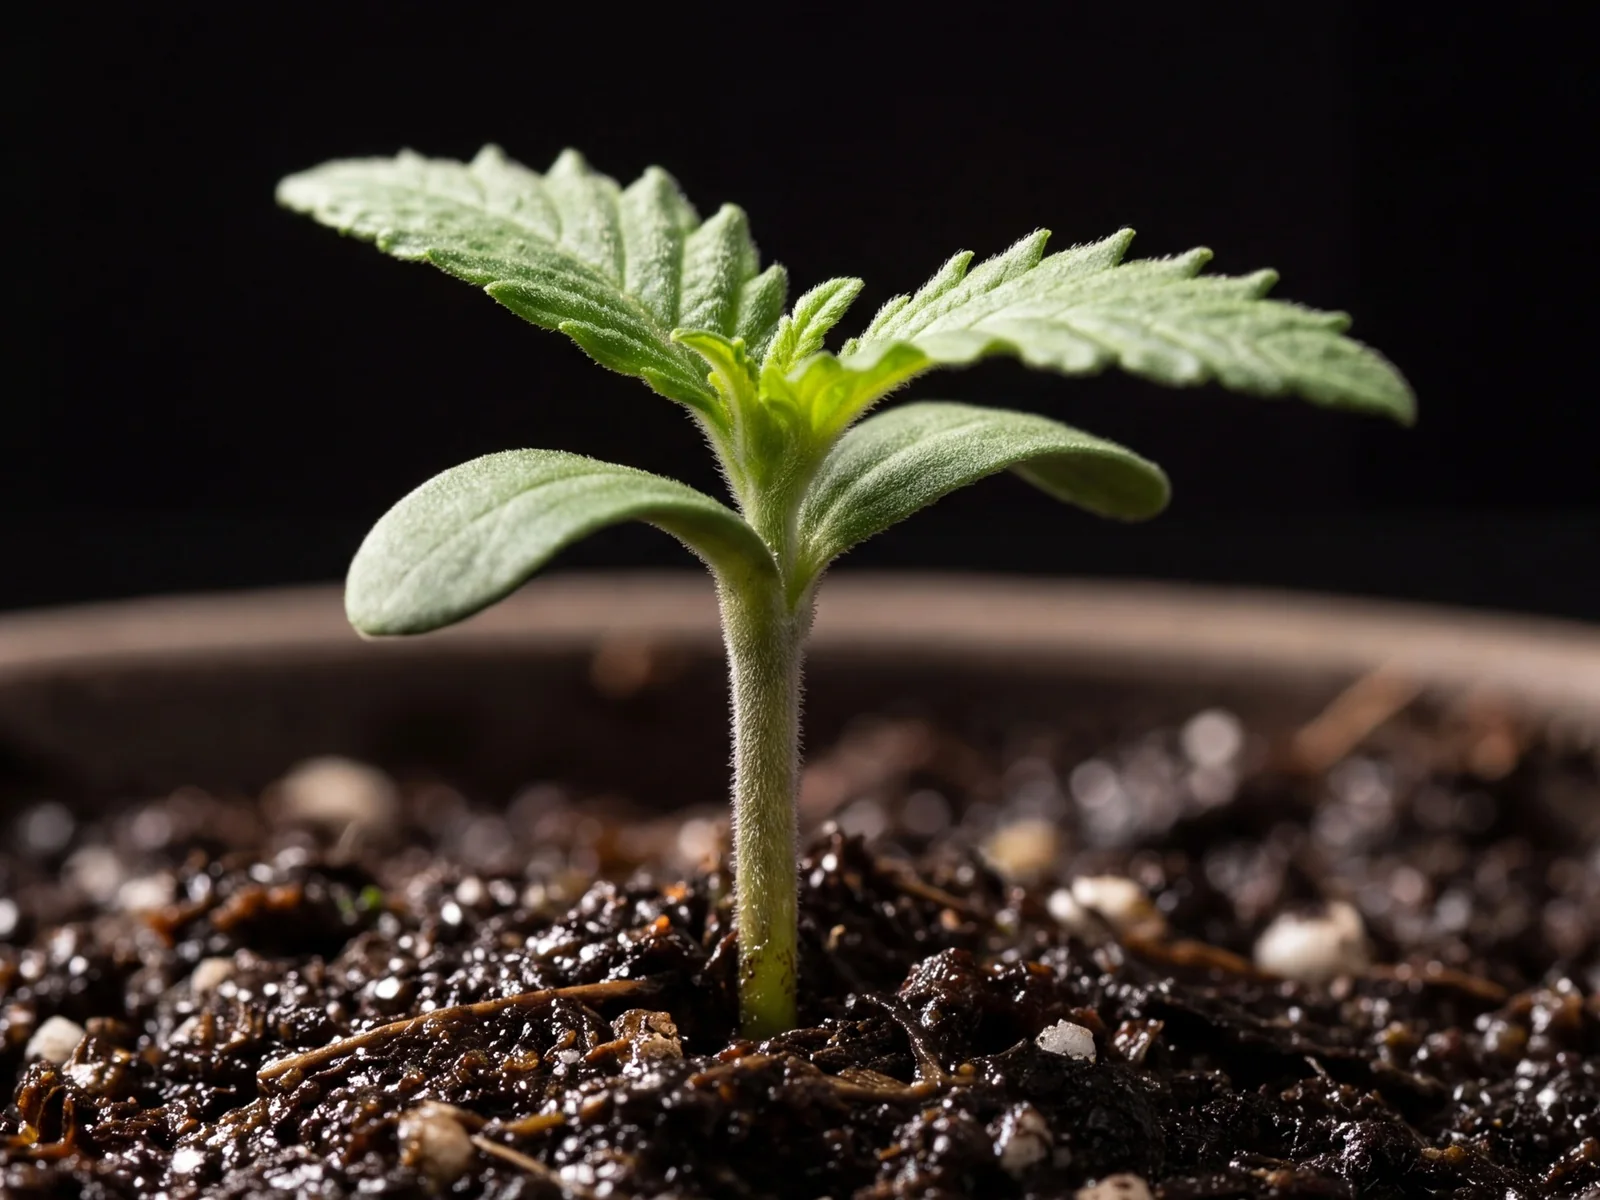
Water close to the stem in small amounts, not the whole pot. Indoors, keep the light far enough to avoid stress, but close enough that the seedling grows sturdy and doesn't start stretching and falling over.
Outdoors, harden young weed plants off by giving them a few hours of direct sun at first before leaving them outside full time. Humidity around 65–70% keeps young leaves from drying out.
Move on to Step 7 once your seedling has 2–3 sets of true leaves and keeps growing steadily. That's the sign it's leaving the fragile stage and entering veg.
Step 7: Take Care of Your Weed Plant Through Veg
In the vegetative phase, taking care of a weed plant comes down to three habits: water by pot weight, feed at the right pH, and train the plant while it's growing fast. Indoors, keep photoperiods on an 18/6 light schedule through this stage. The stems and branches your plant builds now are what will carry its buds.
Watering: How Much and How Often
Water when the top inch of medium is dry and the pot feels noticeably light when you lift it. The lift test is more reliable than checking the surface, which dries out long before the roots do. When you water, pour slowly and evenly over the whole surface until about 30% drains out the bottom, then leave it until the pot feels light again.
Constantly wet medium is the most common first-grow mistake, and soggy roots cause more failures than any pest. Your plant drinks more as it grows, so the routine that works in week 3 won't hold in week 8. Let the pot's weight set the timing, not the calendar.
Feeding and pH
A good pre-amended soil still holds enough food for the first few weeks of veg, so start feeding once the lower leaves begin to lose their deep green color. Use a nitrogen-rich veg formula and start below the label dose, feeding every other watering with plain water in between. pH controls nutrient uptake, so aim for an ideal pH of 6.0–6.3 in soil.
Mix the feed into your water first, then check the pH and adjust with pH Up or Down before it goes in, every time. In organic soil, you feed the soil, not the plant, by top-dressing with dry organic amendments or watering in an organic liquid feed. The organic matter and soil life hold pH steady, so you generally don’t need to adjust pH at all.
| Medium | Ideal pH | Acceptable pH | How to Manage pH |
| Soil with synthetic nutrients | 6.0–6.3 | 5.5–6.5 | Adjust every feed |
| Organic soil with organic feed | 6.0–6.3 | 5.5–6.5 | Water as is. Keep a pH meter on hand to spot a genuine problem |
| Coco coir | 5.8–6.2 | 5.6–6.4 | Adjust every feed and every watering |
| Hydro setups | 5.8–6.2 | 5.6–6.4 | Check and adjust the reservoir daily |
Test the water that drains from the pot now and then to spot a pH problem, but don’t adjust your feed based on that runoff number. Doing so usually leads to over-correcting, especially in soil. Cannabis uses more nitrogen in veg and more phosphorus and potassium in flower, so you’ll switch to a bloom feed in Step 8.
Training and Pruning Your Homegrown Weed Plant
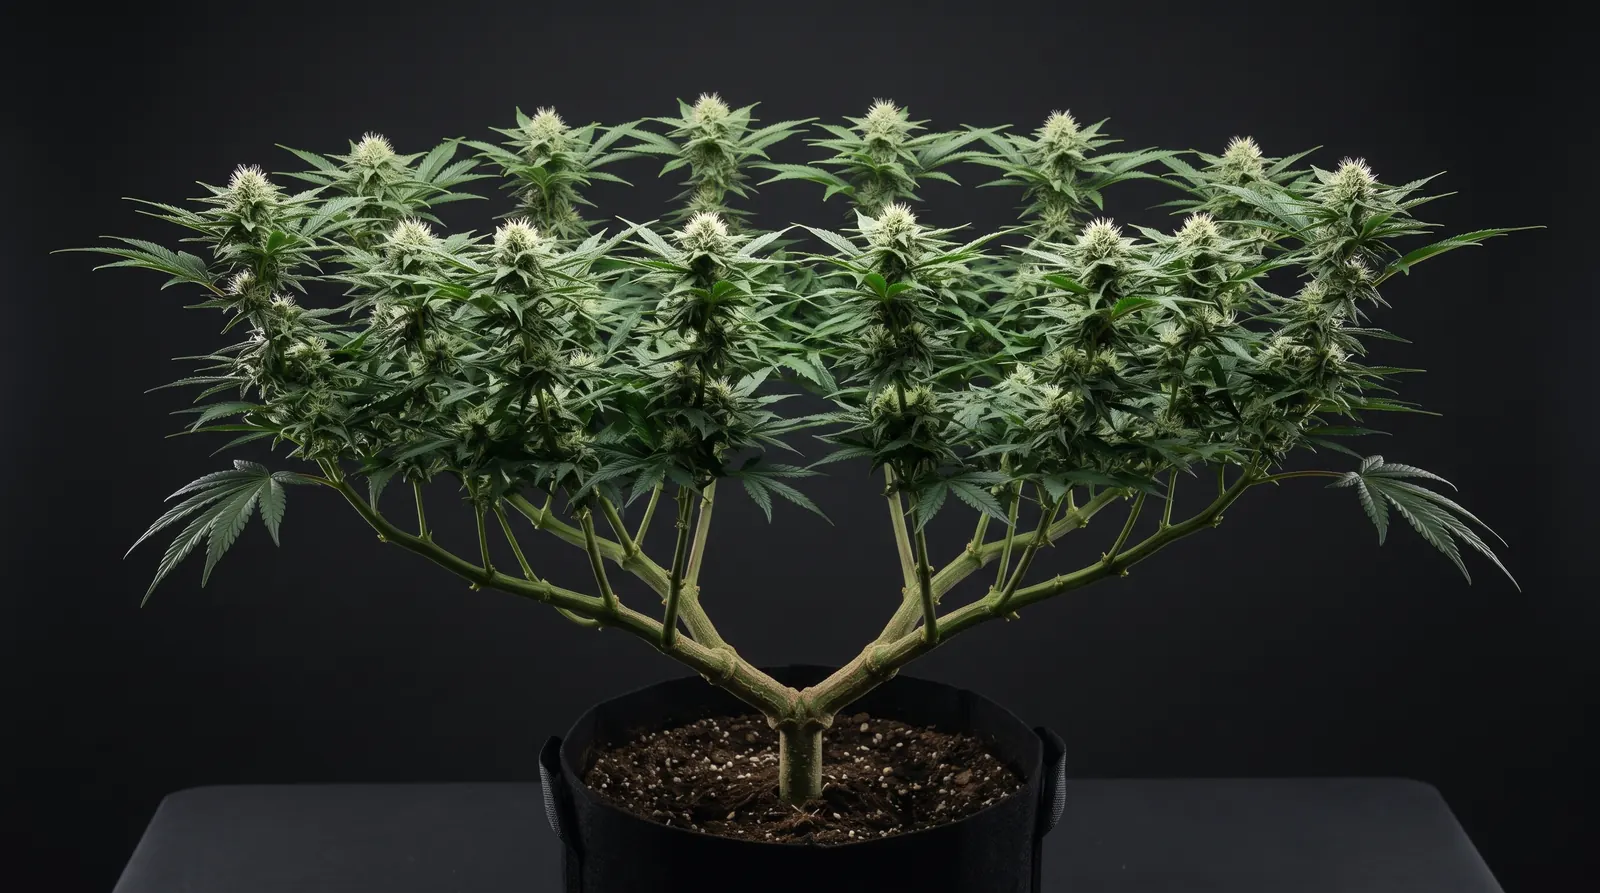
Training and pruning help your plant put its energy into the best-developing colas, which usually means more top-quality buds from the same plant. Left alone, cannabis grows like a Christmas tree: one tall main cola takes most of the light, while the shaded lower branches end up with small, airy buds.
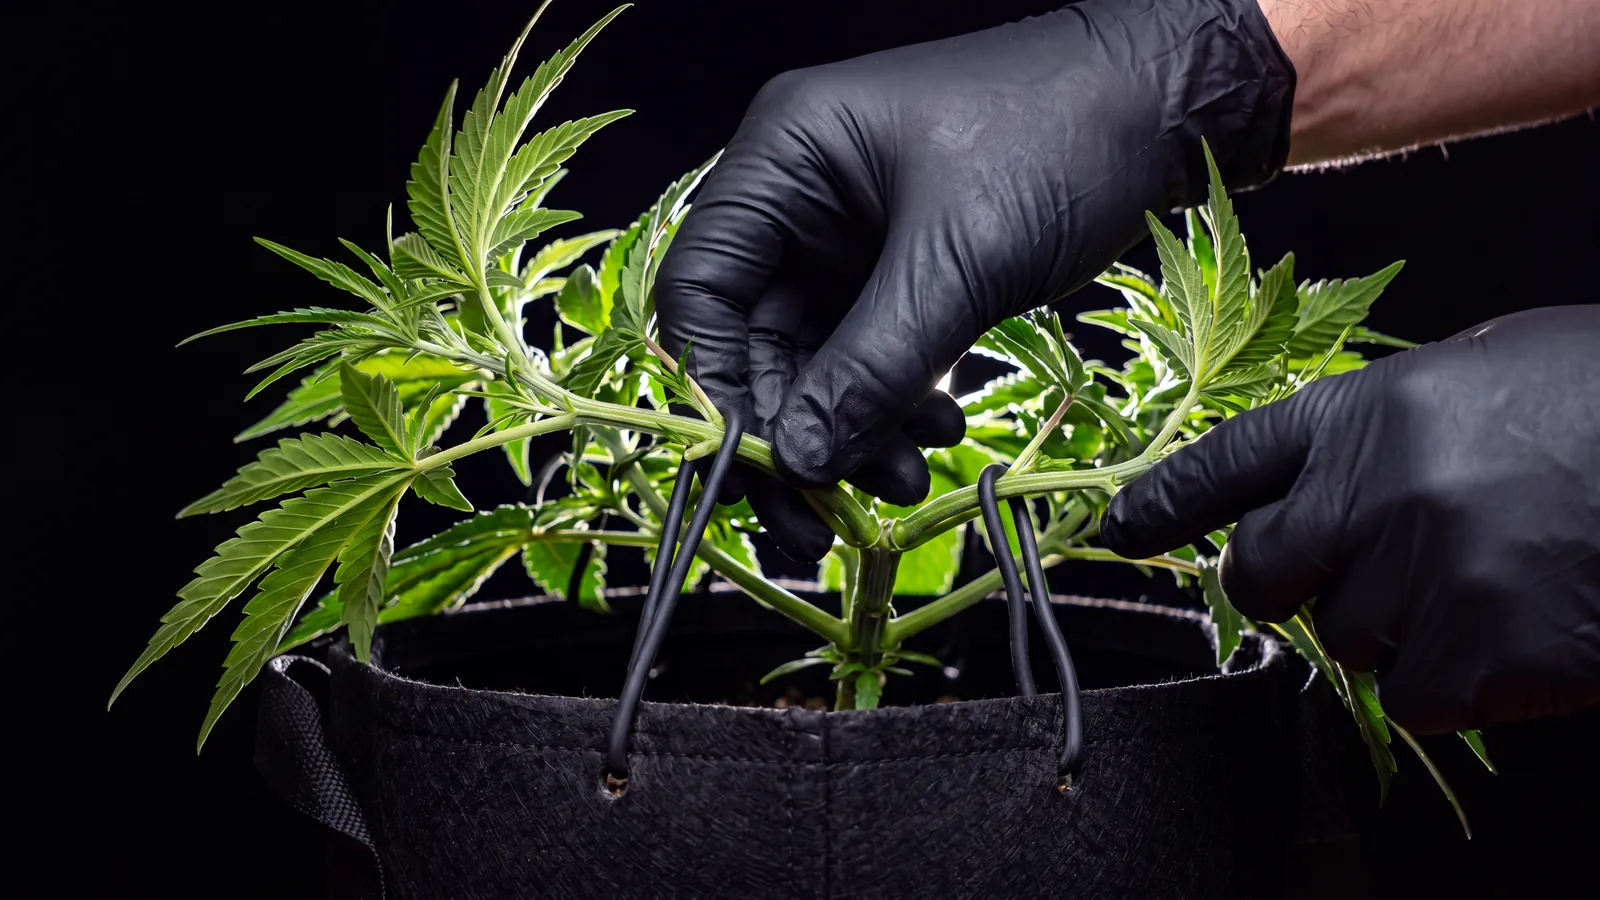
Training spreads the plant out so more branches reach the light, and pruning removes growth that never will. Together, they also keep height in check and let air move through the plant. Low-stress training (LST) and topping are two of the easiest ways to train your weed plant. Here’s how both techniques and pruning work:
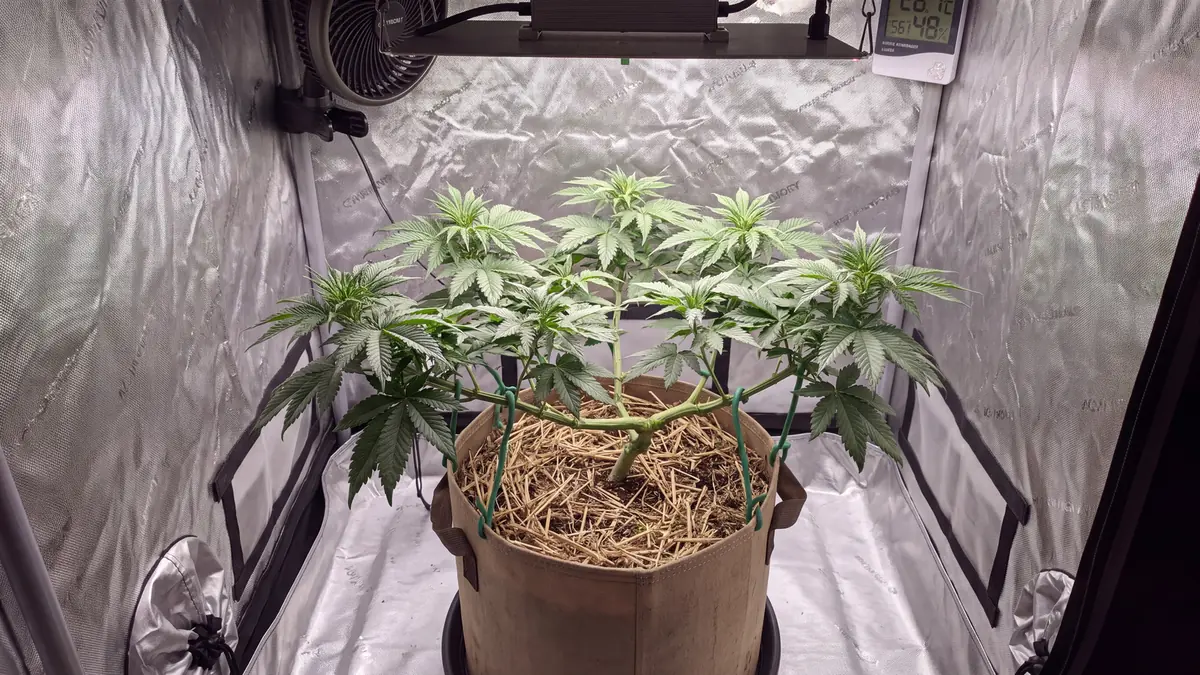
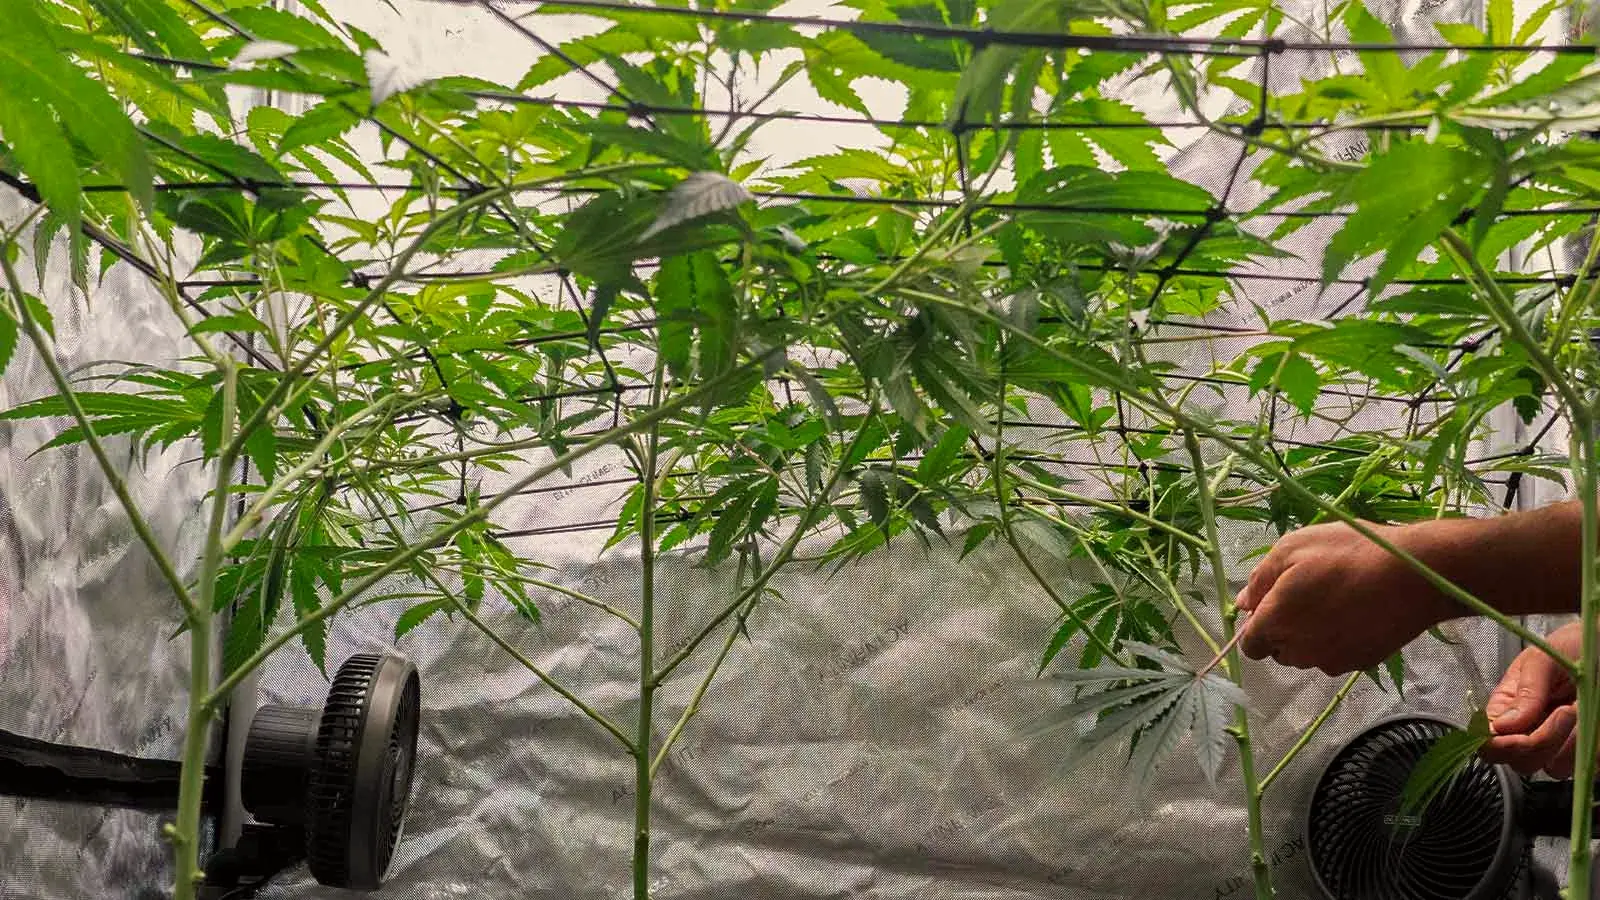
- LST means gently bending branches outward and tying them down so the canopy grows wide and even, with lower bud sites raised level with the main top. Start once the plant has a few nodes, anchoring soft ties to the pot rim. Adjust them every few days as the branches turn back up toward the light. Since nothing is cut, LST is the safest start.
- Topping means cutting the main growing tip just above a node so the plant grows two main colas instead of one. Top once the plant has around 5 or 6 nodes, using clean, sharp scissors, then give it a few days to a week to recover before you train the new tops outward. Stick to LST with autos, which don’t have spare time to recover from a cut.
- Pruning means removing growth that won’t make good buds. On a first grow, keep it to a light cleanup: snip the small, spindly shoots at the very bottom of the plant, plus any big fan leaf that completely shades a bud site.
- Heavier pruning, like lollipopping the whole lower section or stripping fan leaves, can pay off but is easy to overdo, so save it for a later grow.
Most pruning and training happens in veg but once the stretch in early flower winds down, the plant’s structure is set and doing any more here does more harm than good.
Step 8: Flip Your Plant to Flower
When your indoor photoperiod plant reaches about half the final height your space can handle, switch the lights to 12 hours on and 12 hours of unbroken darkness. That change triggers flowering. Outdoors, photoperiods flip themselves as the days shorten in late summer. Autoflowers skip this step and flower on their own.
Expect a growth spurt called “the stretch,” when weed plants can grow a lot taller over the first 2–3 weeks of flower, which is why you flip at half height indoors. Finish training by tucking new growth under the ties, then stop once the stretch ends. As buds fill out, support heavy branches with stakes or a trellis net so they don’t bend or snap under the weight.
Once flowering starts, switch to bloom-specific nutrients with more phosphorus and potassium and less nitrogen. As buds start to stack, bring indoor humidity down toward 40–50% to protect the thickening flowers from mold. Outdoors, you can’t control humidity, so remove a few crowded inner leaves to keep air moving through the plant.
Indoors, keep the dark period truly dark. Light leaks can stress photoperiod plants and may lead to re-vegging or hermie plants, so check your space with the lights off once your eyes adjust.
Step 9: Monitor Your Weed Plant and Fix Common Problems
Check your weed plant at least once a week from seedling to harvest, and identify the cause of any problem before you react. Most first-grow problems trace back to too much water, too much feed, heat or light stress, high humidity, or pests. Catching them early protects the buds forming in flower, when your plant has the least time to recover.
Weekly Grow Checklist
A quick weekly routine catches most problems before they spread:
- Lift the pot to check moisture.
- Read the week's high and low temperature and humidity.
- Test the pH of whatever you're about to give your plant.
- Look under the leaves, not just at the tops.
- Indoors, adjust the light height as your plant grows.
- Rotate the pot so every side gets time closest to the light.
Common Problems and How to Fix Them
Match what you see to the likely cause, then make one fix at a time. The wrong fix applied fast usually makes things worse. Besides, if you cut the feed, raise the light, and change your watering all at once, you won't know which fix solved the problem.
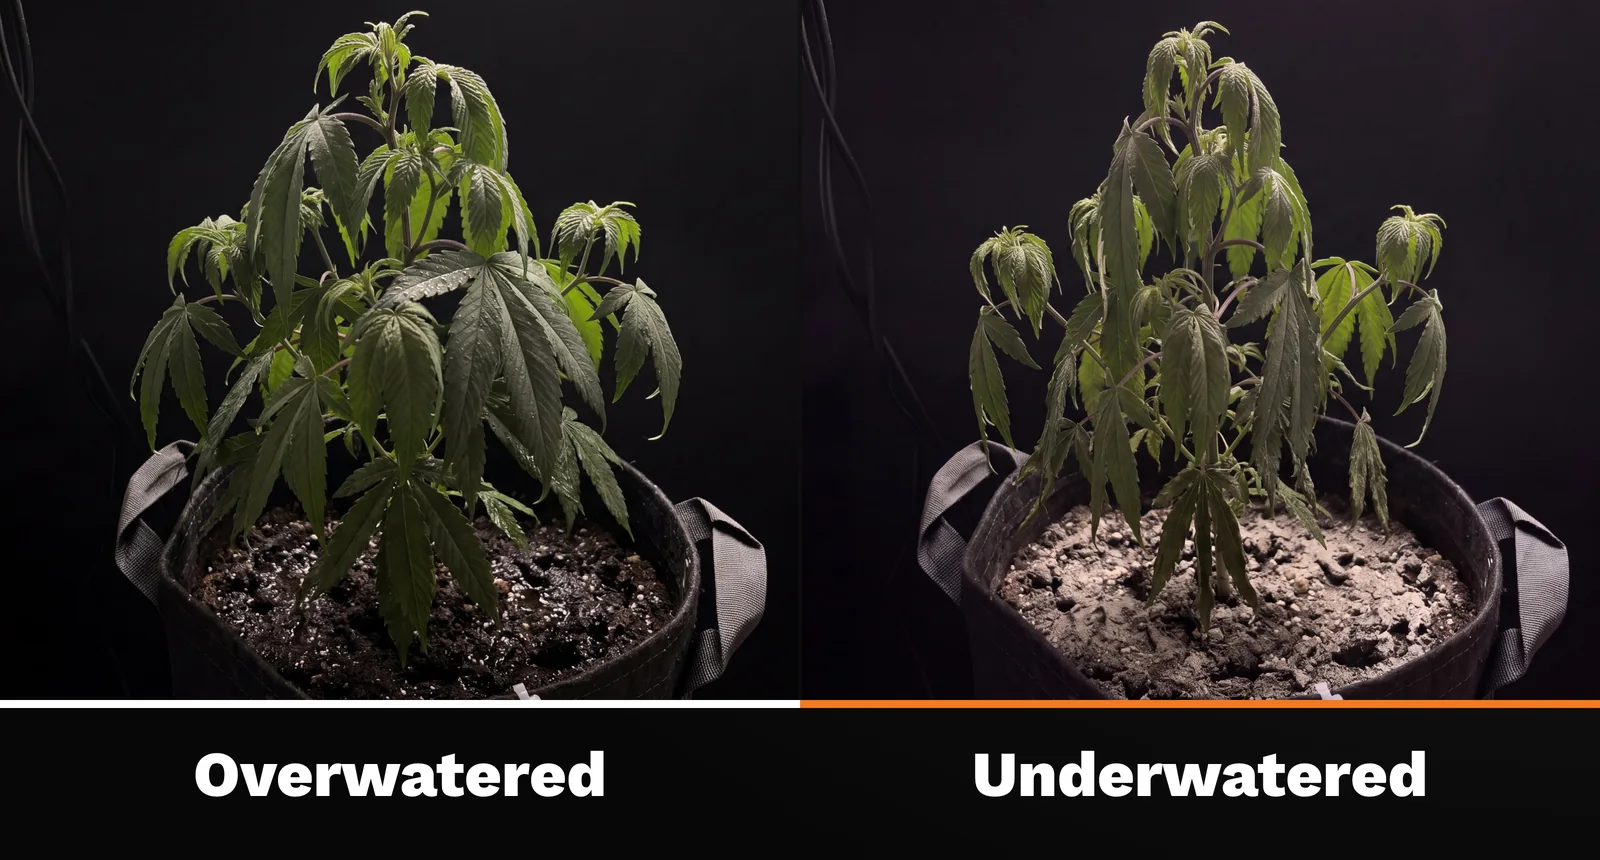
| Symptom | Likely Cause | What to Do |
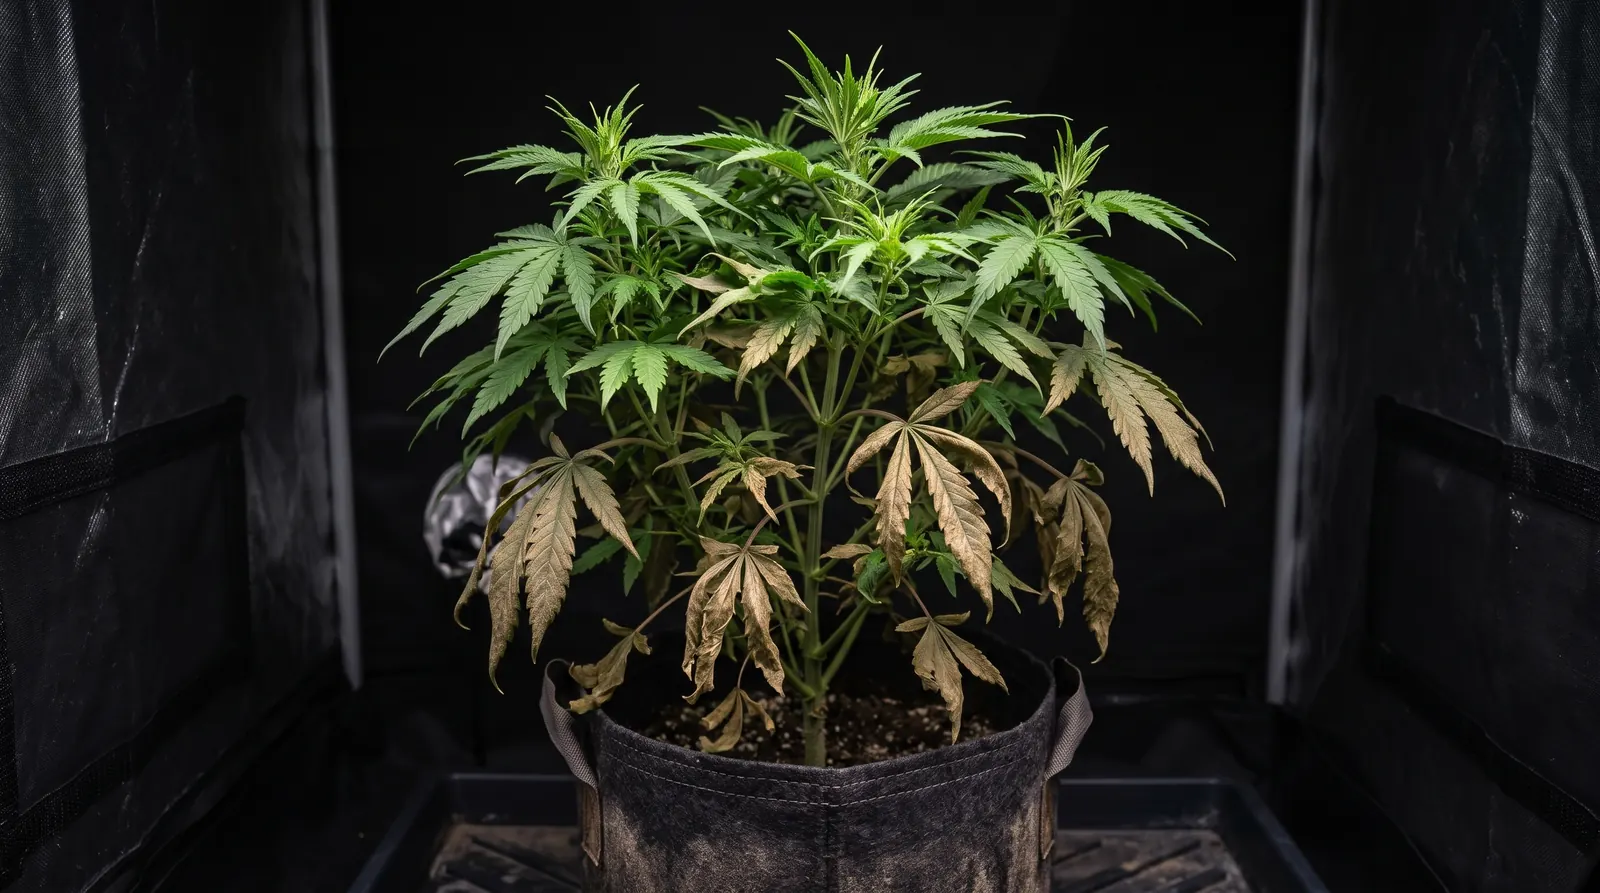
| Drooping leaves that feel firm and curl down, with wet medium | Overwatering | Stop watering and let the medium dry back. Check drainage, then water by pot weight |
| Drooping leaves that feel thin and papery, with a dry, light pot | Underwatering | Water slowly until about 30% drains out, then return to the dry-back routine |
| Burnt, crispy leaf tips, worst on the biggest leaves | Nutrient burn | Cut back the feed. Give plain pH-adjusted water for a cycle or two, then resume at a lower strength |
| Discoloration spreading across the leaf, not starting at the tips | Marijuana nutrient deficiencies, or a pH problem that mimics one | Check the pH of your water and feed first. Fix that before changing nutrients |
| Leaves cupping upward like a taco, with bleached or pale tops nearest the light | Heat or light stress | Raise the light and improve extraction and airflow. Rule out heat before blaming nutrients |
| Gray-brown mush inside dense buds late in flower | Bud rot (botrytis) from high humidity | Carefully remove affected buds right away. Increase airflow and lower humidity |
| Fine webbing and tiny specks under leaves, with stippled dots on top | Spider mites | Isolate the plant if you can, treat leaf undersides and keep checking. They multiply fast in warm, dry air |
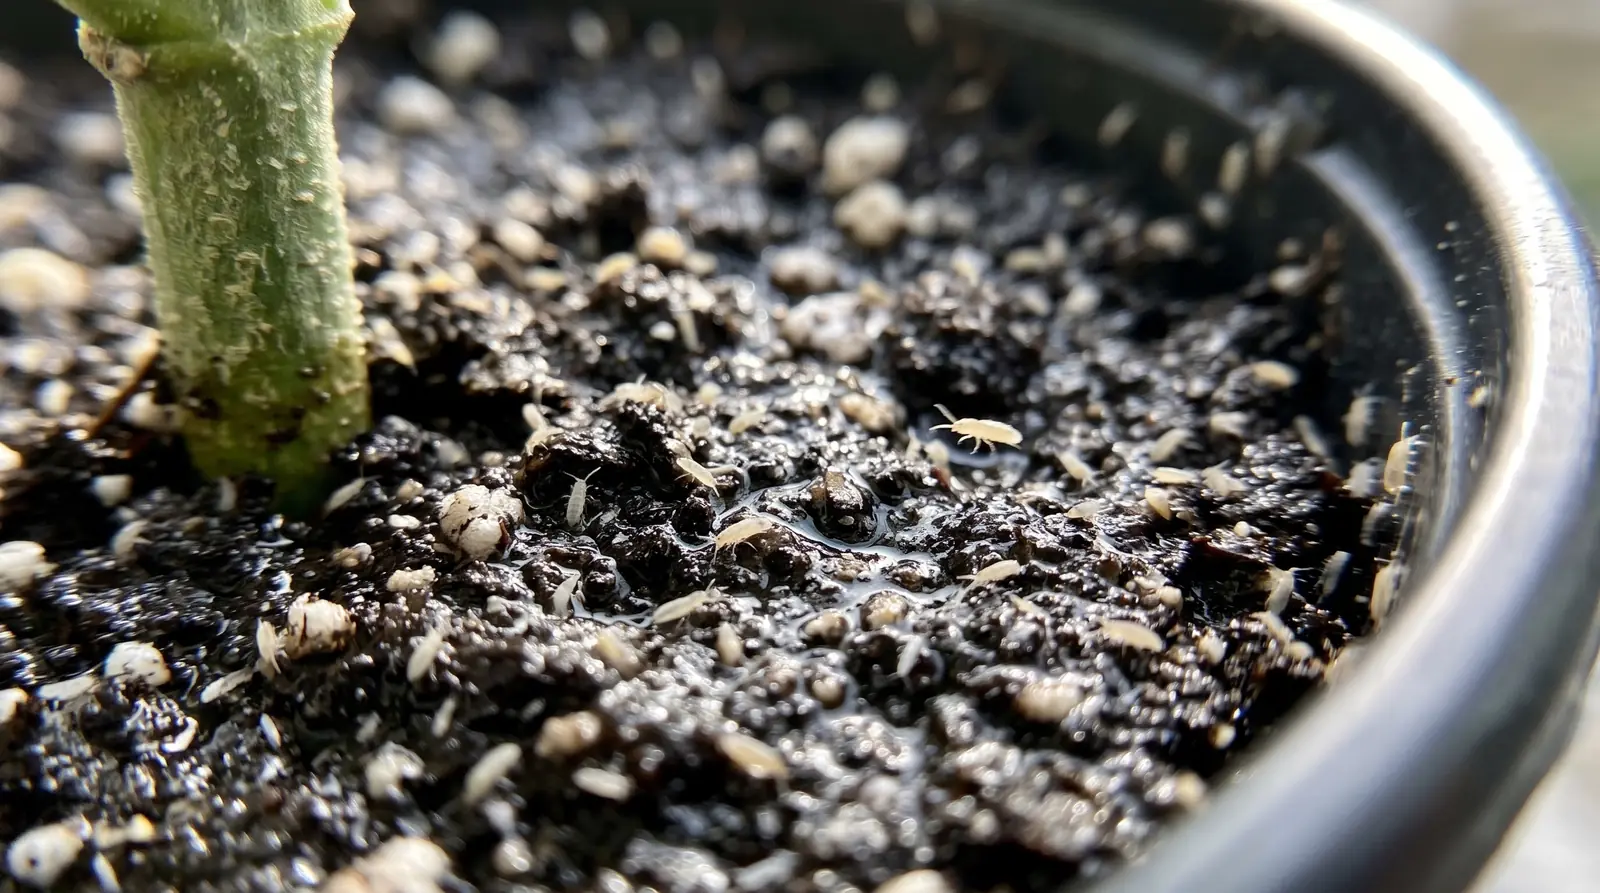
| Small dark flies around wet topsoil and sluggish seedlings | Fungus gnats | Let the top of the medium dry out properly between waterings |
| Silvery scarring and streaks on leaf surfaces | Thrips | Inspect closely, treat and keep watching new growth |
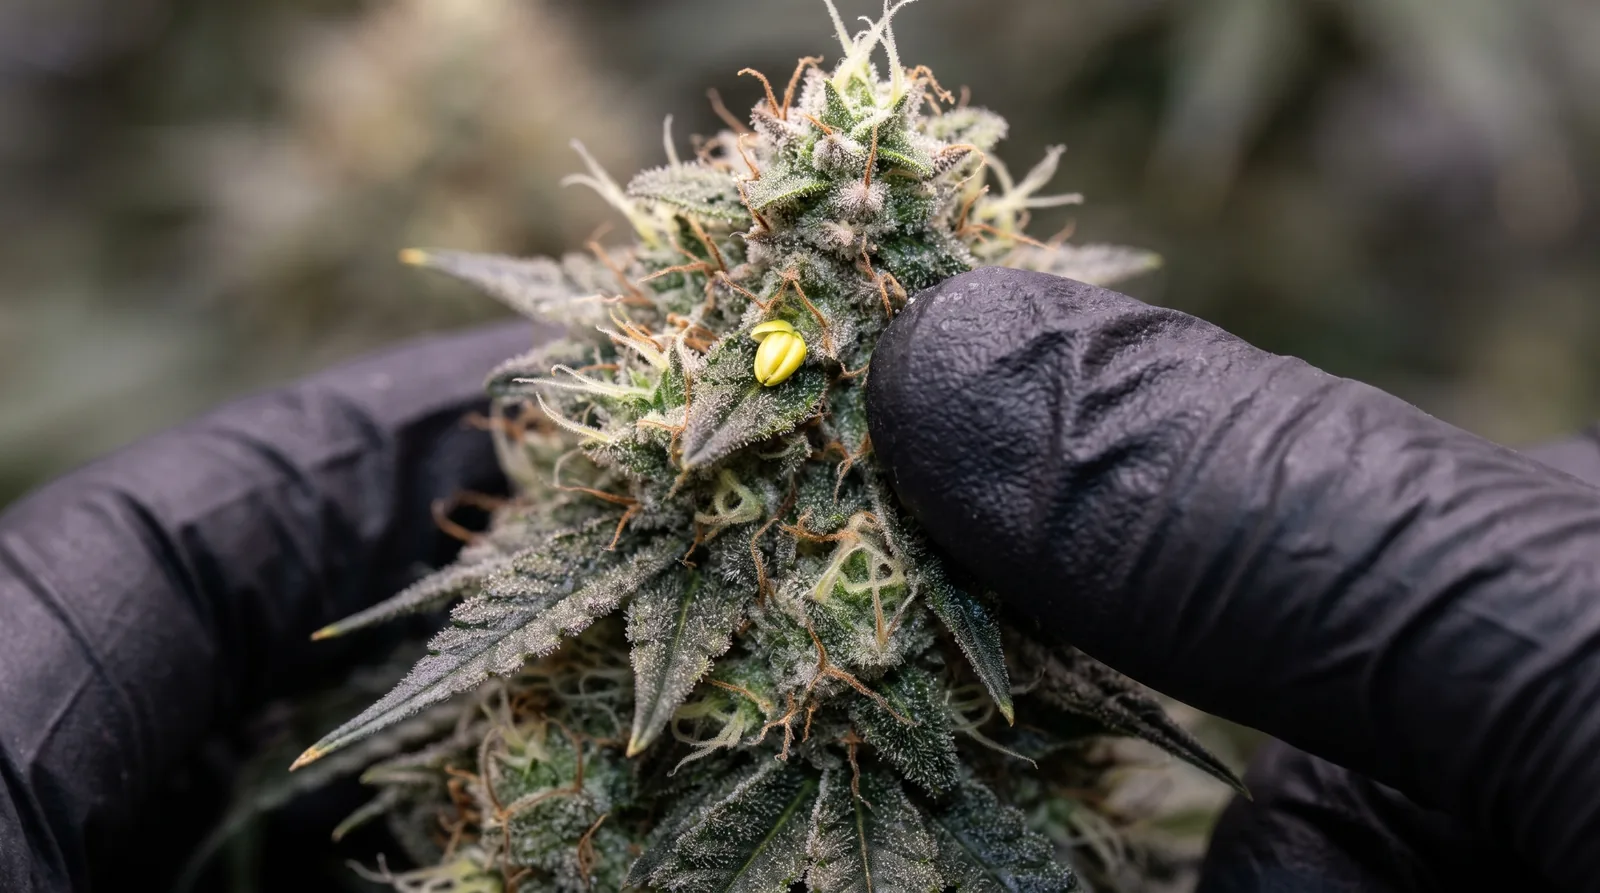
| Odd regrowth, reverting pistils or unexpected pollen sacs on a photoperiod plant | Light leaks during the dark period | Light-proof the space. Check it with the lights off once your eyes adjust |
| Tall, thin, floppy seedlings with long gaps between leaf sets | Not enough light, or the light is too far away | Lower the light or raise its intensity. Support the stem and plant a little deeper at transplant if needed |
Damaged leaves don't repair themselves. A burnt tip stays burnt, so judge whether a fix worked by watching the new growth that comes in over the next several days.
Step 10: Harvest Your Plant at the Right Time
It’s the right time to harvest when most trichomes look cloudy with a few turning amber, and most pistils have darkened and curled in. These signs show up late in flower, once the buds have spent weeks stacking and filling out.
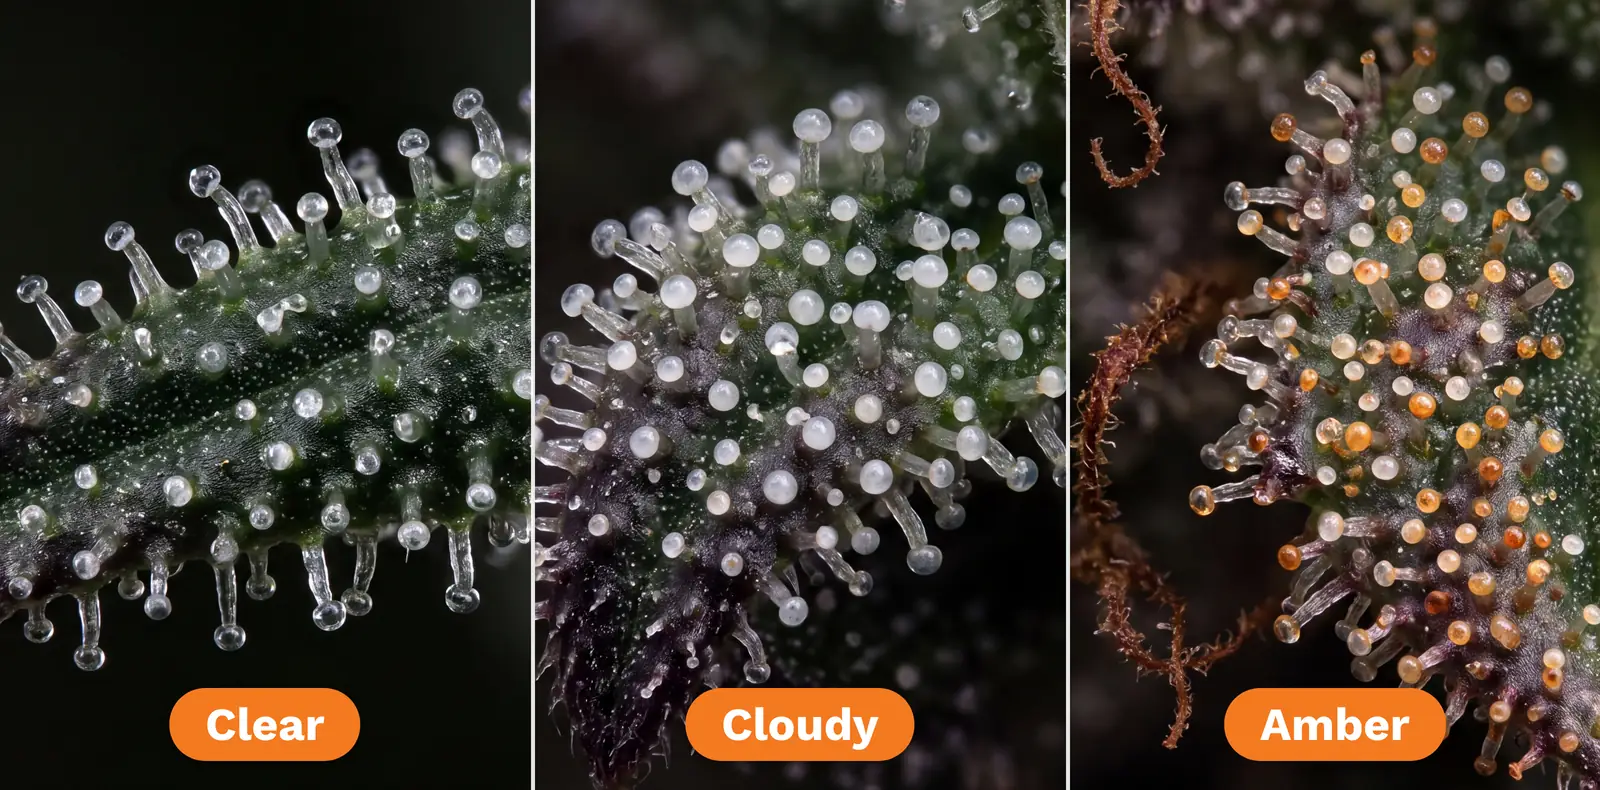
Your cannabis plant shows it's finishing in other ways too. Buds turn dense and resinous, calyxes swell, and fan leaves start to yellow. Use a jeweler's loupe or your phone’s magnification lens to watch the trichomes shift from clear to cloudy and then amber.
Reading those signs takes practice, and pinning down exactly when to harvest for the effect you prefer is worth learning before you make the cut.
As harvest gets close, many growers “flush” their plants — feeding only plain, pH-adjusted water for the final 1–2 weeks so the plant uses up the nutrients left in the medium. It’s most common with synthetic feeds in coco or soil, where salts can build up. Organic and living soil growers rarely flush. Tapering is a gentler option, where you cut the feed strength gradually.
Research on either method is limited, so treat both as optional, not required.
Step 11: Dry and Cure Your Homegrown Weed
Dry the branches slowly for about 7–14 days, then cure the buds in airtight jars for at least 2–4 weeks. A slow dry and a patient cure decide how smooth and aromatic your homegrown weed turns out, so don't rush this final step.
How to Dry and Cure Weed
Drying and curing remove moisture slowly, so your buds keep their aroma and smoke smoothly. Work through these steps in order:
- Cut: Take the whole plant at the base, or go branch by branch if that's easier to hang. Work in a clean space and handle buds as little as possible.
- Trim: Wet trimming removes leaves right after cutting and speeds up drying, which suits humid rooms. Dry trimming leaves them on until later and slows the dry, which suits rooms where buds would otherwise dry too fast.
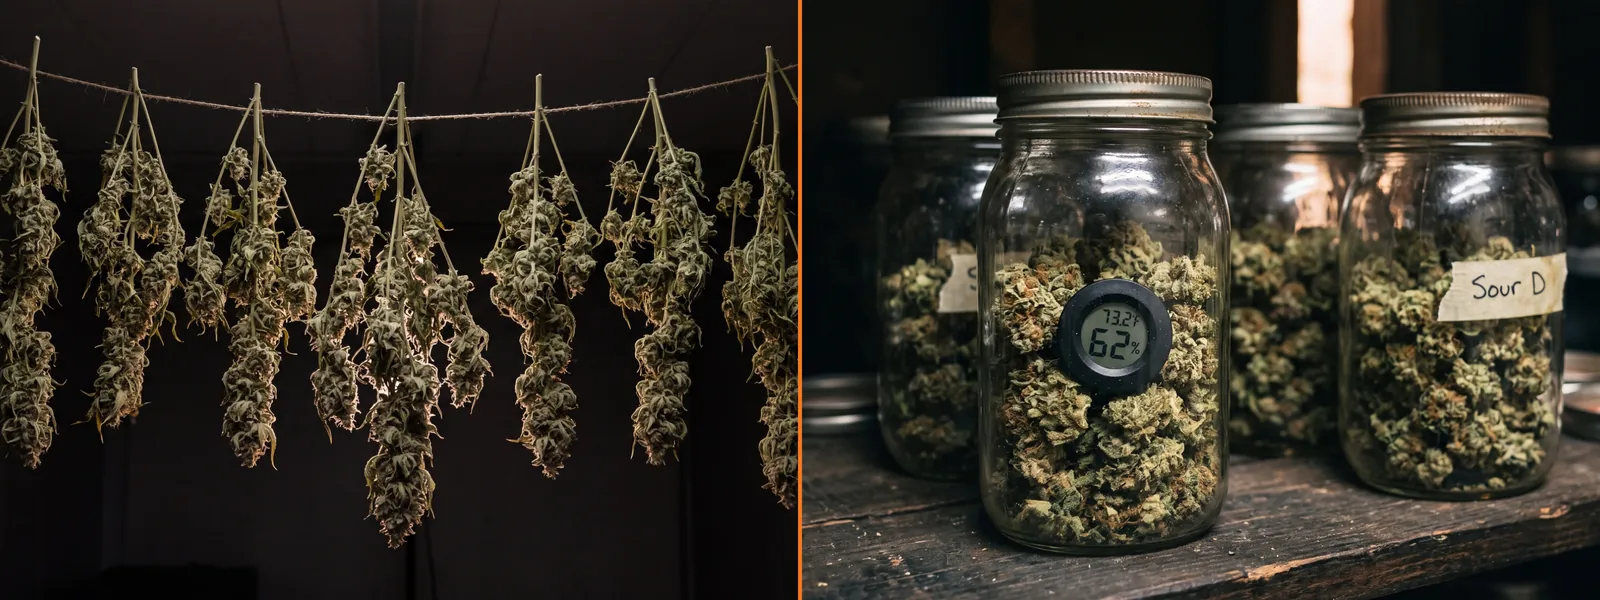
- Dry: Hang branches in a dark, ventilated space at around 60–68°F and 55–62% relative humidity for 7–14 days. Keep air moving gently through the room, never aimed straight at the buds. They're ready when small stems snap instead of bending.
- Cure: Fill airtight glass jars loosely and aim for about 62% humidity inside. Open them daily for the first week or two to let moisture out, a step called burping, and cure for at least 2–4 weeks. Longer cures usually improve aroma and smoothness.
- Store: Keep cured jars sealed somewhere cool and dark.
Drying and Curing Mistakes to Avoid
Most post-harvest problems come from rushing a step or skipping one:
- Drying too fast: Heat or a fan pointed at the buds usually leaves flower harsh and grassy.
- Jarring too wet: Sealing damp buds invites mold inside the jar.
- Over-drying: Brittle buds crumble and are hard to bring back.
- Skipping the burp: Moisture keeps leaving the buds during the first week, and it needs somewhere to go.
Once your jars settle, keep checking for any musty smell over the first few weeks and note what worked this run for next time. Get the dry and cure right, and the flavor and aroma your cannabis seeds were bred for come through in every jar.
How Long Does It Take to Grow Weed From Seeds?
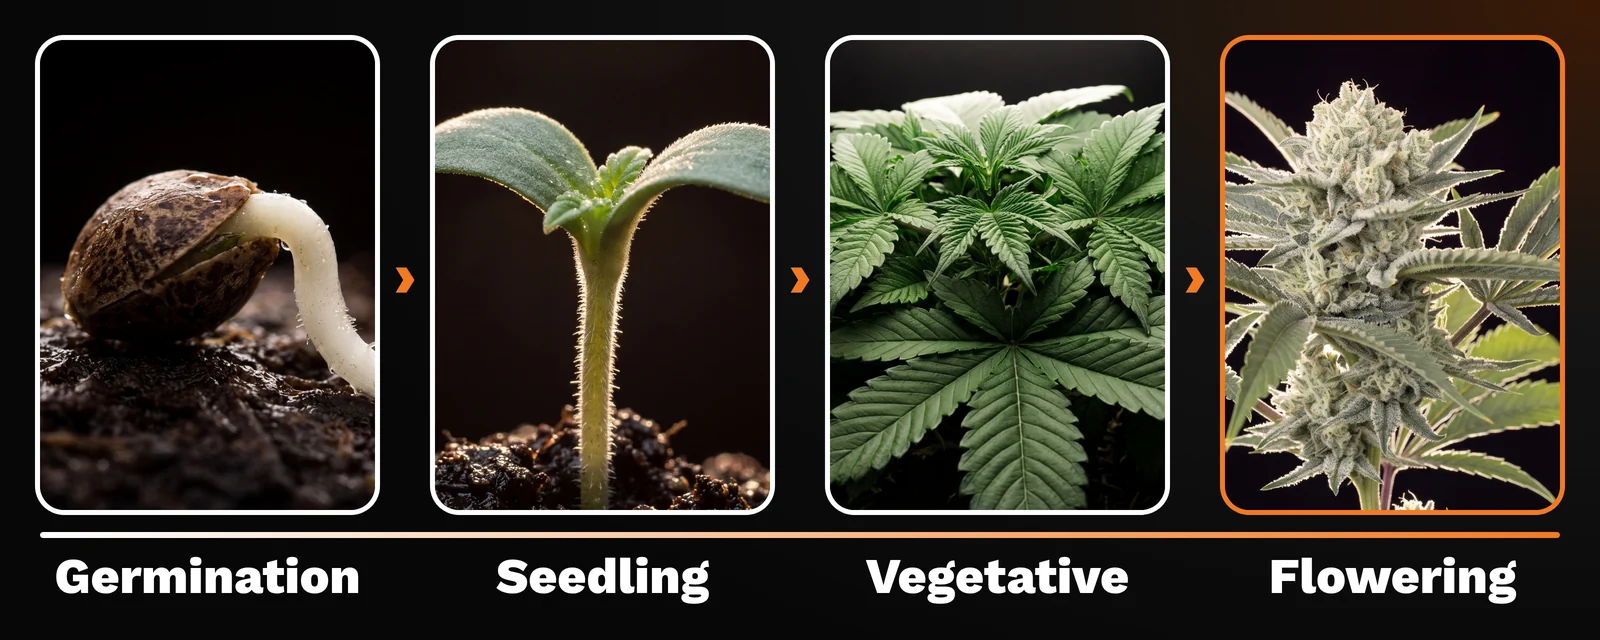
It takes about 3–5 months to grow weed from seeds indoors, about 5–7 months outdoors, and around 2–3 months with autoflowers, indoors or out. That’s seed to harvest, with around 3–6 more weeks for drying and curing on top. Genetics and conditions shift how long each of the growth stages take, so use these numbers for planning, not as fixed dates.
| Stage | Typical Duration | What the Plant Is Doing | Steps |
| Germination | 1–7 days | The seed cracks and a taproot emerges | Step 5 |
| Seedling | 1–3 weeks | Cotyledons open and the first serrated true leaves appear | Step 6 |
| Vegetative | 3–8+ weeks, depending on setup and genetics | Stems, branches, leaves and roots grow fast | Step 7 |
| Flowering | 8–10 weeks for most photoperiods | Calyxes and pistils stack into buds and resin builds | Steps 8–10 |
| Drying and Curing | 7–14 days drying 2–4+ weeks curing | Buds lose moisture slowly and aroma develops | Step 11 |
Indoors, veg is the only stage you control with photoperiod plants. Nothing pushes them into flower until you change the light schedule, so a longer veg means a bigger plant and a longer grow. Outdoors, the shortening days of late summer make that call for you, and autoflowers start flowering based on age wherever they grow.
Your weed plant signals each of its growth stages through its leaves, stems, and flowers, and every shift is your cue to change how you water, feed, and care for it.